The Exposure mission in Black Ops 7 campaign begins with Mason talking about an infil location for a Guild R&D Facility in Avalon. You are tasked with breaching through the entire facility and making your way into the server room. The mission is to gather as much usable data as possible from this building and escape.
This article will highlight the most effective method to complete the Exposure mission in Black Ops 7.
Note: Parts of this article are subjective and reflect the author’s opinion.
Complete guide for Exposure mission in Black Ops 7
Exposure is the first mission you must complete in Black Ops 7’s campaign mode. The game begins with a cinematic showcasing the return of Raul Menendez. Kagan spots a team of four infiltrating one of the Guild’s facilities. The team, led by David Mason, is ordered by Colonel Marshall to discover any links between Menendez and the Guild.
Here is a complete overview of the Exposure mission in Black Ops 7:
Infiltrate the Facility
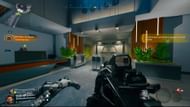
The mission begins with a cinematic where the JSOC team takes out a guard on the roof, and David grapples up with others to the facility. As soon as you drop down to the lobby, you will be provided with an objective update. You must remain as quiet as possible in this phase to avoid attracting unwanted attention.
Enter through the door at the end of the hall. Here, you will find two crates you can loot for gear. Move through the left side slowly while avoiding the guards patrolling the area. Alternatively, you can go in loud and eliminate the enemies as well.
Clear the Area (objective triggered whenever enemies spawn in the area)
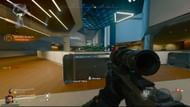
As soon as you shoot the guards, your location will be revealed. So you must take down all the enemies in the area to complete this objective. Landing precise headshots can help complete this objective faster. Make sure to use the armor plates to replenish shields during gunfights.
Also read: How to unlock Fire Works in Black Ops 7 Zombies
Find the server room
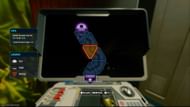
Climb down the stairs from the upper level and take the route on the left through the automatic doors. An objective marker will appear on a door console. Interact with it to unlock the next door by solving the puzzle. All you need to do is rotate the triangular blocks and connect the pathway to the other end.
Take down the Guild robots that appear in this room. They are easy to eliminate and do not take much time. Make sure to check all of the smaller rooms for enemies to clear the area.
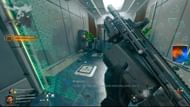
A new marker will appear on your screen. Climb the stairs at the edge of the room to get to the upper floor through another door. A few robots will be present here, guarding the hallway. You must shoot the power supply on the left side of the hallway wall to enter. Repeat the same for the power supply on the right side, through the window, to disable the next plasma field.
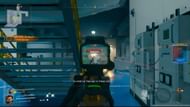
You will encounter a wave of enemies on the other side. Shoot them down to move forward. You must also destroy the automatic turret located at the edge of this room. After it is destroyed, follow the wires on the ground to find the power supply and shoot it to disable the plasma field.
Access Quantum Drive
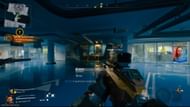
Once you go through the door, you will receive a new objective. You will find a Jailbreak Machine inside this room that can be used to upgrade your current weapon. However, these machines can only be used once.
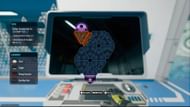
Go near the central area and interact with the Quantum Drive. You will need to follow a new objective marker toward the right side of the room to access a console. Destroy the power supplies to disable the plasma field. Similar to the previous door console, you must rotate the triangles and create a path to the other end to hack it. Repeat the same steps for the room on the left side to expose the drive.
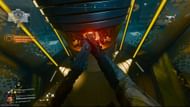
Go back to the central part of the room and interact with the machine to acquire the item. Once it is secure, eliminate more guards flooding the room.
Check out: How to unlock all Tactical Equipment in Black Ops 7 Zombies
Plant explosives
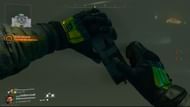
New objective markers will appear on the walls, marking points where you must plant explosives. Simply interact with these markers to complete the task. A counter will also be available on the left side of the screen to help you tally all your objectives for this phase.
A few more guards will enter the upper area. Take down all the enemies before returning to the markers to plant the explosives.
Exfiltrate

All that is left to do now is make it out of the Guild’s facility. Go back through the route you came in, while defeating all enemies that block your path. You can also utilize the map on the top left and check for markers to find your way to the exit. However, you will be trapped inside a room by Kagan.
Escape
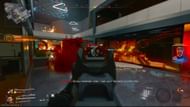
You will be affected by an unknown toxin and be left inside a red mist. Make your way through the hallway and follow the markers on the map. You must eliminate the infected and Guild guards that try to block your path. After you get to the main lobby, where you initially started the mission, make your way to the other end and go through the door.
You will suddenly be dropped into an unknown area after the cinematic with Menendez ends. Here, you will find an Ability Case that can be used to acquire abilities for combat.
Press Forward
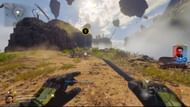
Use the Kinetic Jump ability to climb through the floating rock platforms. Make sure to sprint before using this ability to gain more distance. Defeat all enemies that spawn on the route and make your way to the gated mansion on the edge. Clearing this area can take a while due to the larger size of the playable area, which contains several houses and cover. Move up the road slowly and eliminate all enemies on the side as well to avoid taking unnecessary damage.
Interact with the door to enter the courtyard area.
Eliminate the threat
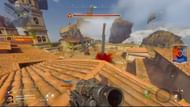
A massive health bar will appear on the top for Menendez. Shoot him to deal damage and force the enemy to teleport. Menendez will disappear throughout this phase and summon soldiers around the area that you must defeat. You can also find ammo resupplies around the courtyard to replenish your weapons and grenades.
Use the map to locate Menendez easily, as a boss marker will show his whereabouts when he teleports. Ensure you clear the open areas to avoid the large machete attacks. You can also pick up the Machete Attack killstreak after Menendez’s move ends. Use this attack to deal a critical blow to the enemy and shave off a massive chunk of his health pool.

Repeat these steps and keep launching the killstreak on him to eliminate the threat. This will mark the end of the first mission in Black Ops 7 campaign.
Follow Sportskeeda for more updates, guides, and news.
- How to unlock Augment Research in Black Ops 7 Zombies
- All Black Ops 7 operators and how to unlock them
- How to unlock all Lethal Equipment in Black Ops 7 Zombies
- How to unlock Cryo Freeze in Black Ops 7 Zombies