
'%20x='0'%20y='0'%20height='100%25'%20width='100%25'%20%0A%20%20%20%20%20%20%20%20%20%20xlink%3Ahref='data:image/jpg;base64,/9j/2wBDAAYEBQYFBAYGBQYHBwYIChAKCgkJChQODwwQFxQYGBcUFhYaHSUfGhsjHBYWICwgIyYnKSopGR8tMC0oMCUoKSj/2wBDAQcHBwoIChMKChMoGhYaKCgoKCgoKCgoKCgoKCgoKCgoKCgoKCgoKCgoKCgoKCgoKCgoKCgoKCgoKCgoKCgoKCj/wgARCAAGAAoDASIAAhEBAxEB/8QAFgABAQEAAAAAAAAAAAAAAAAAAAQH/8QAFQEBAQAAAAAAAAAAAAAAAAAAAwT/2gAMAwEAAhADEAAAAMfkAr//xAAgEAADAAECBwAAAAAAAAAAAAABAgMFABEEEhMUITFS/9oACAEBAAE/AMpKUMv2+OUcMCiKdhzBn+juT7OrLaFnlTpF5sUYhfG41//EABYRAQEBAAAAAAAAAAAAAAAAAAIAAf/aAAgBAgEBPwALb//EABYRAQEBAAAAAAAAAAAAAAAAAAEAIf/aAAgBAwEBPwBMv//Z'%3E%3C/image%3E%3C/svg%3E)
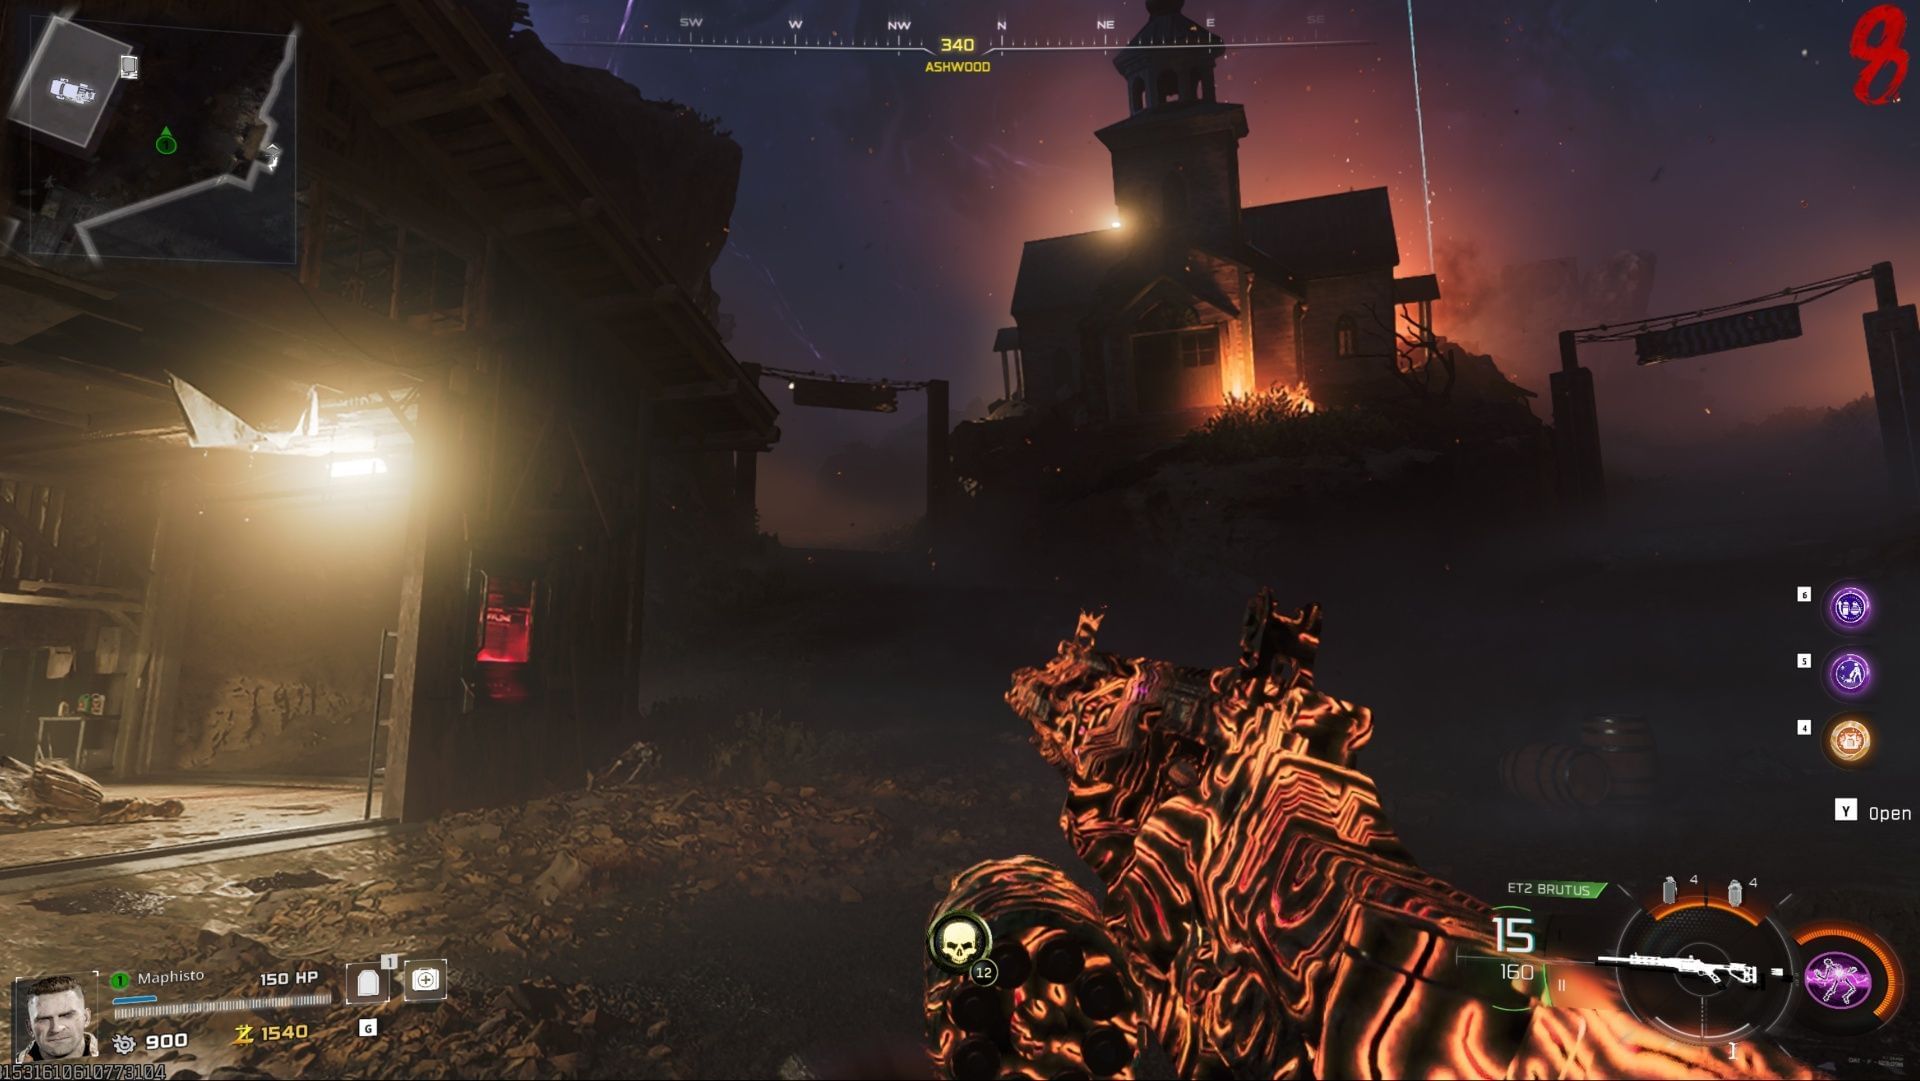
Ashes of the Damned is the map for Black Ops 7 Zombies. Previously, the Black Ops 6 Zombies story concluded with the team being teleported into the Dark Aether, and this new story picks up exactly from that point. The map is massive, with different Points of Interest (POIs), and this time, you will have a vehicle named Tessie that you can easily move around in.
This article provides detailed information to help you complete the main quest Easter Egg for the Ashes of the Damned map in Black Ops 7 Zombies.
How to complete the Black Ops 7 Zombies Ashes of the Damned main quest Easter Egg
At the start, you spawn in the Janus Towers Plaza, and your gameplay begins here with several guided objectives:
1) Unlock Pack-a-Punch
Investigate the Server Room
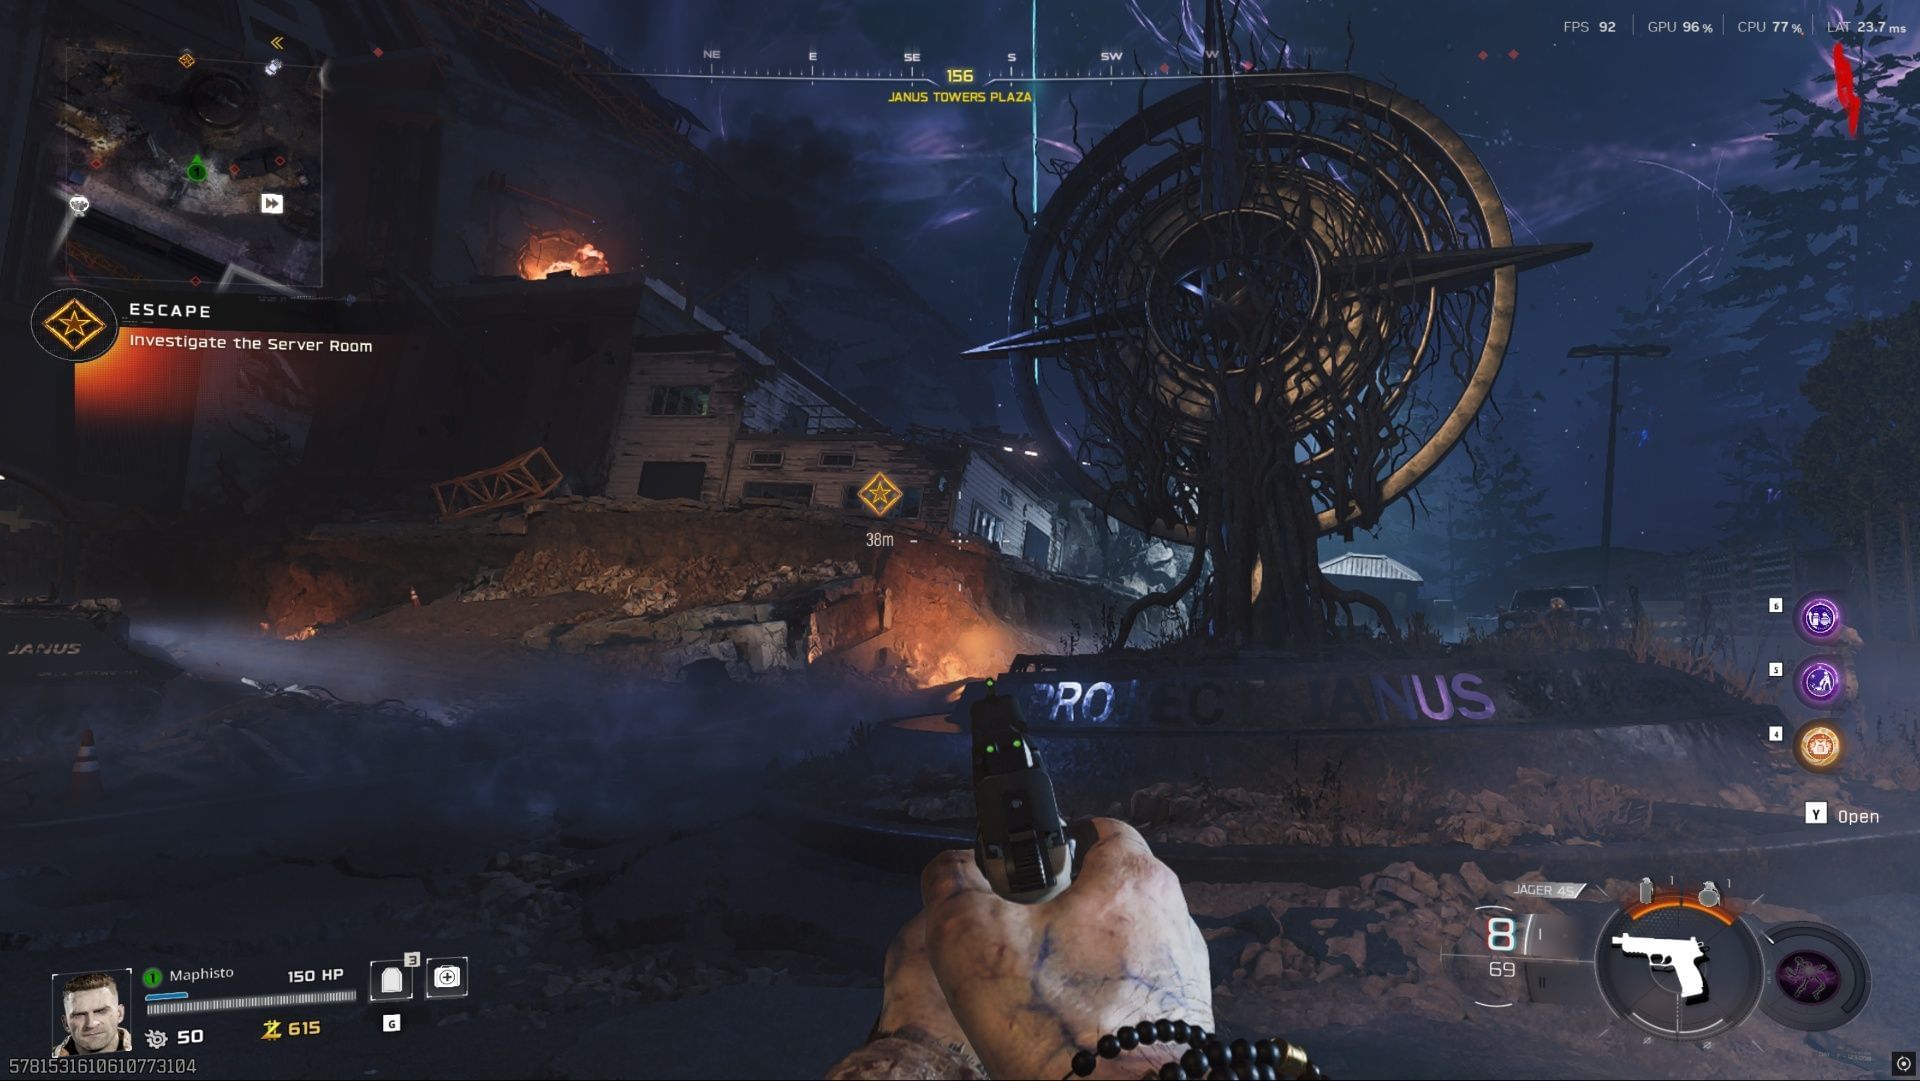
Just where you spawn, you'll see a white building to the southeast. Before heading there, kill a few zombies and gather at least 1,250 Essence, as you'll need it to open the locked door to access the building. Once unlocked, head inside the building. This is the Server Room.
Melee the grate to break it open
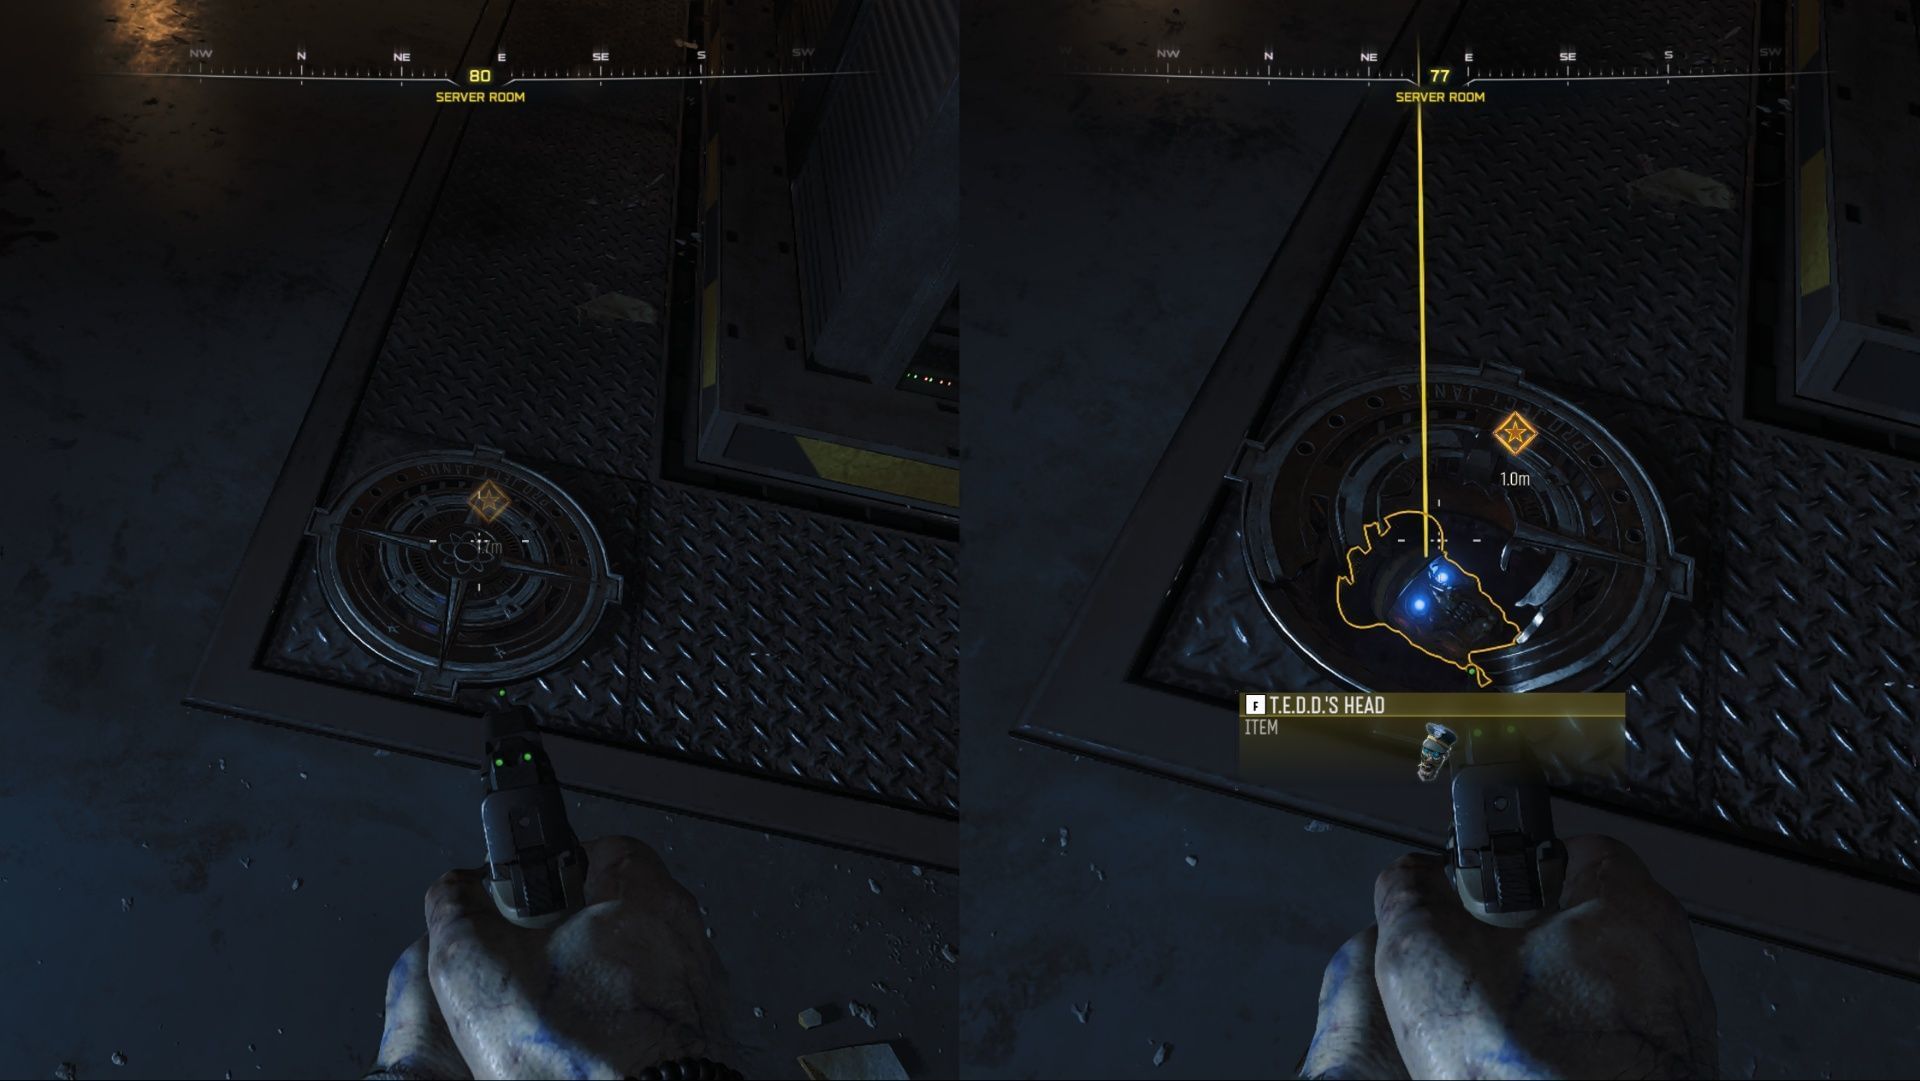
As you head inside, you will find a grate on the floor. Simply approach it and melee it to break it open. There, you will find the item T.E.D.D.'s Head; pick it up.
Install T.E.D.D.'s Head onto Ol' Tessie
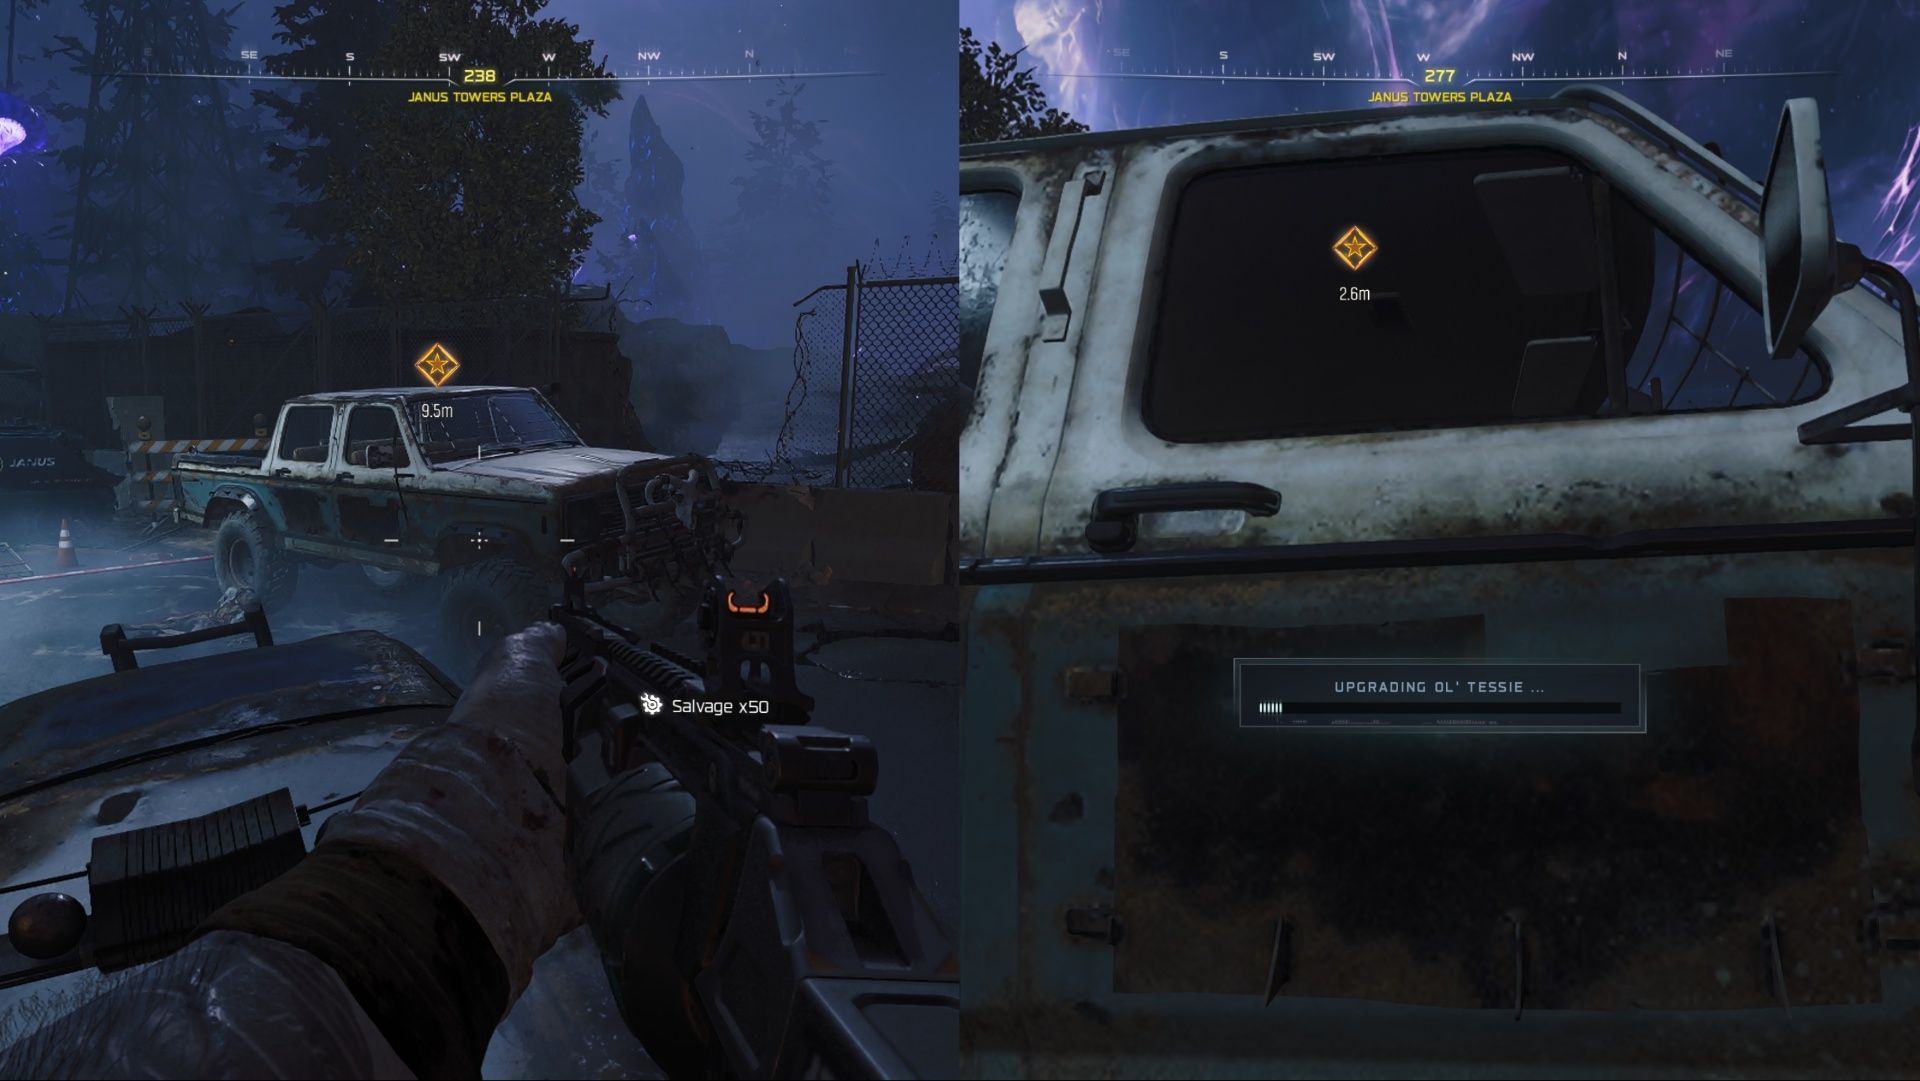
Now, if you take the west exit from the building, you will find a pickup truck just outside. Approach it and press and hold the install button to place T.E.D.D.'s Head onto Ol' Tessie. Once done, drive Tessie.
Break through the wooden barriers
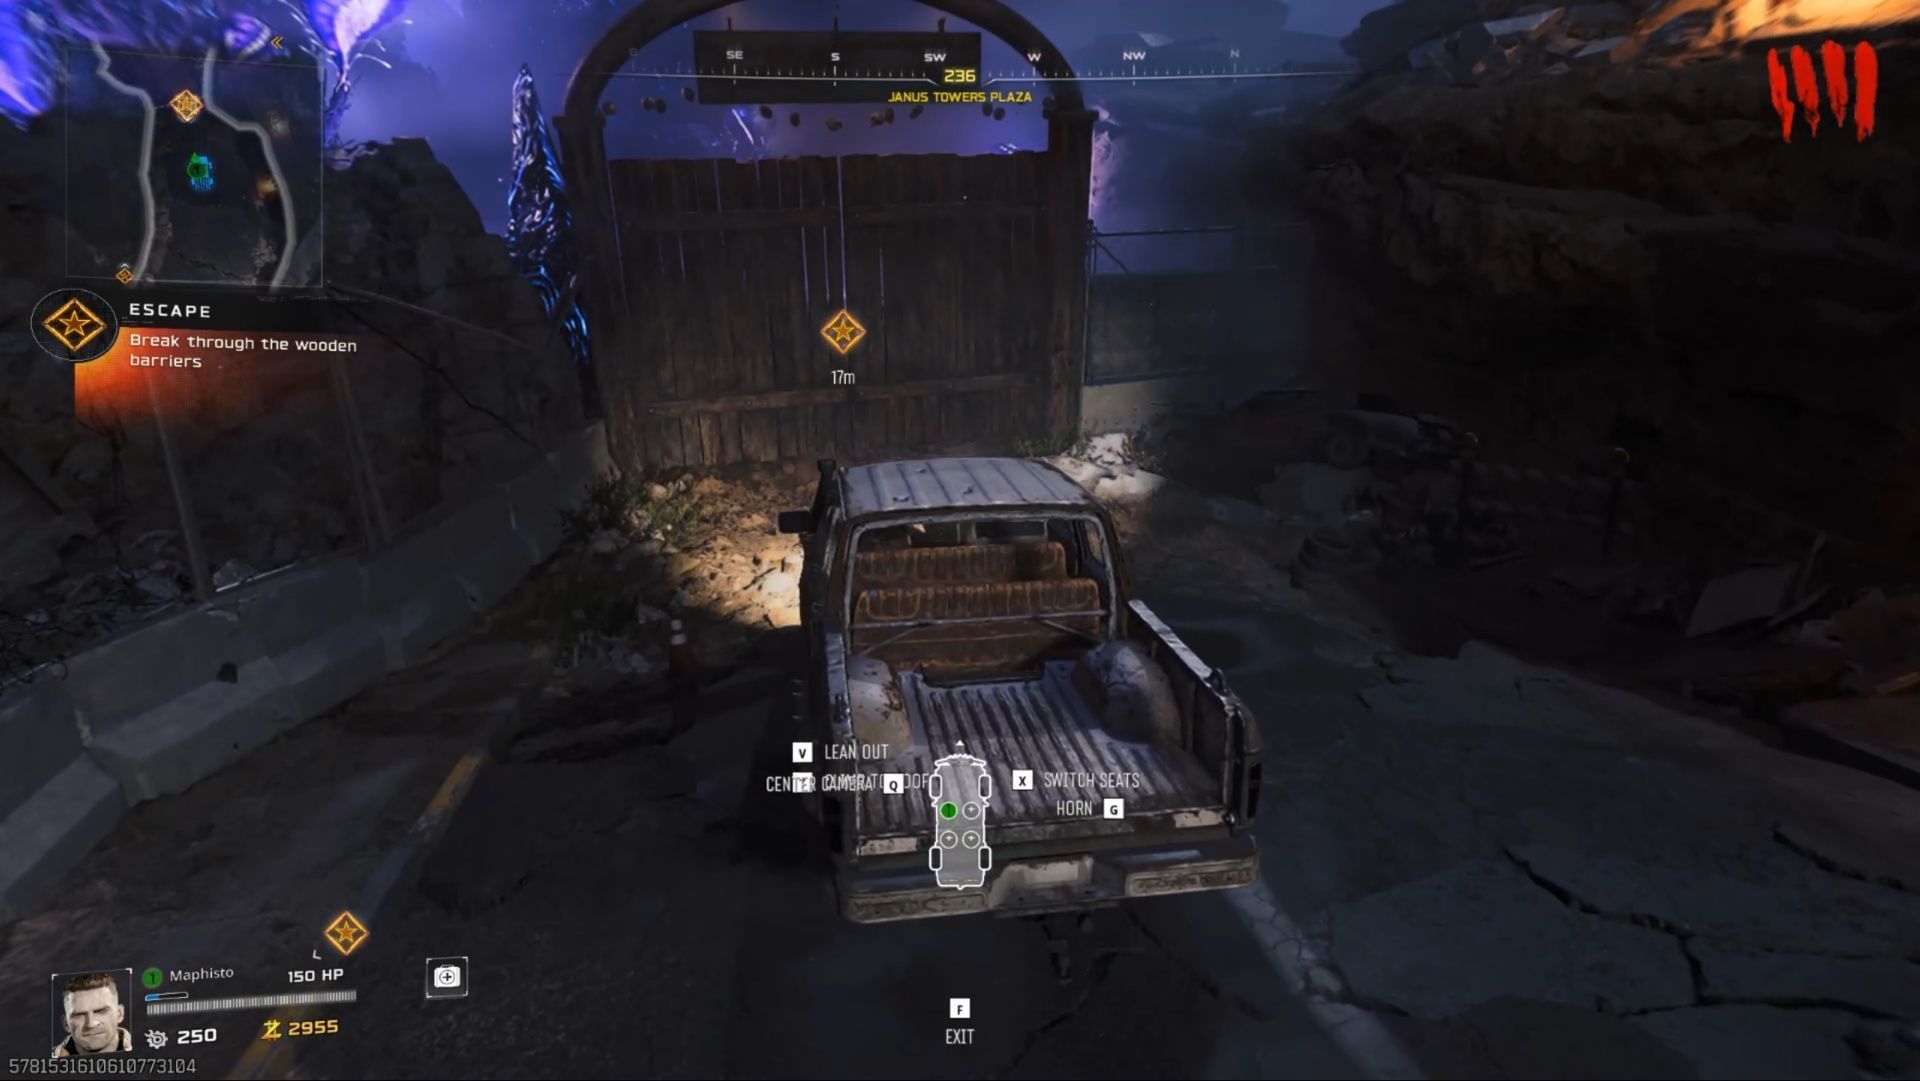
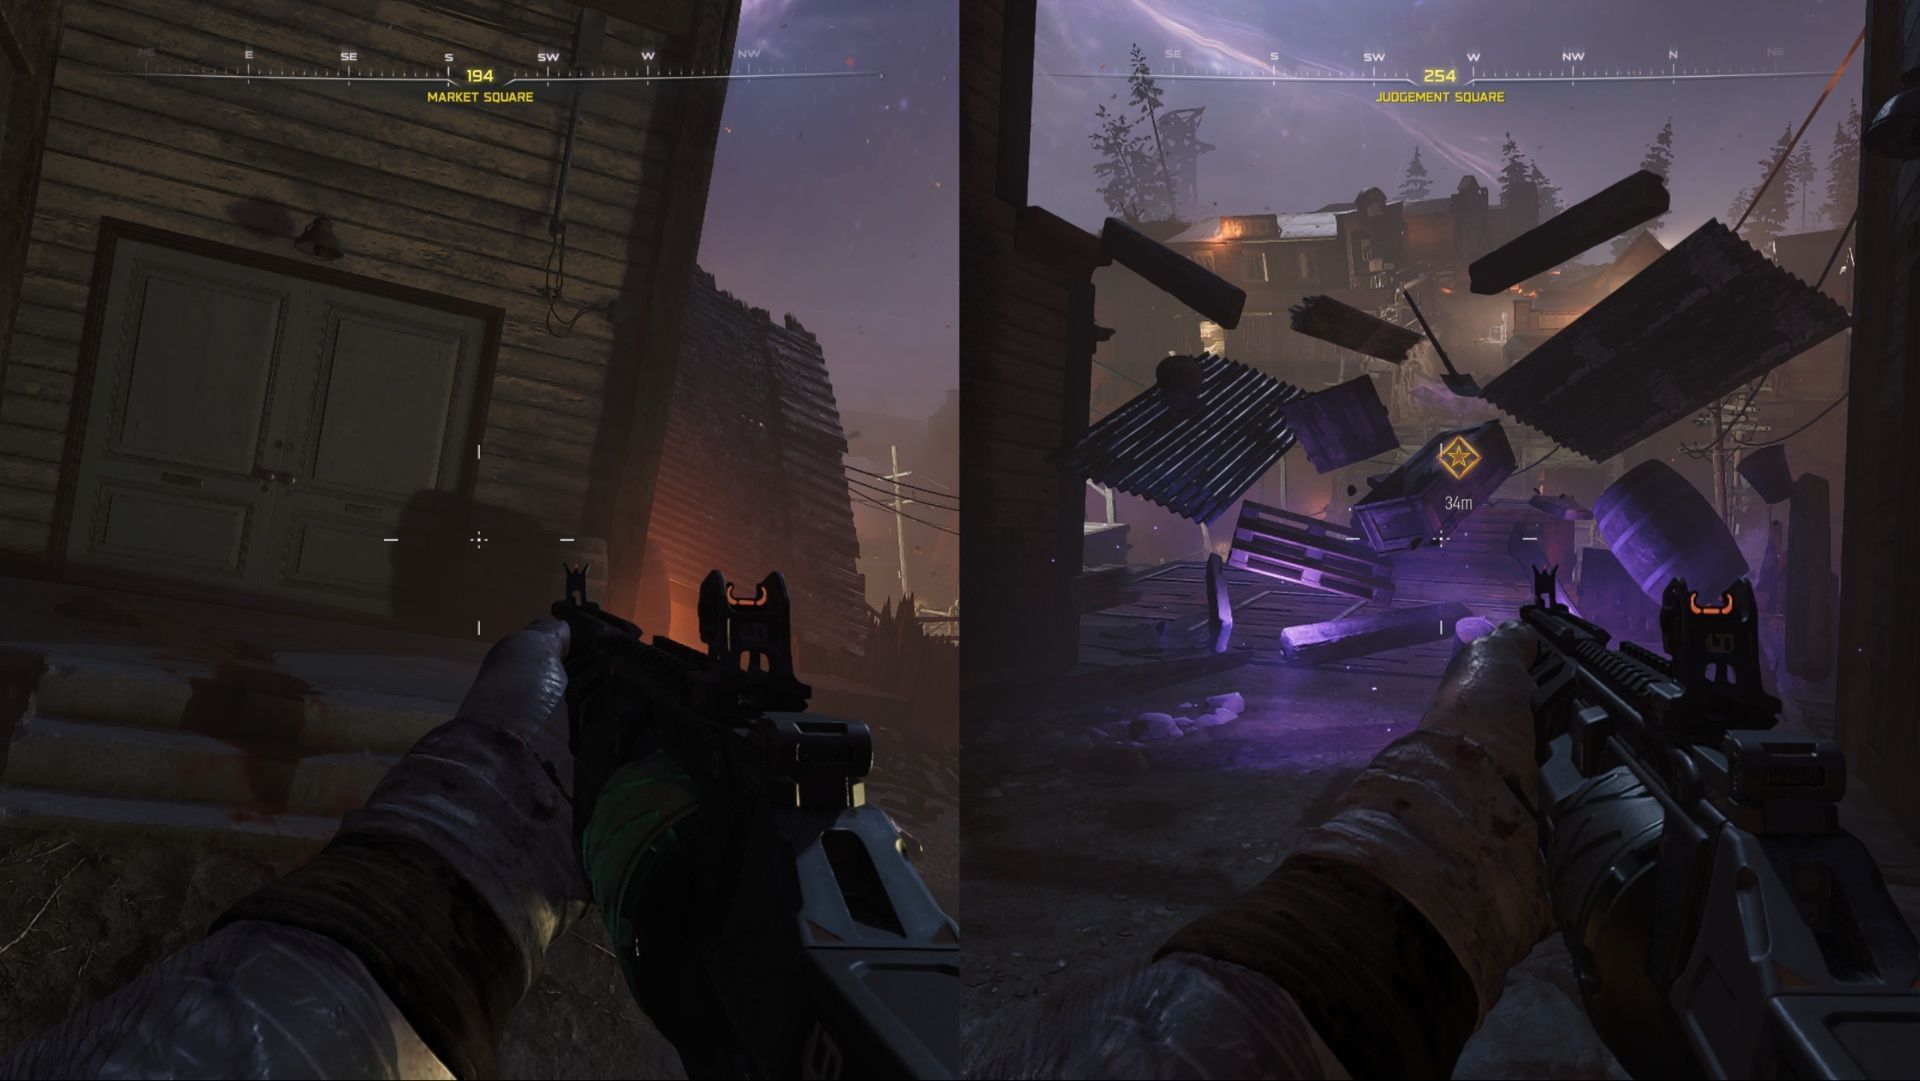
As you drive Tessie, you can choose either the right or the left path. Pick whichever you prefer and drive through the wooden barriers to break them open. If you take the left path, the next Point of Interest (POI) you need to reach is Blackwater Lake. The path is linear, so just drive until you reach the POI.
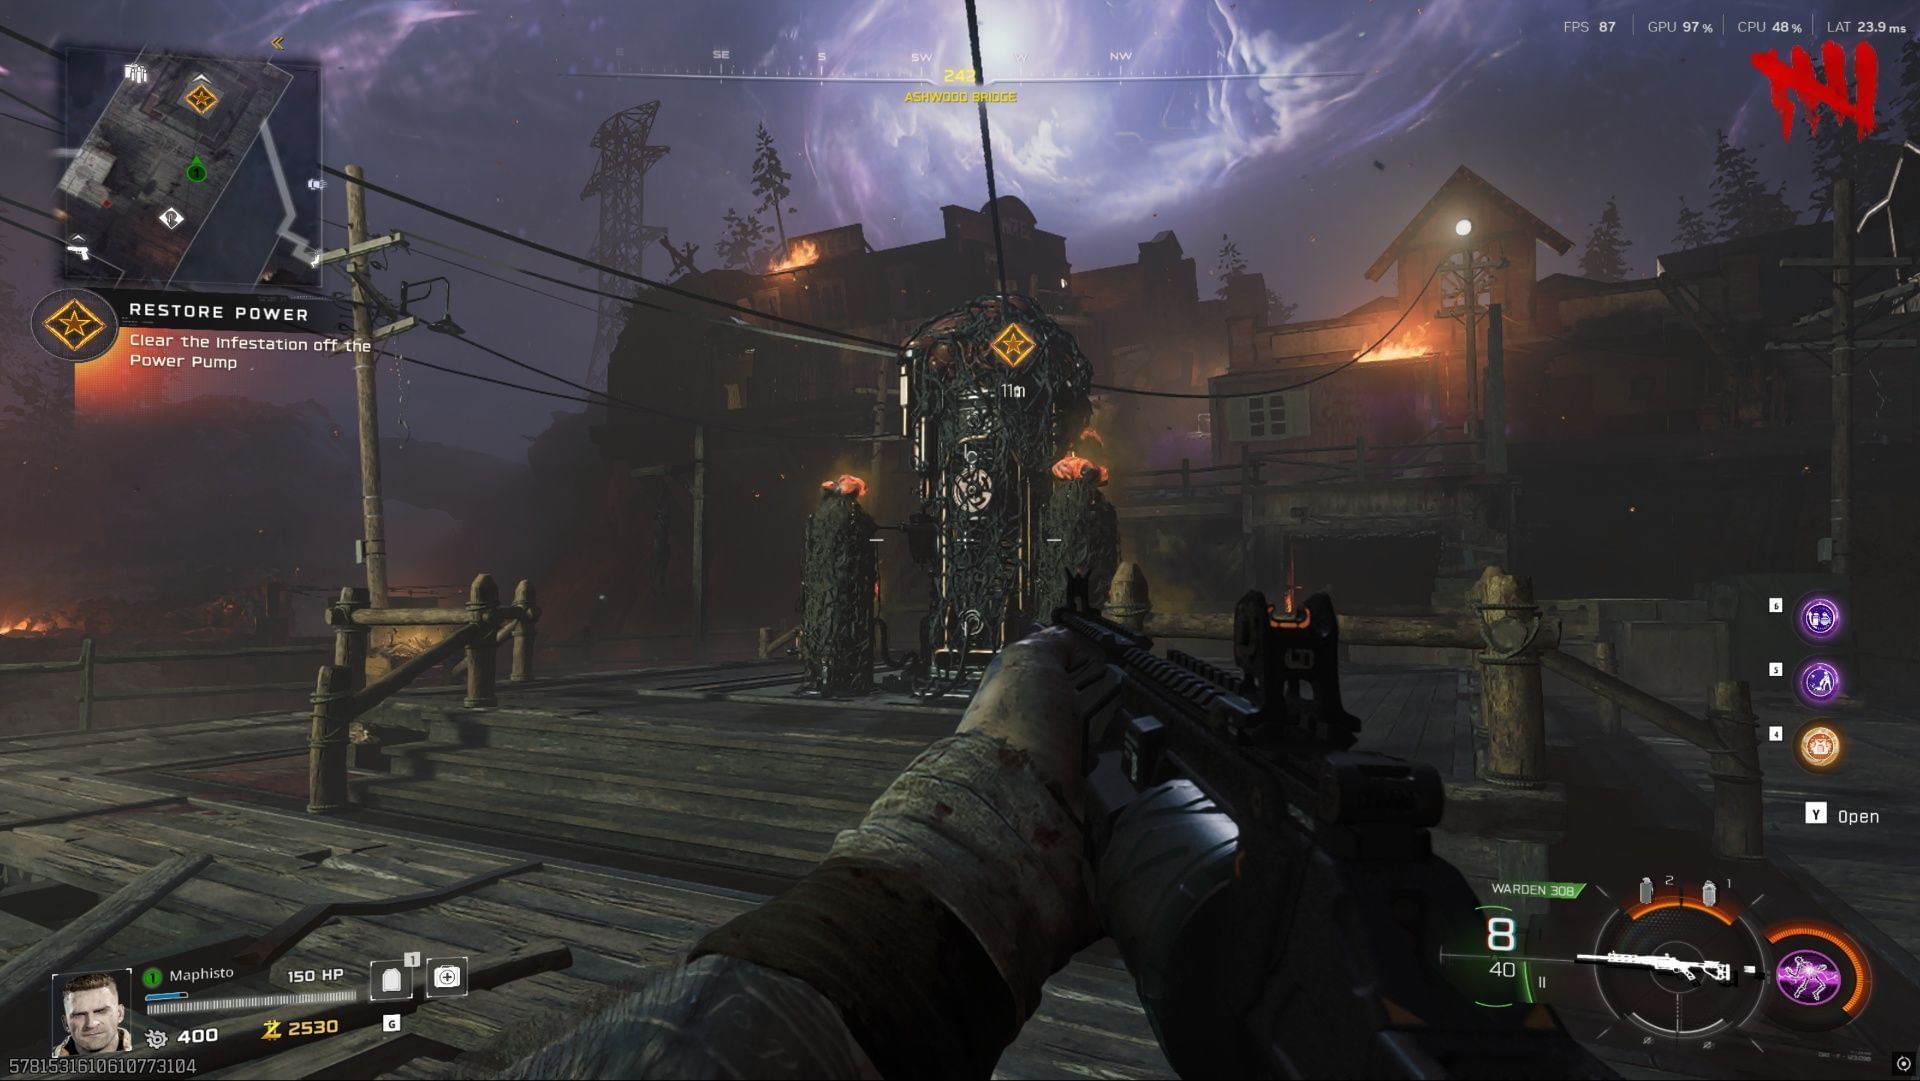
Clear the infestation off the Power Pump
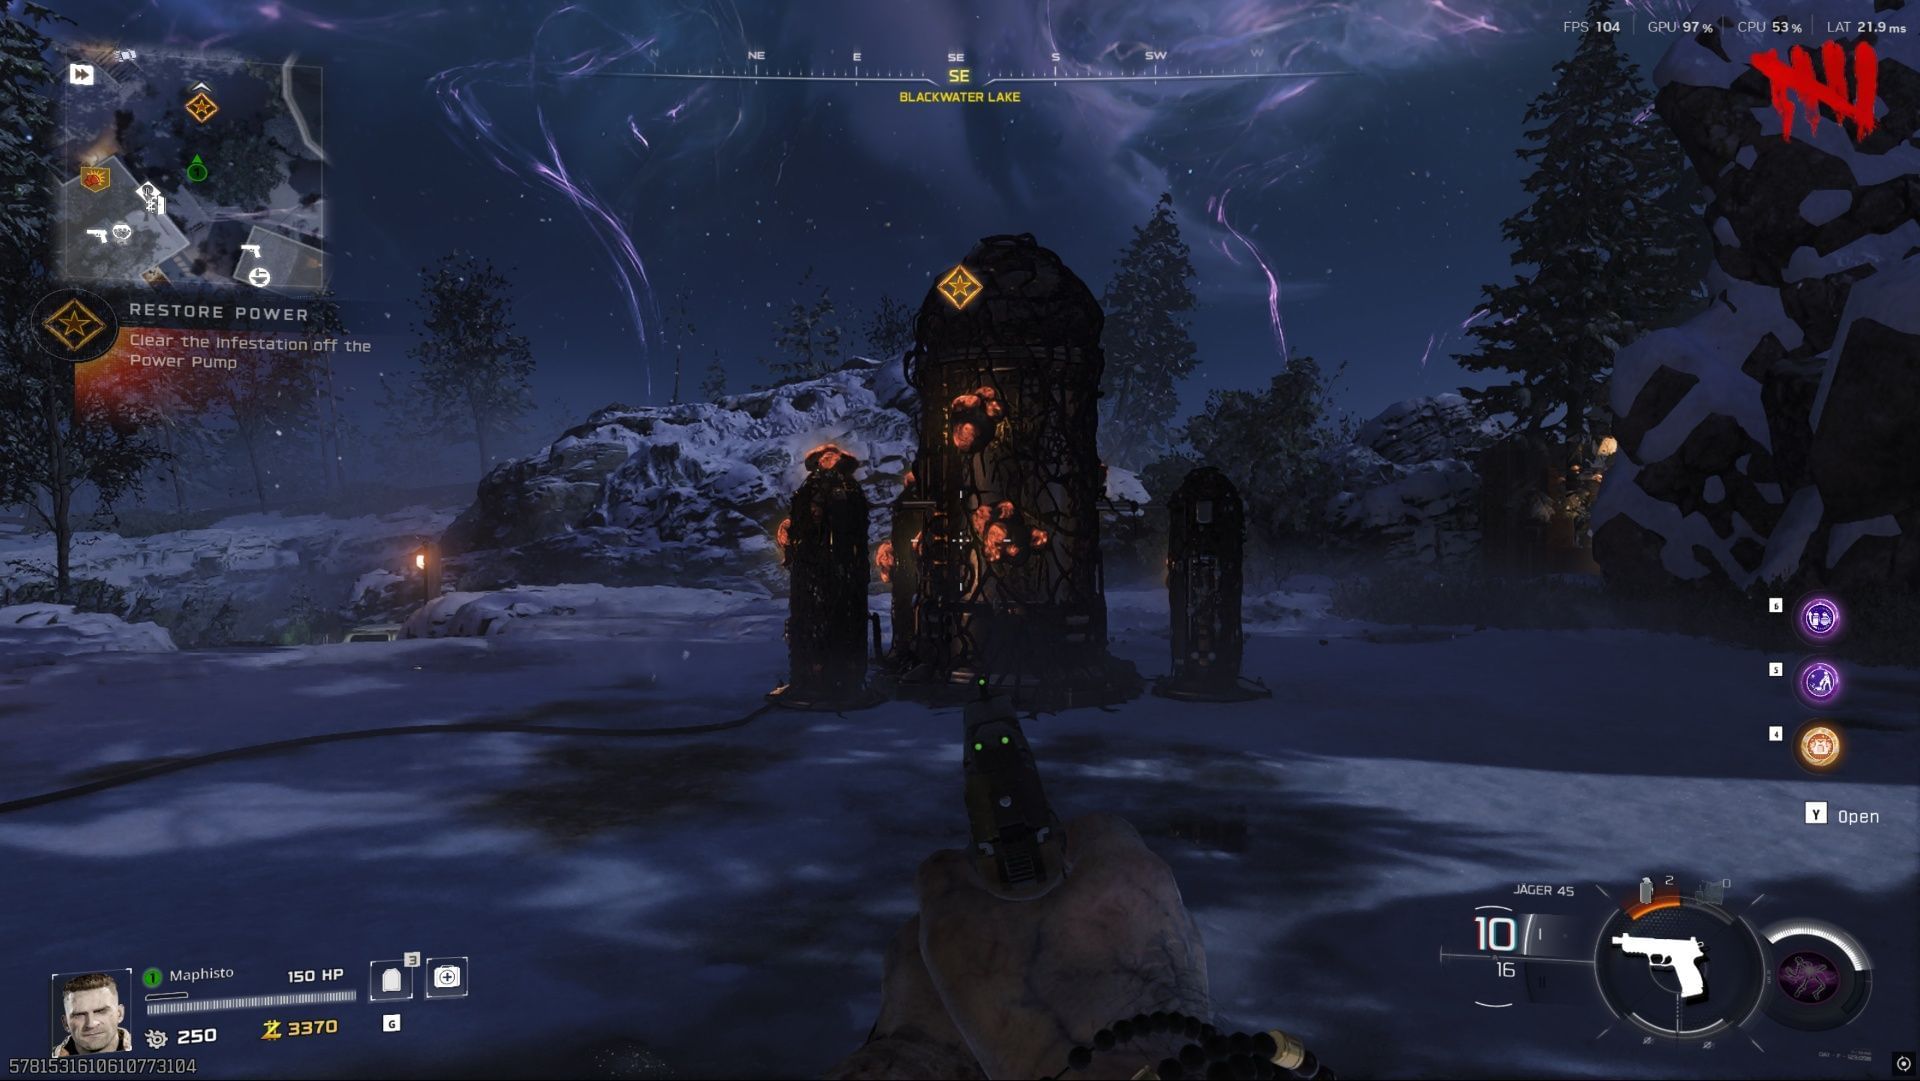
Exit the vehicle at the POI, and you will see a power pump covered with infestation. Just shoot the orange pores. Once you shoot one, a 30-second timer will begin, giving you a window to remove all the infestations from the power pump. If you fail, you can try again.
Flip the power switch
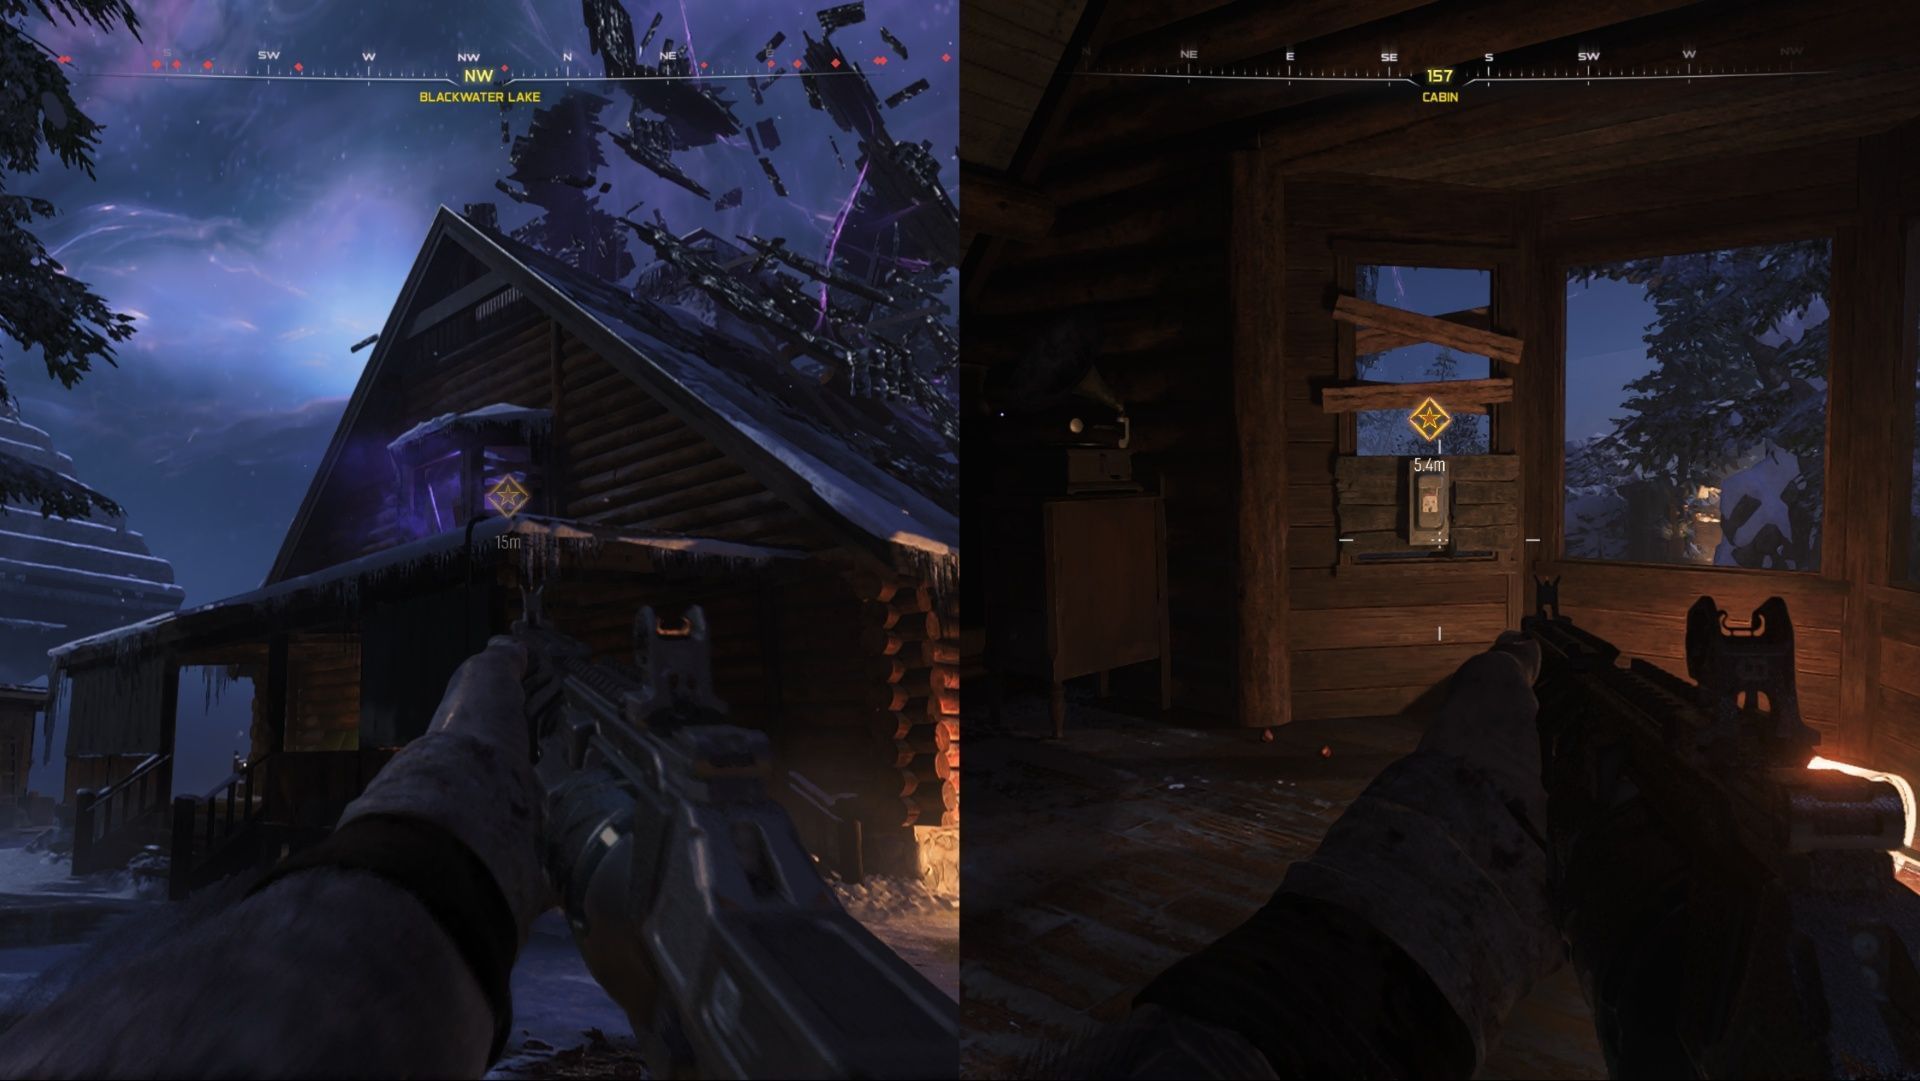
If successful, you then need to flip the power switch inside the building just near the power pump. However, ensure you have at least 1,750 Essence, as the door will be locked. Once open, head upstairs and approach the switch to flip it.
Also read: How to unlock all Lethal Equipment in Black Ops 7 Zombies
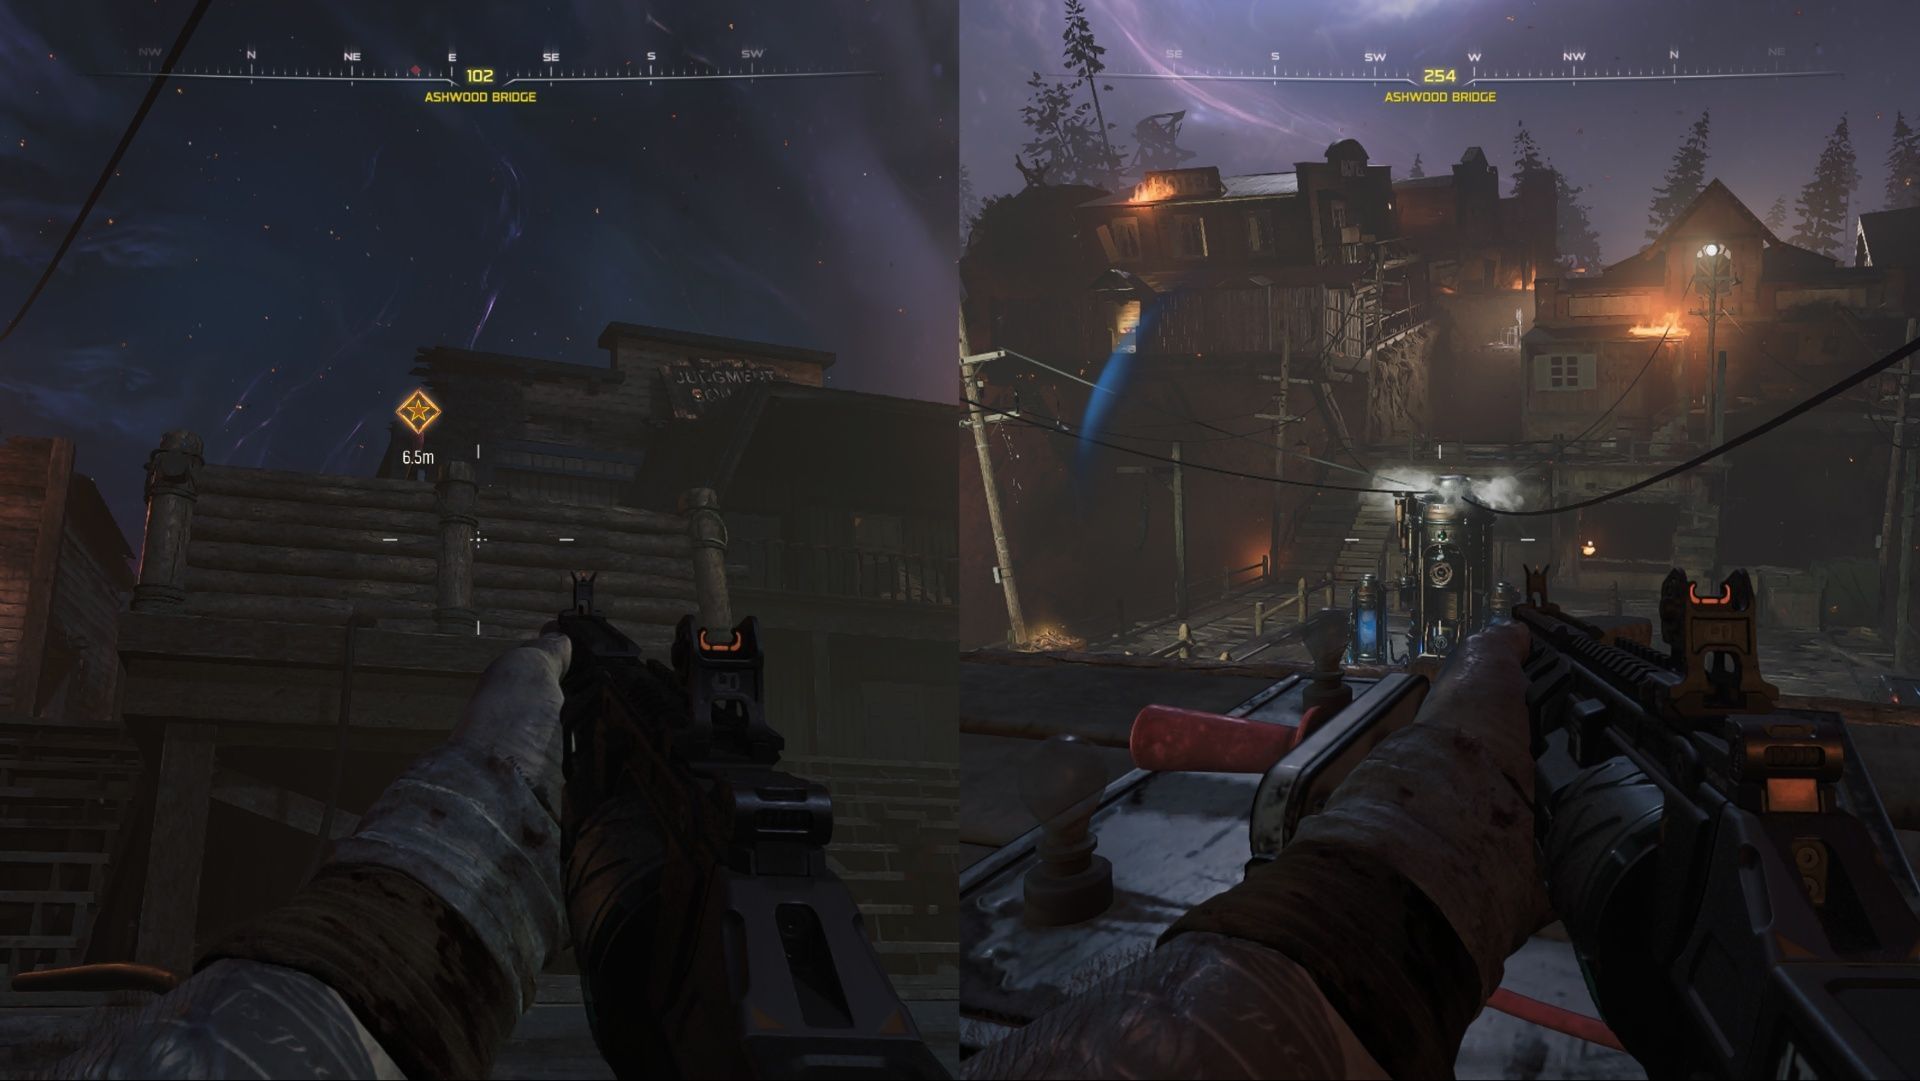
Drive Ol' Tessie to Ashwood
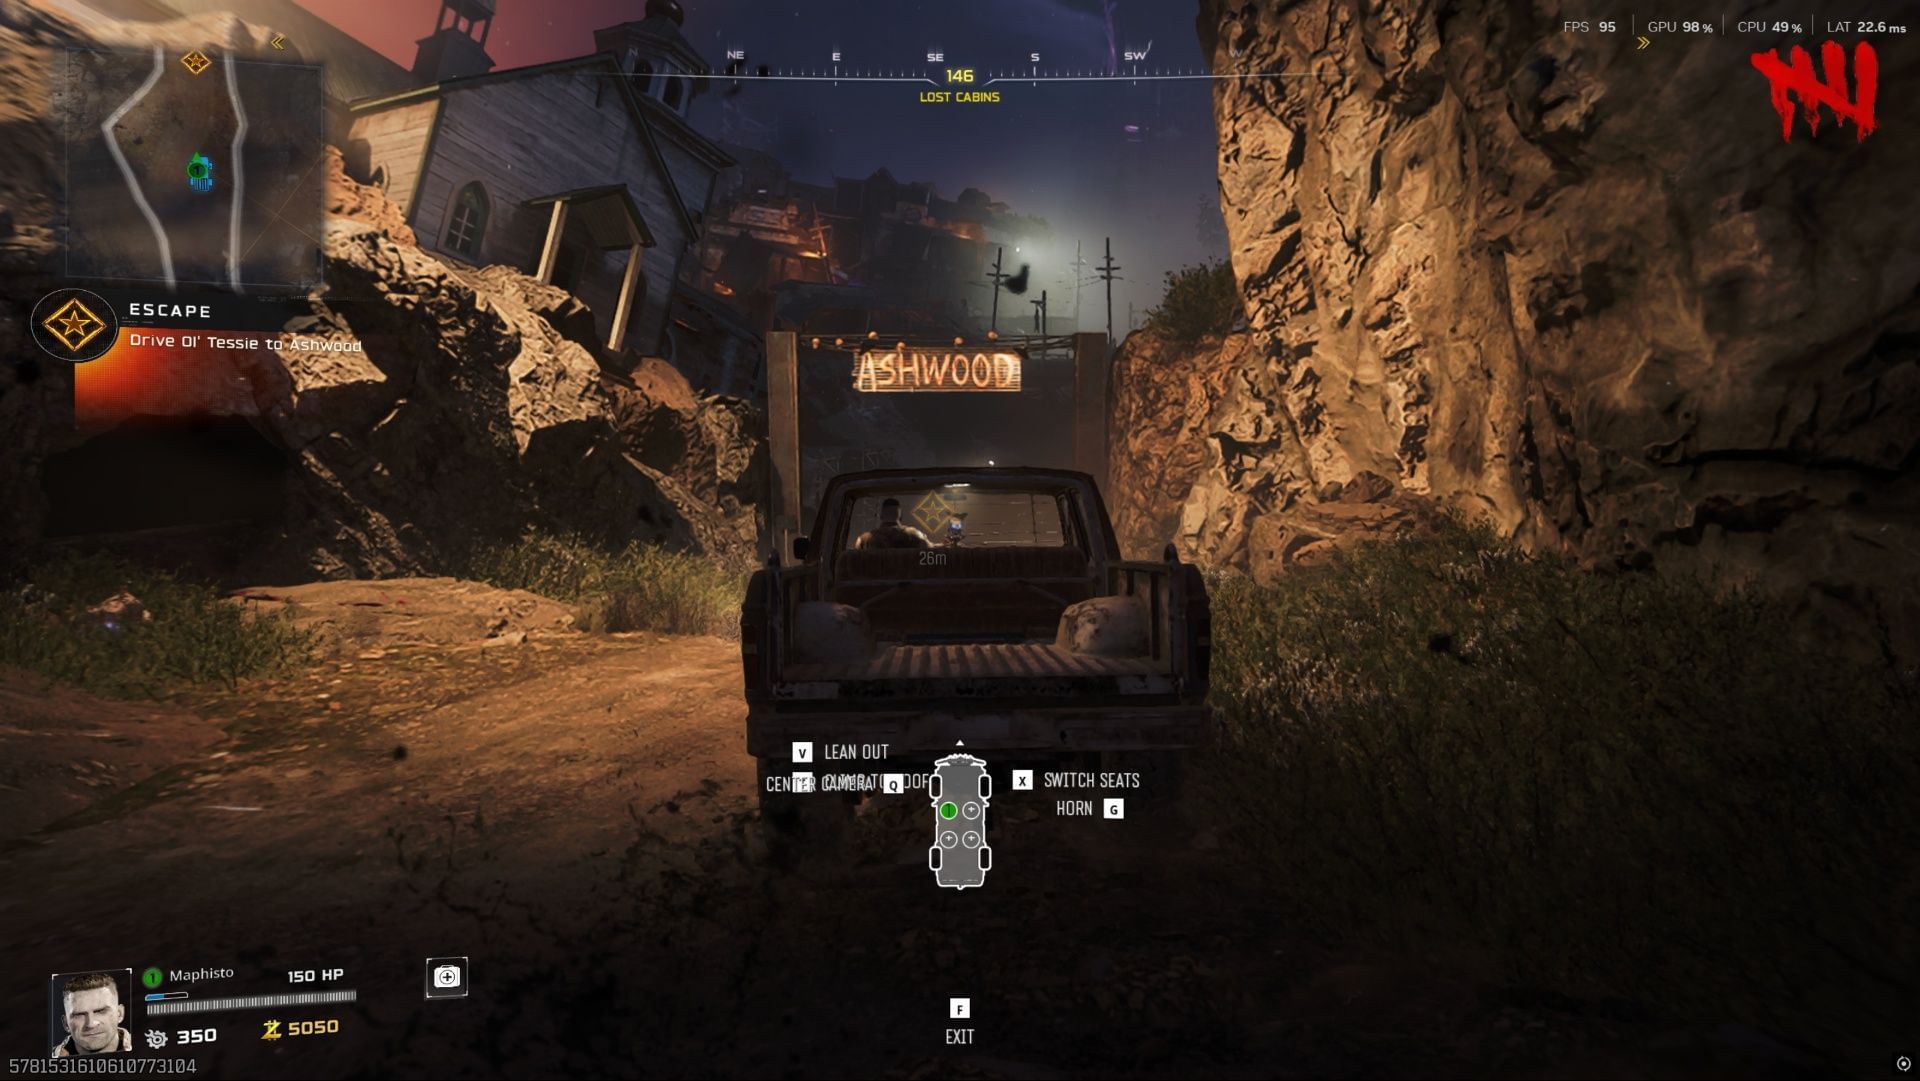
Now, drive your vehicle again and follow the path, which will eventually lead you to Ashwood, another major POI on the map.
Locate the power pump in Ashwood
As you reach Ashwood, you will find an upper platform that you need to reach by using your ascender. Just head to the marked point and ascend.
Make sure beforehand that you have at least 2,750 Essence, as there will be two blocked entrances, one costing 1,000 Essence and the other 1,750 Essence to clear. Afterward, you will find the power pump covered with infestations.
Clear the infestations off the Power Pump
As you did before, clear out all the infestations within the limited time frame.
Flip the power switch
Once the infestations are gone, head east, where you will find the power switch. Flip it, and this will open the garage door below.
Also read: How to unlock Augment Research in Black Ops 7 Zombies
Drive Ol' Tessie into the garage
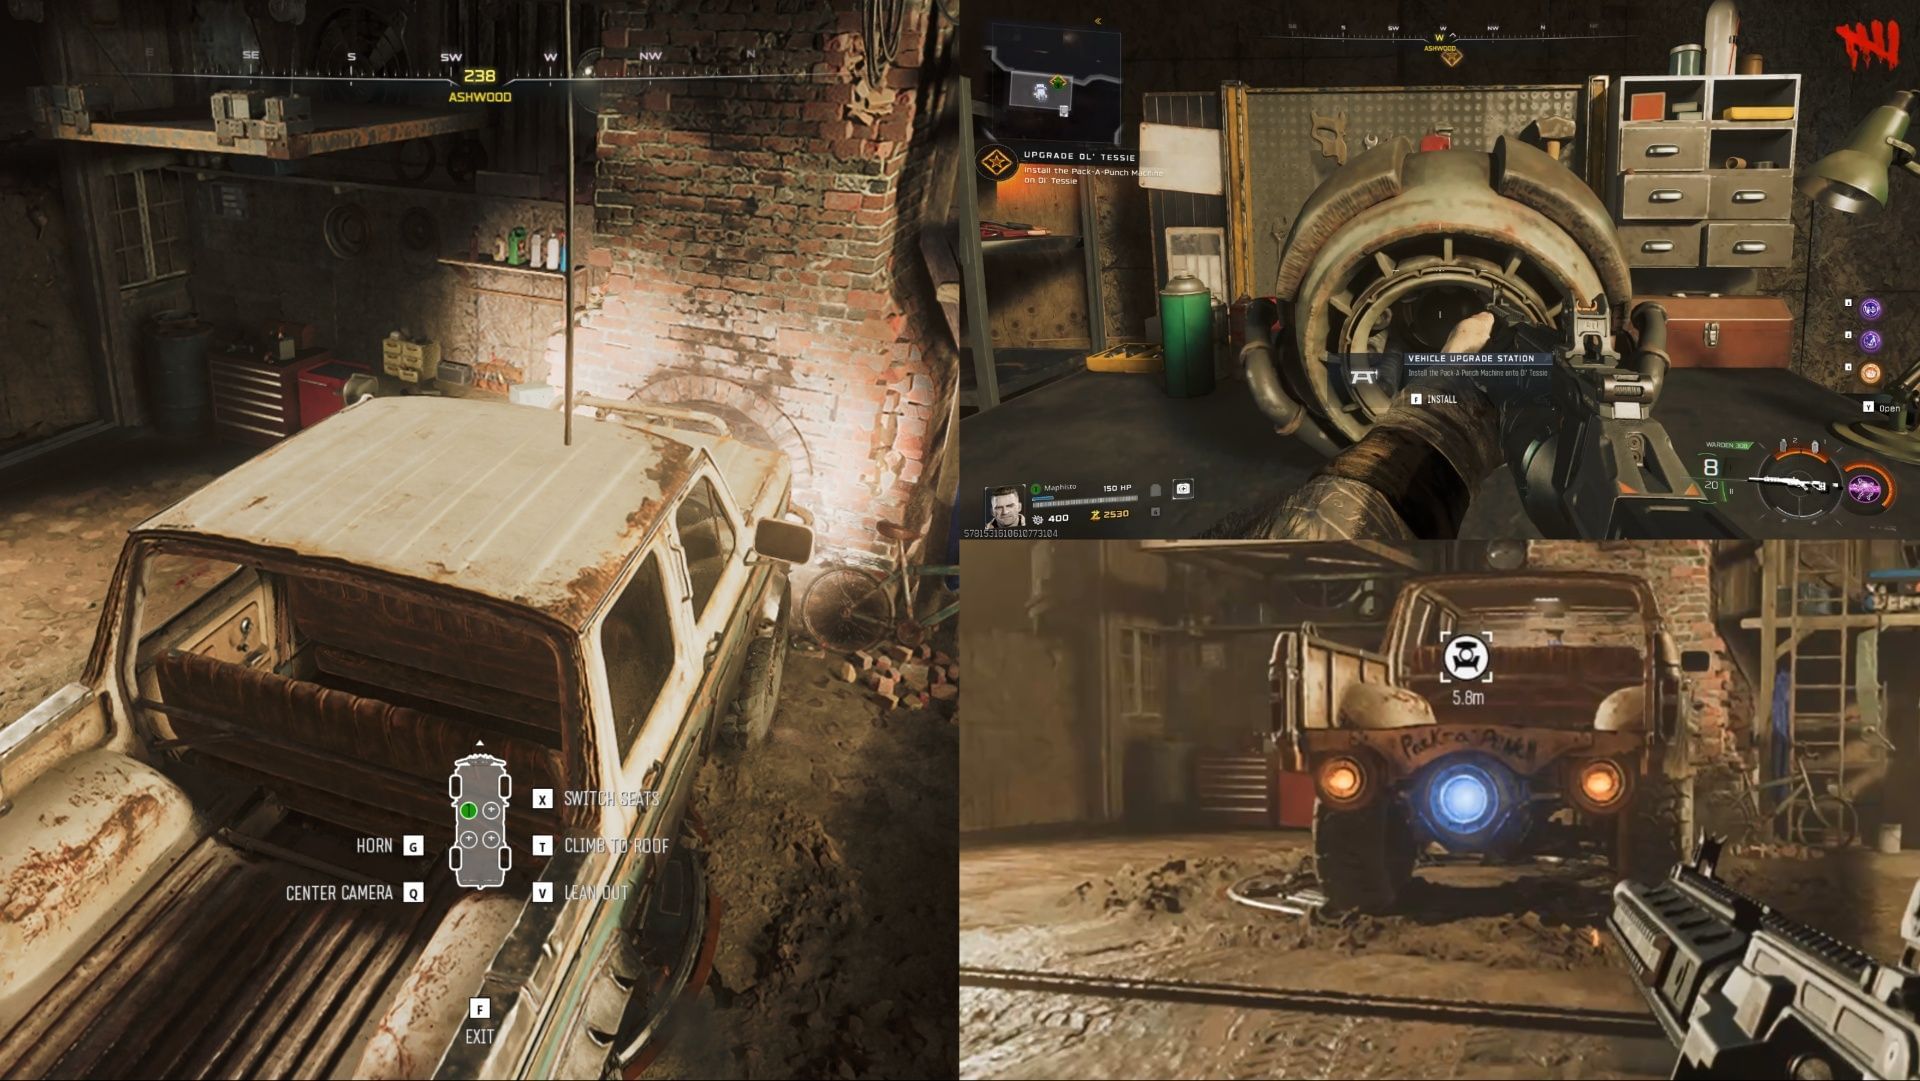
Now you need to drive your vehicle into the garage. Just nearby, you will find a workbench. Interacting with it will upgrade the truck. Once done, you will install the Pack-a-Punch machine on Ol' Tessie's trunk.
Once the guided objectives are complete and you unlock Pack-a-Punch, you will no longer receive guided objectives. To progress, you first need to upgrade your Ol' Tessie by installing an Abomination head into its hood.
2) Abomination upgrade for Ol' Tessie
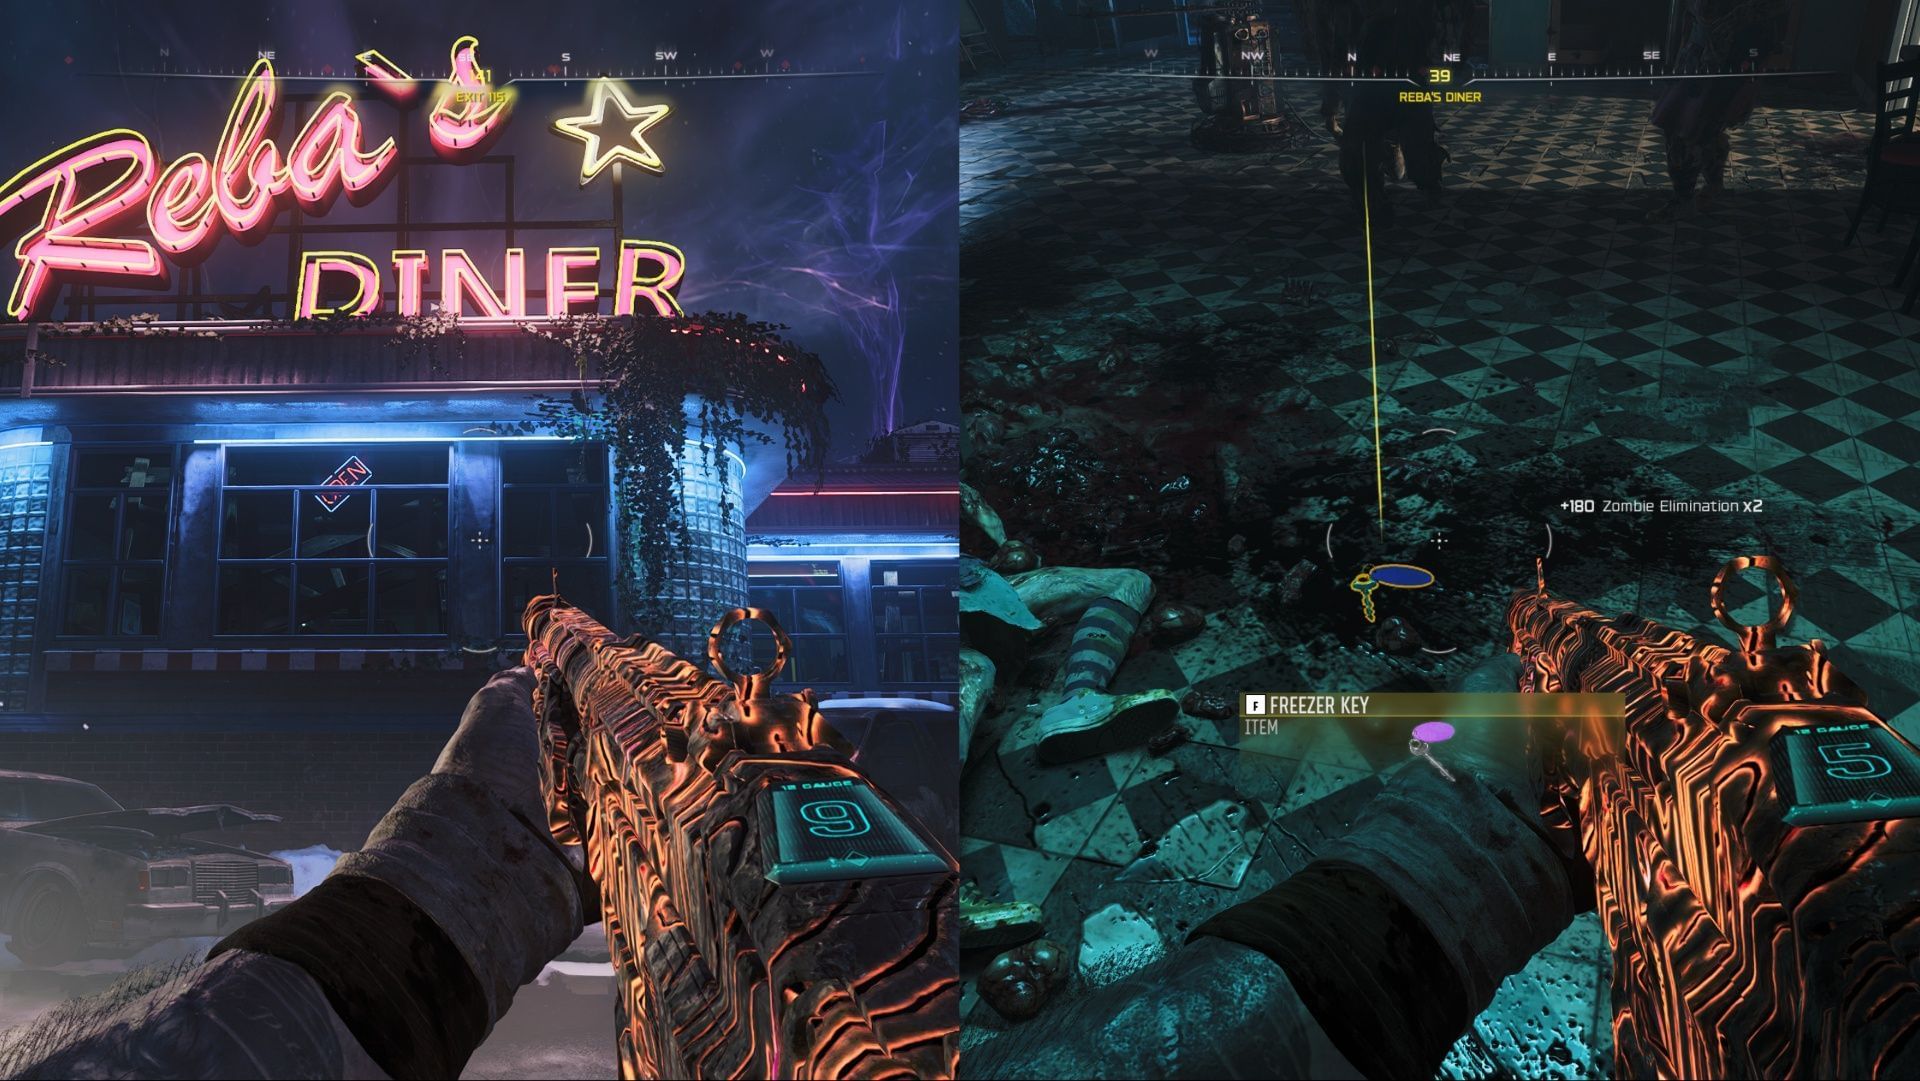
First, head to the Exit 115 Point of Interest (POI) located on the far south side. When you arrive, you will find Reba's Diner. You need to spend 1,250 Essence to unlock the diner's door and head inside. Stay inside and keep eliminating zombies; one of them will drop the Freezer Key.
Now, go to the freezer room inside the diner and use the key to open it. (For the exact location of the freezer, refer to the image below.)
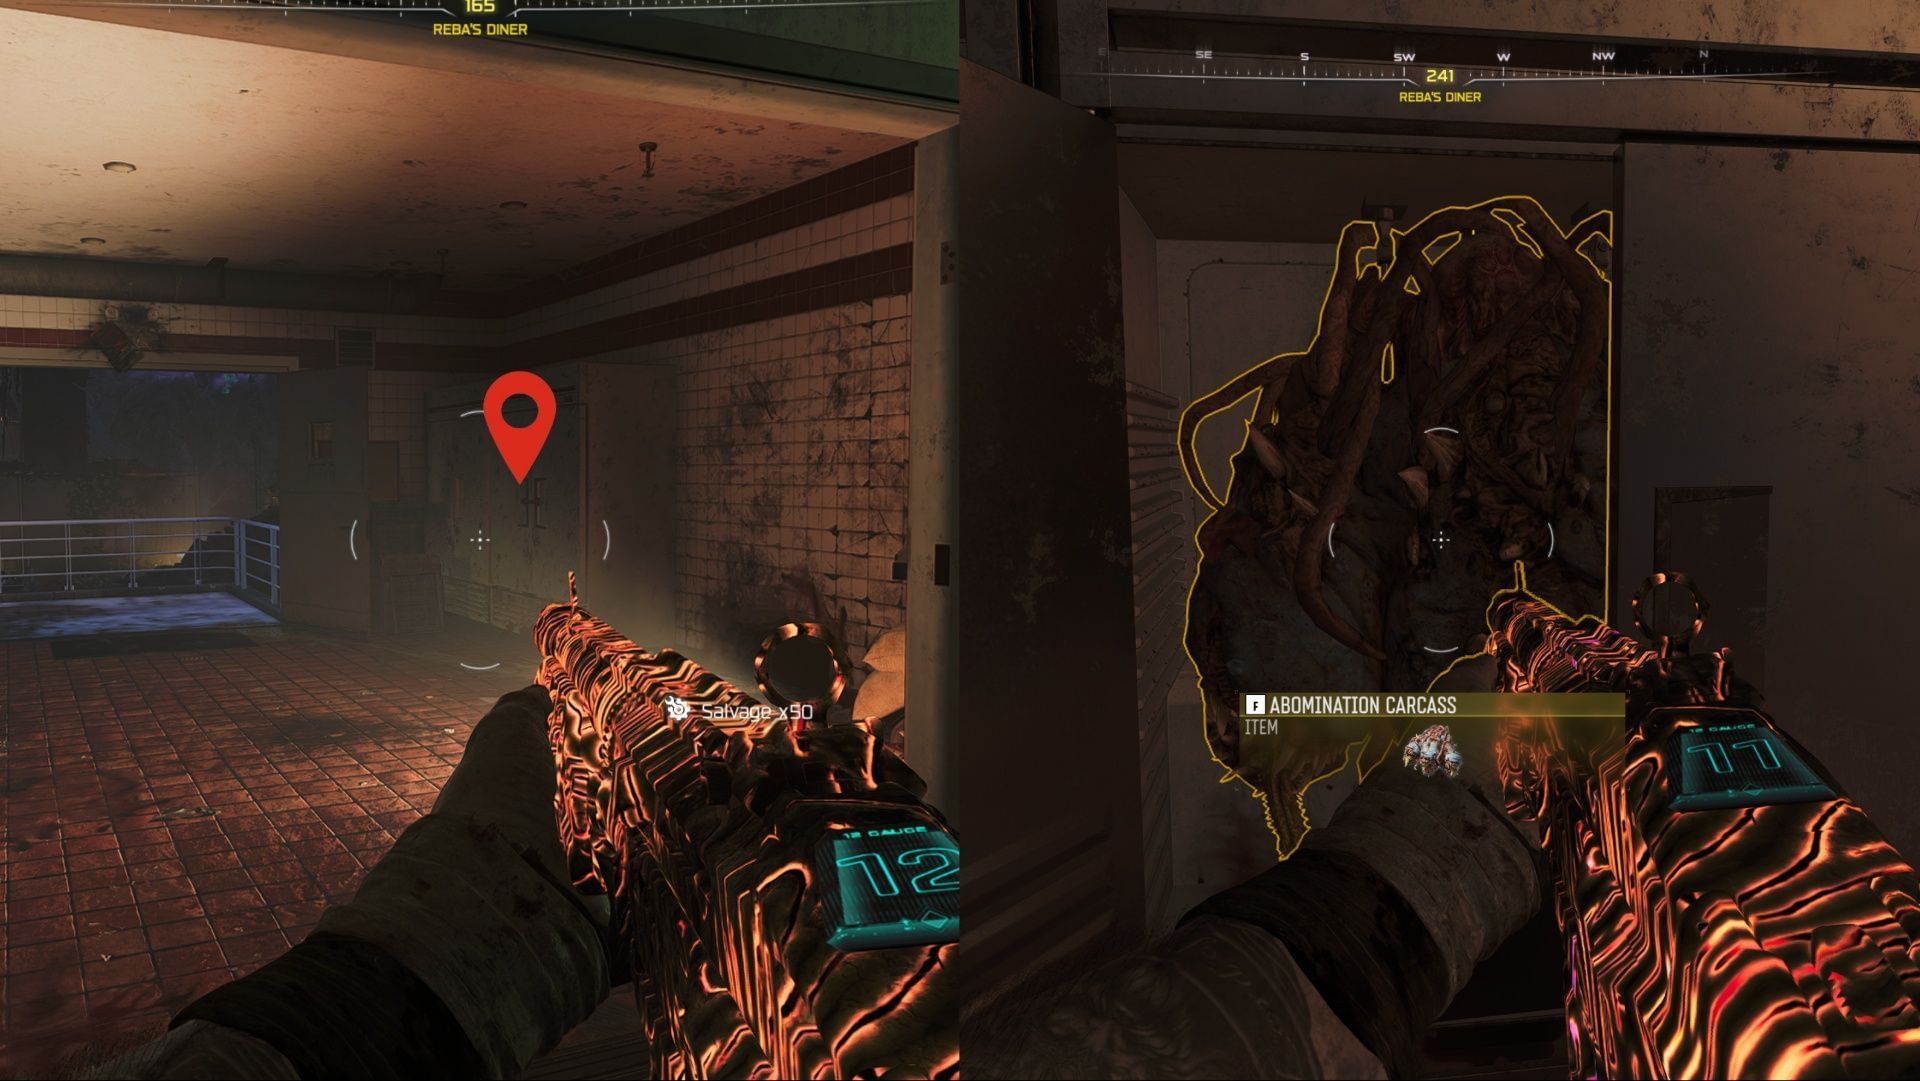
Once you collect the Abomination Carcass, drive Tessie back to Ashwood. Put Tessie inside the garage and go to the vehicle upgrade bench to upgrade the car, which will install the Abomination Carcass into the vehicle's hood.
Once this is complete, you can begin the next step: waking up Klaus. To do so, follow these steps:
3) Free Klaus from the cell
Kill the Uber Klaus in Janus Towers Plaza POI
First, you need to remove infestations from all Power Pumps.
There are three infested Power Pumps in total. By the time you reach the Pack-a-Punch procedure, you should have already cleared two of them, leaving only one remaining. The locations for the three Power Pumps are:
- Blackwater Lake
- Ashwood
- Vandorn Farm
As two of them are already done, therefore, clear whichever Power Pump remains, and then head to the Janus Towers Plaza.
Once you are in Janus Tower Plaza. Walk along the west path, and you will see a flipped-over truck with a small patch of fire nearby. Just walk close to this area, and an Uber Klaus will spawn. Eliminate it, and it will drop the Stabilizer Chip.

Now, return to Ashwood and head near the Vulture Aid Perk-a-Cola machine. Just beside the machine, you will find a building named the Ashwood Sheriff's Office. Open the door using 500 Essence.
Inside, you will find Klaus inside a cell. You will see a panel on the cell where you can install the Stabilization Chip.
Now, all you need to do is wake Klaus up. To do this, craft some Stun Grenades from the Crafting table and throw them at Klaus. Continuously keep throwing the Stun Grenades, where at least four are needed to wake it up. It will fly out of the cell, and you can now command it to assist you in battles.
4) Acquire the Necrofluid Wonder Weapon
Process to unlock the Necrofluid Wonder Weapon
Acquire Aether Barrel
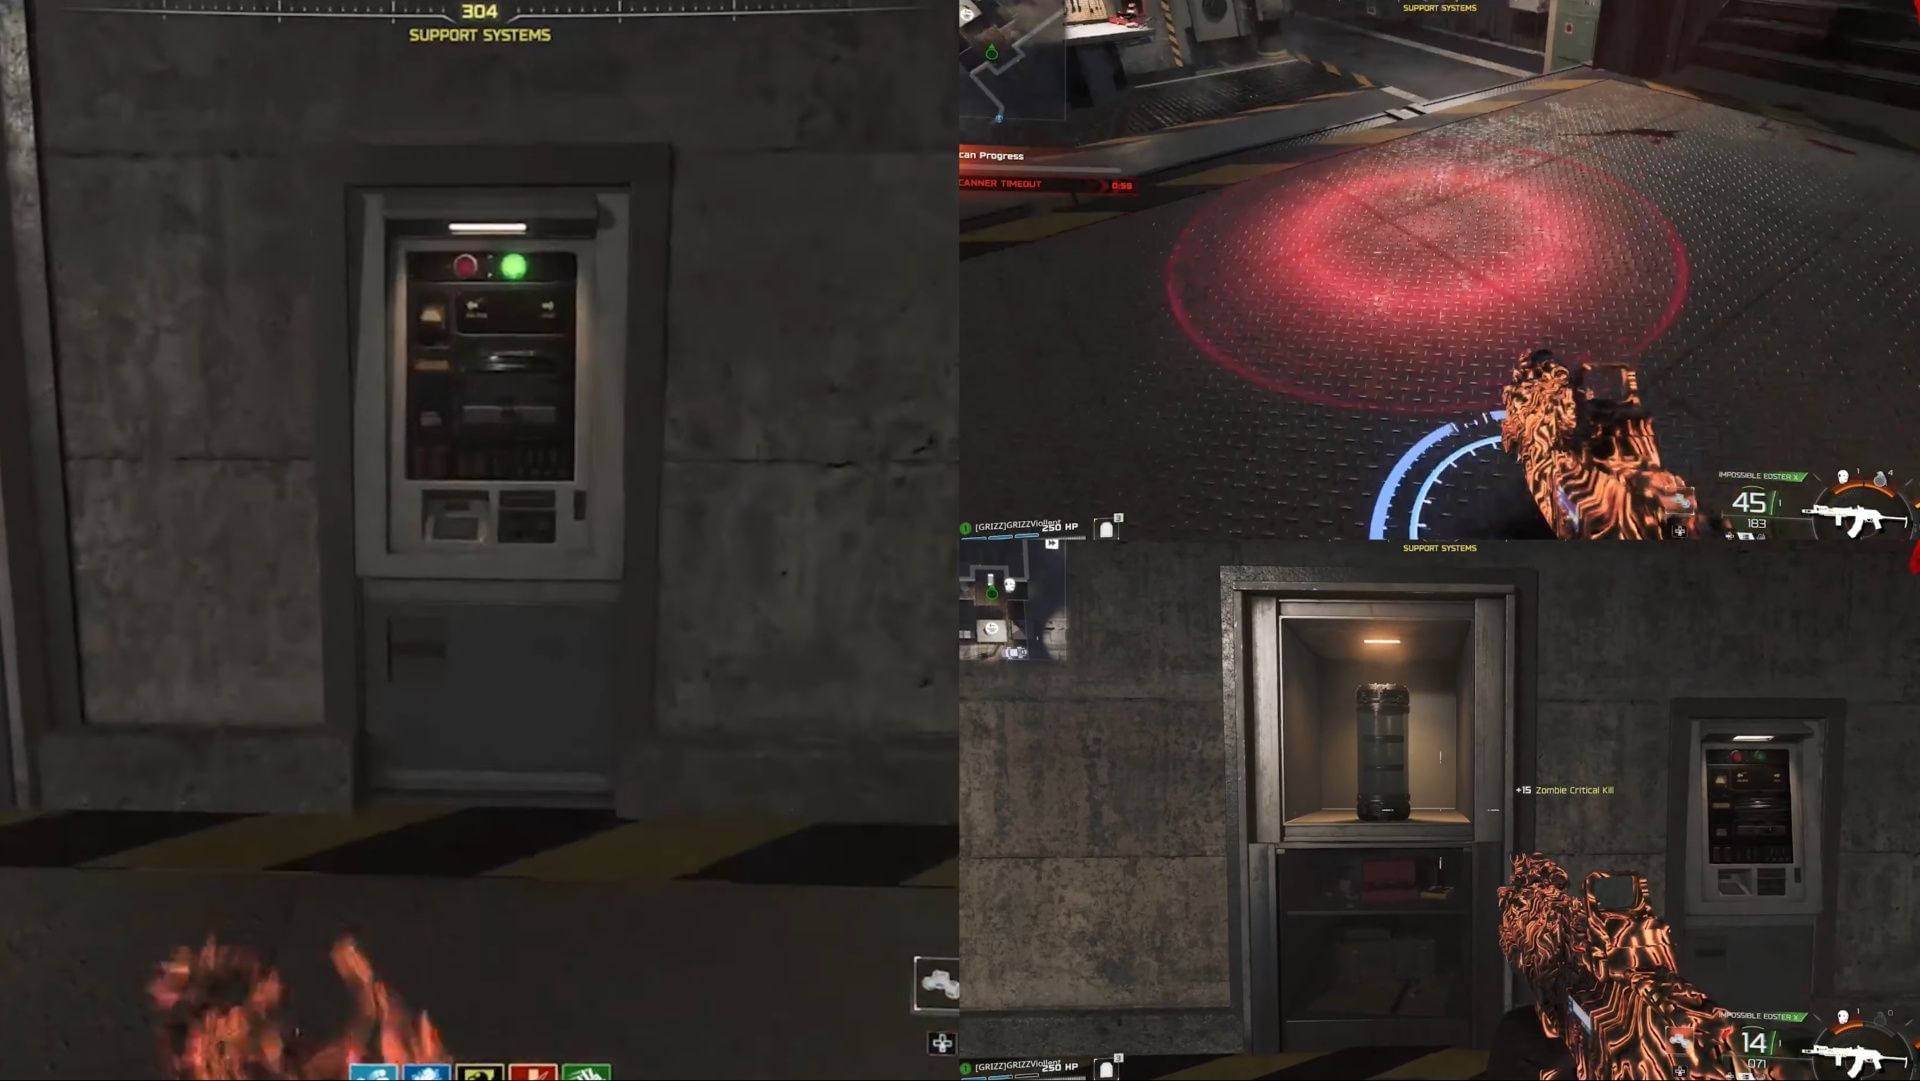
Head to the Zarya Cosmodrome POI. Near the Crafting Table, you will find a downward-sloping path leading to a closed door. Spend 1,750 Essence to unlock the area named Support System. Inside, you will find a panel (scanner) you can interact with. A scanning circle will initiate; call Klaus, and stand within the scanning circle.
This action will trigger a lockdown with a one-minute scan timer. Stand there and eliminate zombies until the timer completes. Once finished, you will receive the Aether Barrel, which you can pick up.
Fill the Aether Barrel
Now you must fill the Aether Barrel by placing it inside all three Power Pumps. After placing it in one pump and filling the canister, you must quickly take it to the next Power Pump, as a timer will give you one minute and 45 seconds to place the canister in the next Power Pump.
It is recommended that you follow this sequence: first complete the Blackwater Lake Power Pump, then the Ashwood one, and finally the Vandorn Farm Power Pump. Once all three are done, quickly head to the cellar area located in Vandorn Farm, where you will find a strange ruin box. Approach the box and place the canister in it.
Find the appropriate ruin symbols
After the previous step is complete, head back to Janus Tower Plaza. Use the Jump Pad to launch yourself toward the Vandorn Farm POI. As you are about to reach the POI, look for the ruin symbols present on the roofs of the buildings in the Vandorn Farm POI. Take a screenshot or remember the symbols; they will be easily distinguishable by their red glowing color.
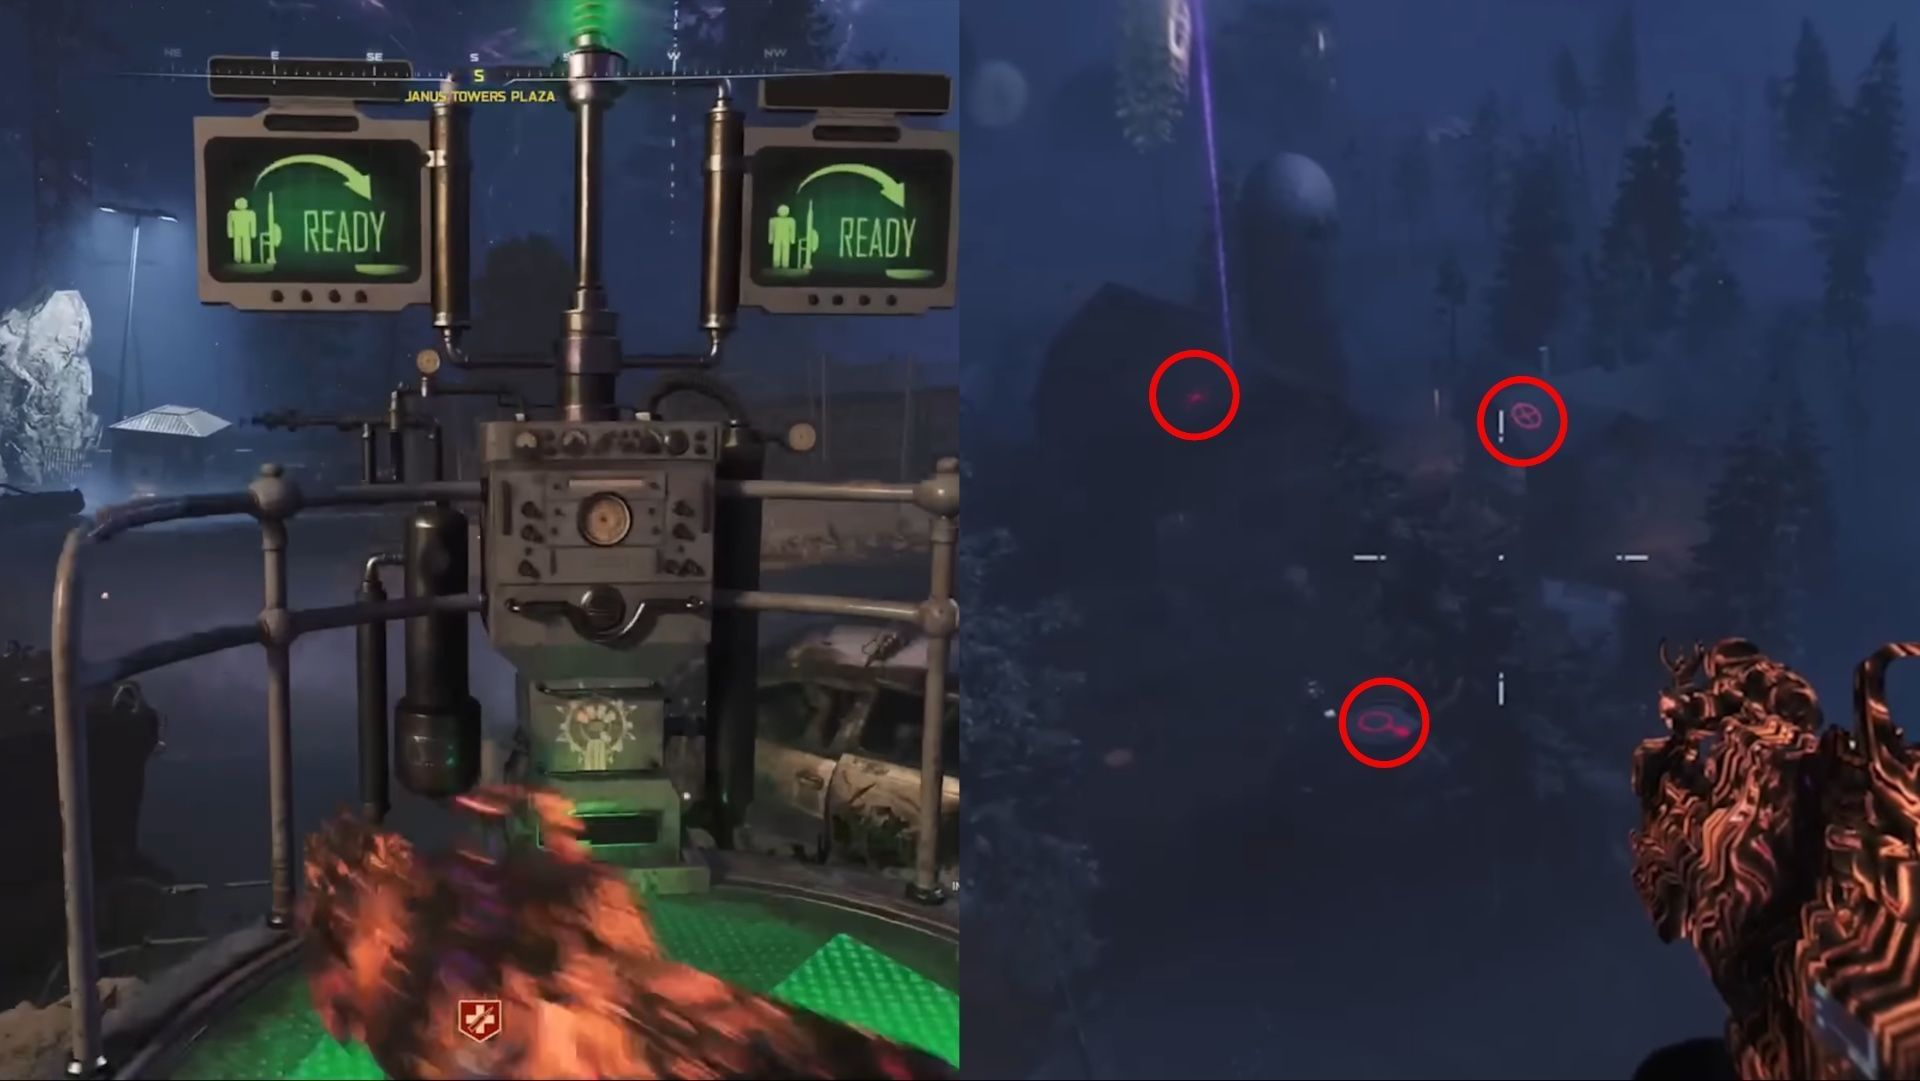
Now, head back down to the Cellar. On the ruin box, match the ruin symbols that you just found. There is no specific order you need to follow. Once the symbols are set, interact with the red eye located on one side of the box to unlock the Necrofluid Wonder Weapon.
Complete the Ritual
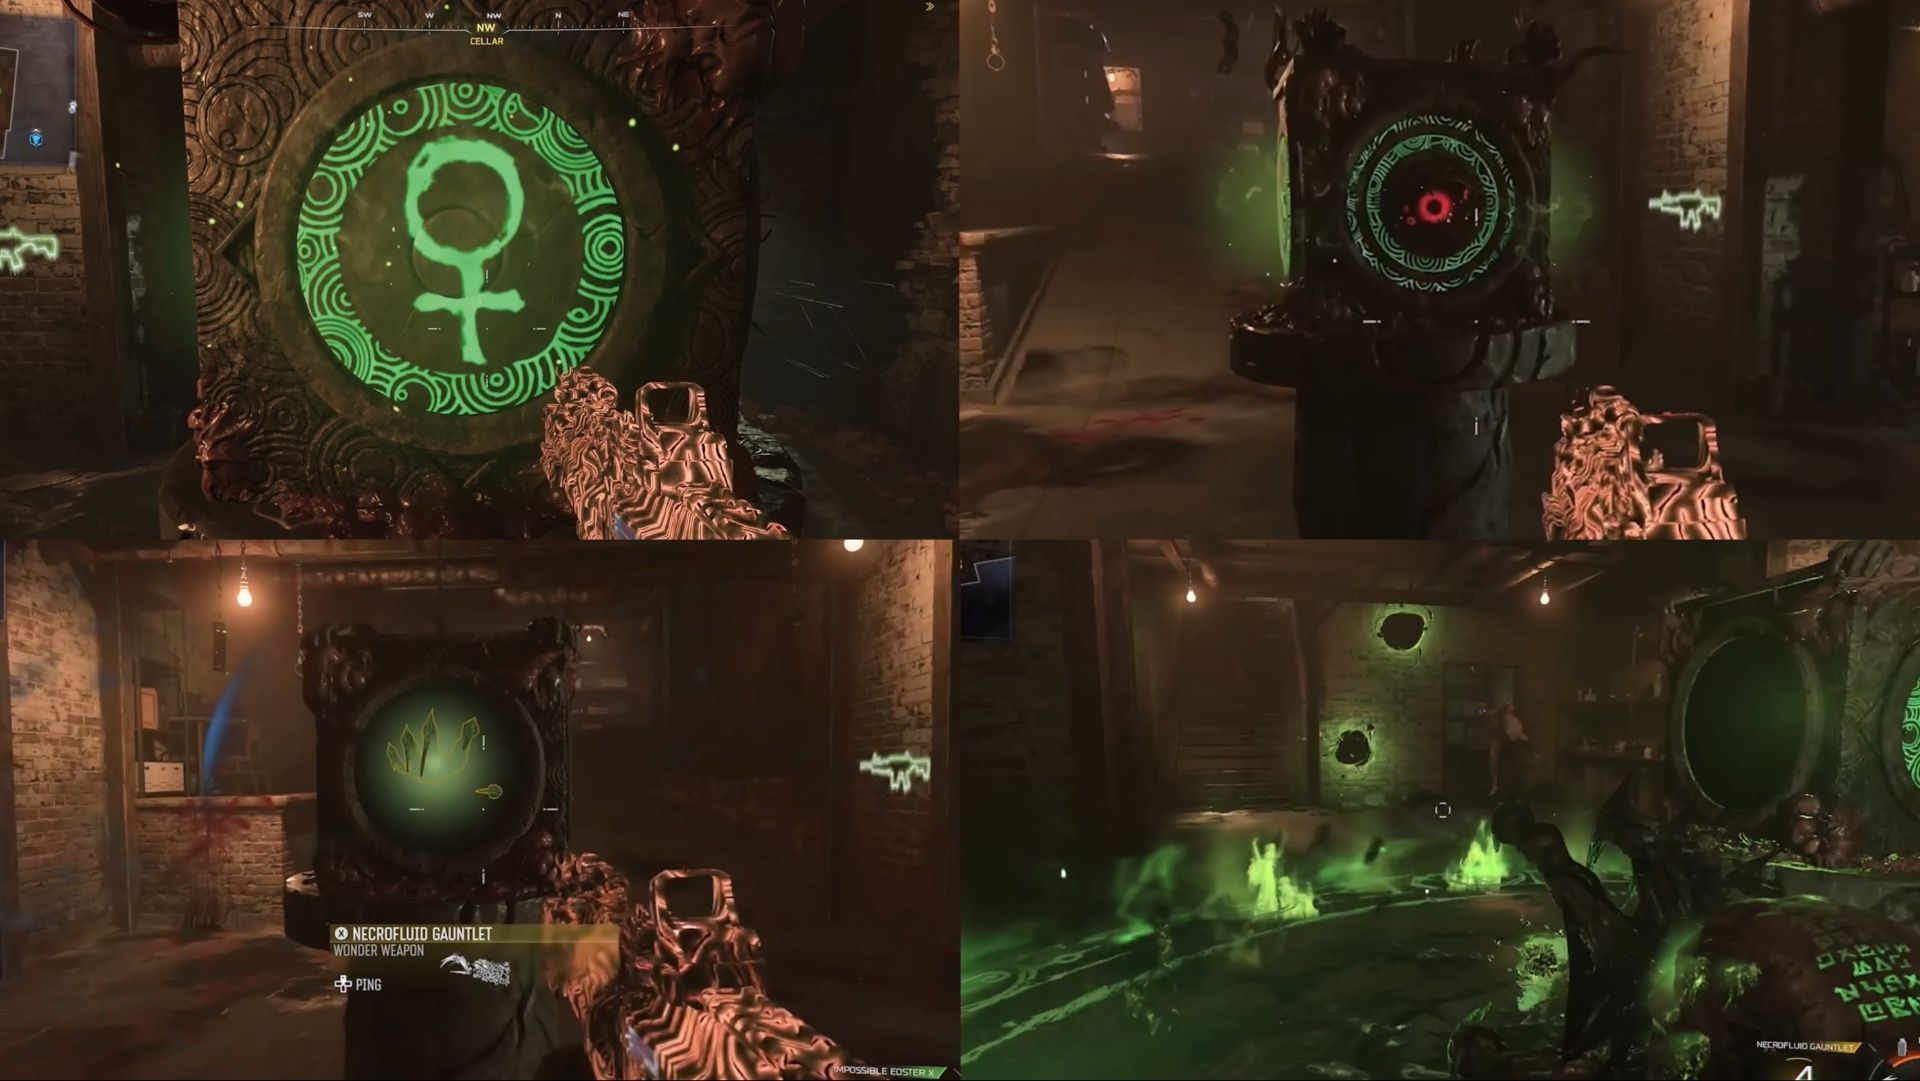
As you grab the Wonder Weapon, a ritual process will initiate. There will be green orbs present in the chamber. Shoot the orbs with your Wonder Weapon, and as you shoot, recall the spike. Repeat this process three or four times to complete the ritual, and you will now have the Necrofluid Wonder Weapon.
Once you have the Necrofluid Gauntlet Wonder Weapon, you can proceed to the next step.
5) Collect all six Serum items
You need to complete a blood ritual, but first, you must gather six items:
- Human Bones
- Ravager Eyes
- Powder of the Forgotten
- Widow's Lantern
- Mysterious Limb
- Horde Husk Chunks
Human Bones
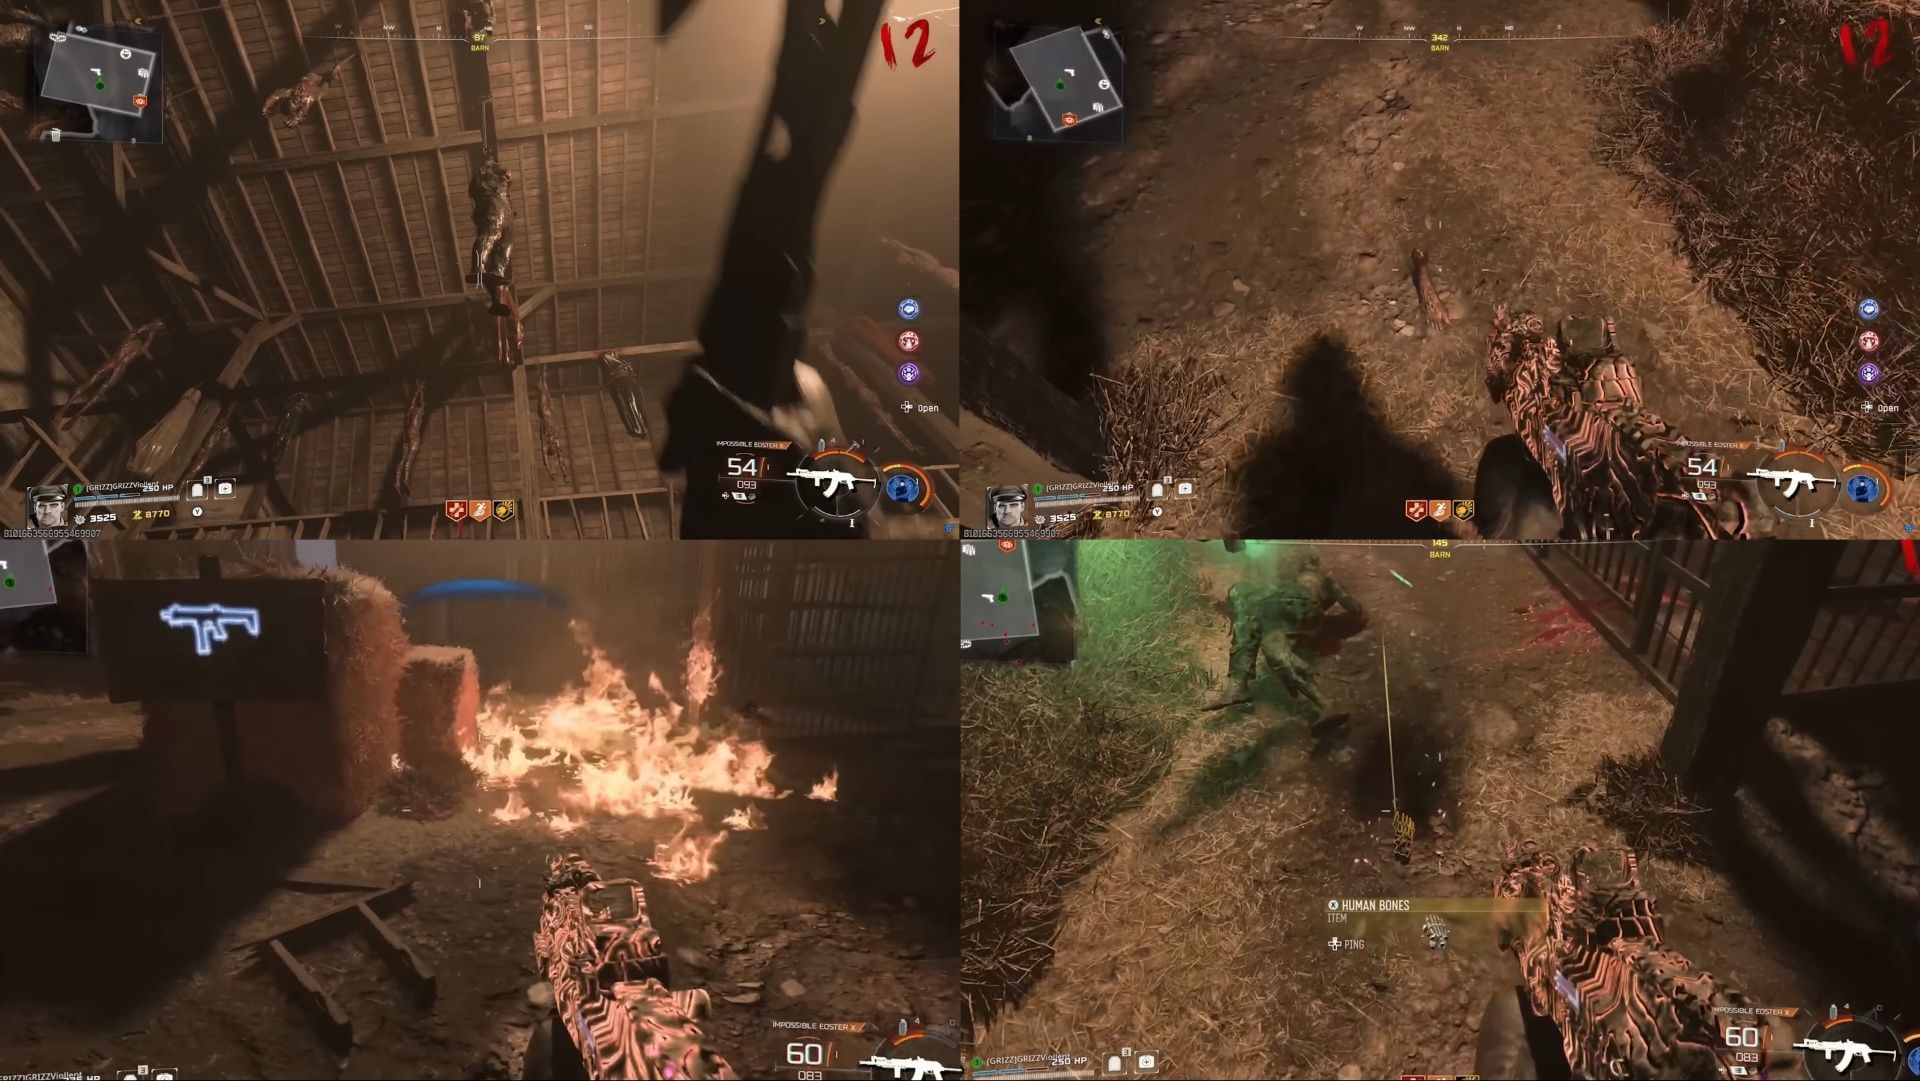
First, acquire a Combat Axe. You can get one for free inside Reba's Diner or craft one at the Crafting Table for 200 Salvage. After that, head to the Vandorn Farm POI. Inside the barn, there will be several hanged bodies. Find the one that is dripping blood. Throw your axe and aim properly at the bleeding leg of the hanging corpse. The leg will then fall to the ground. Now acquire a Molotov or craft one at the Crafting Table, and throw it onto the leg to burn it. This process will yield the Human Bones. Go near and pick up the item.
Ravager Eyes
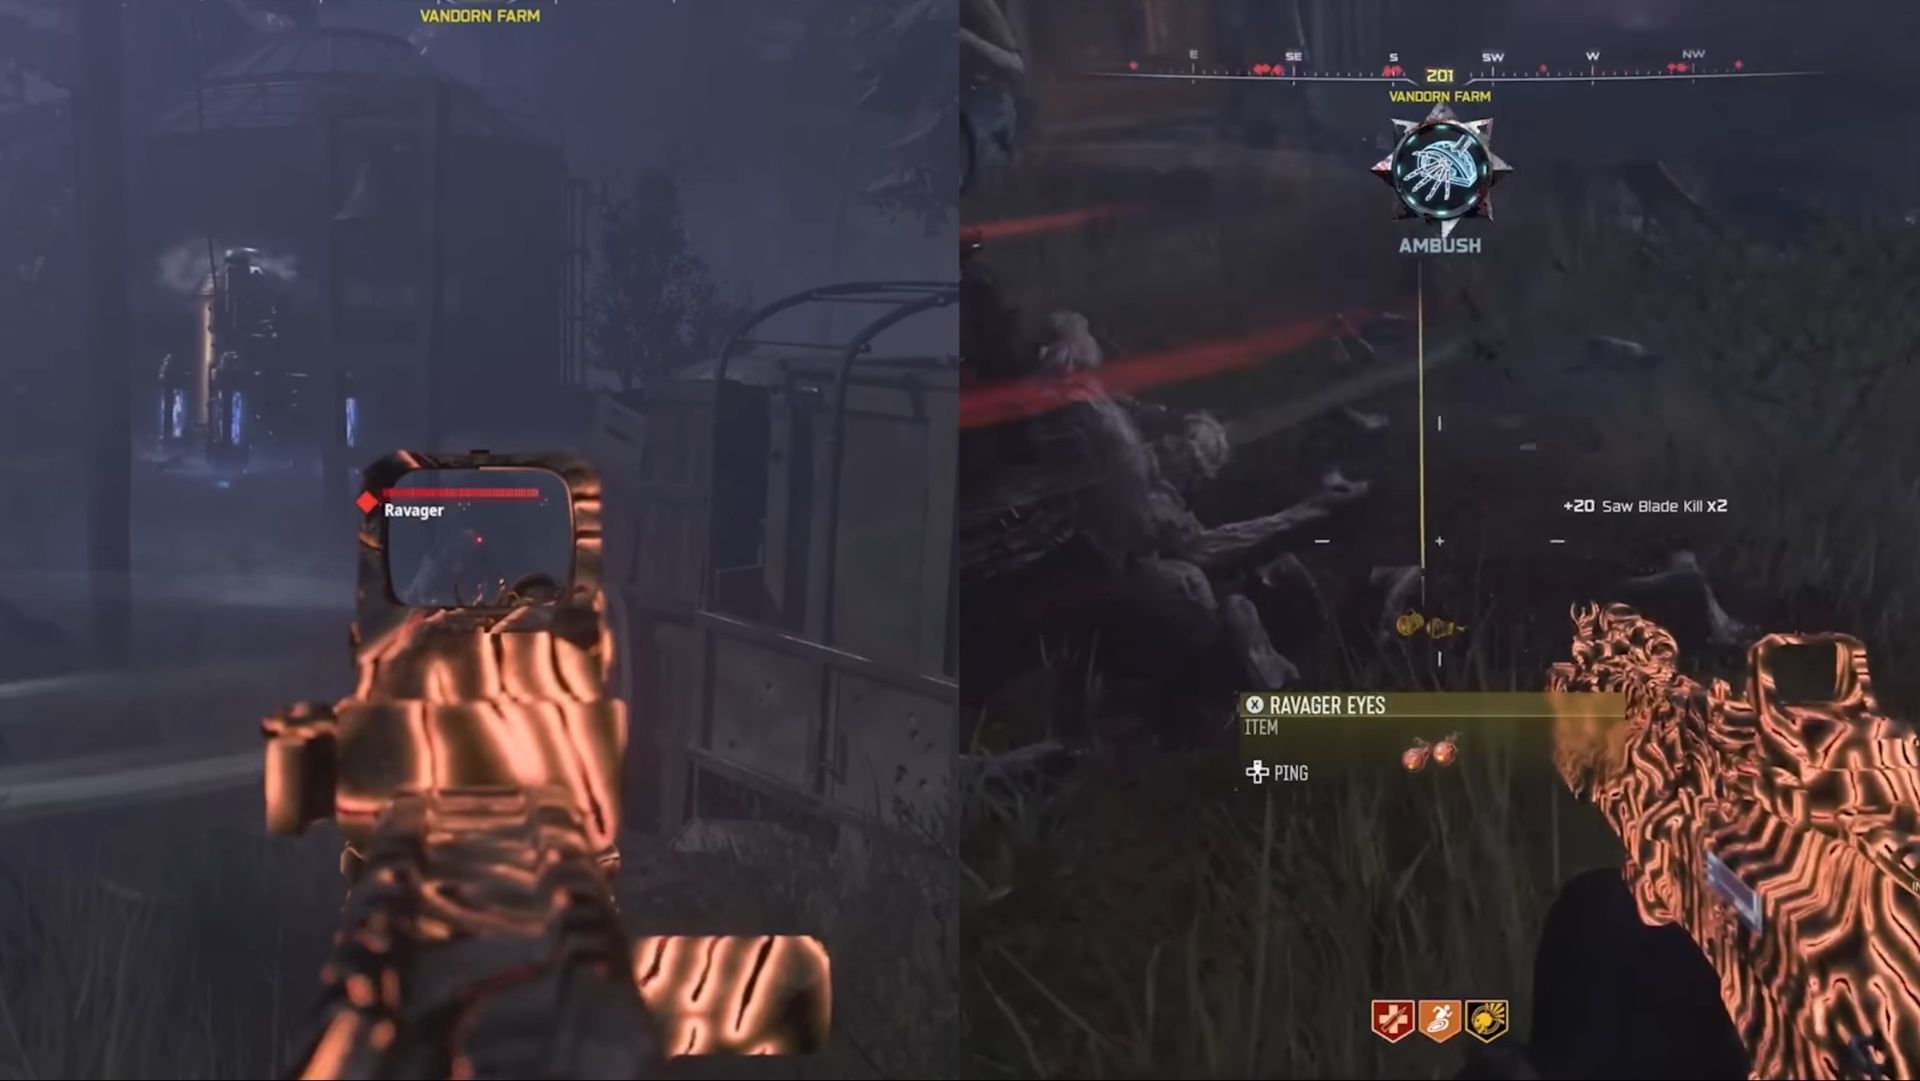
In the same POI, Vandorn Farm, you will find the Sawblade trap. When you see a Ravager pursuing you, quickly activate the trap and let the trap kill the Ravager. This is how you acquire the Ravager Eyes.
Powder of the Forgotten
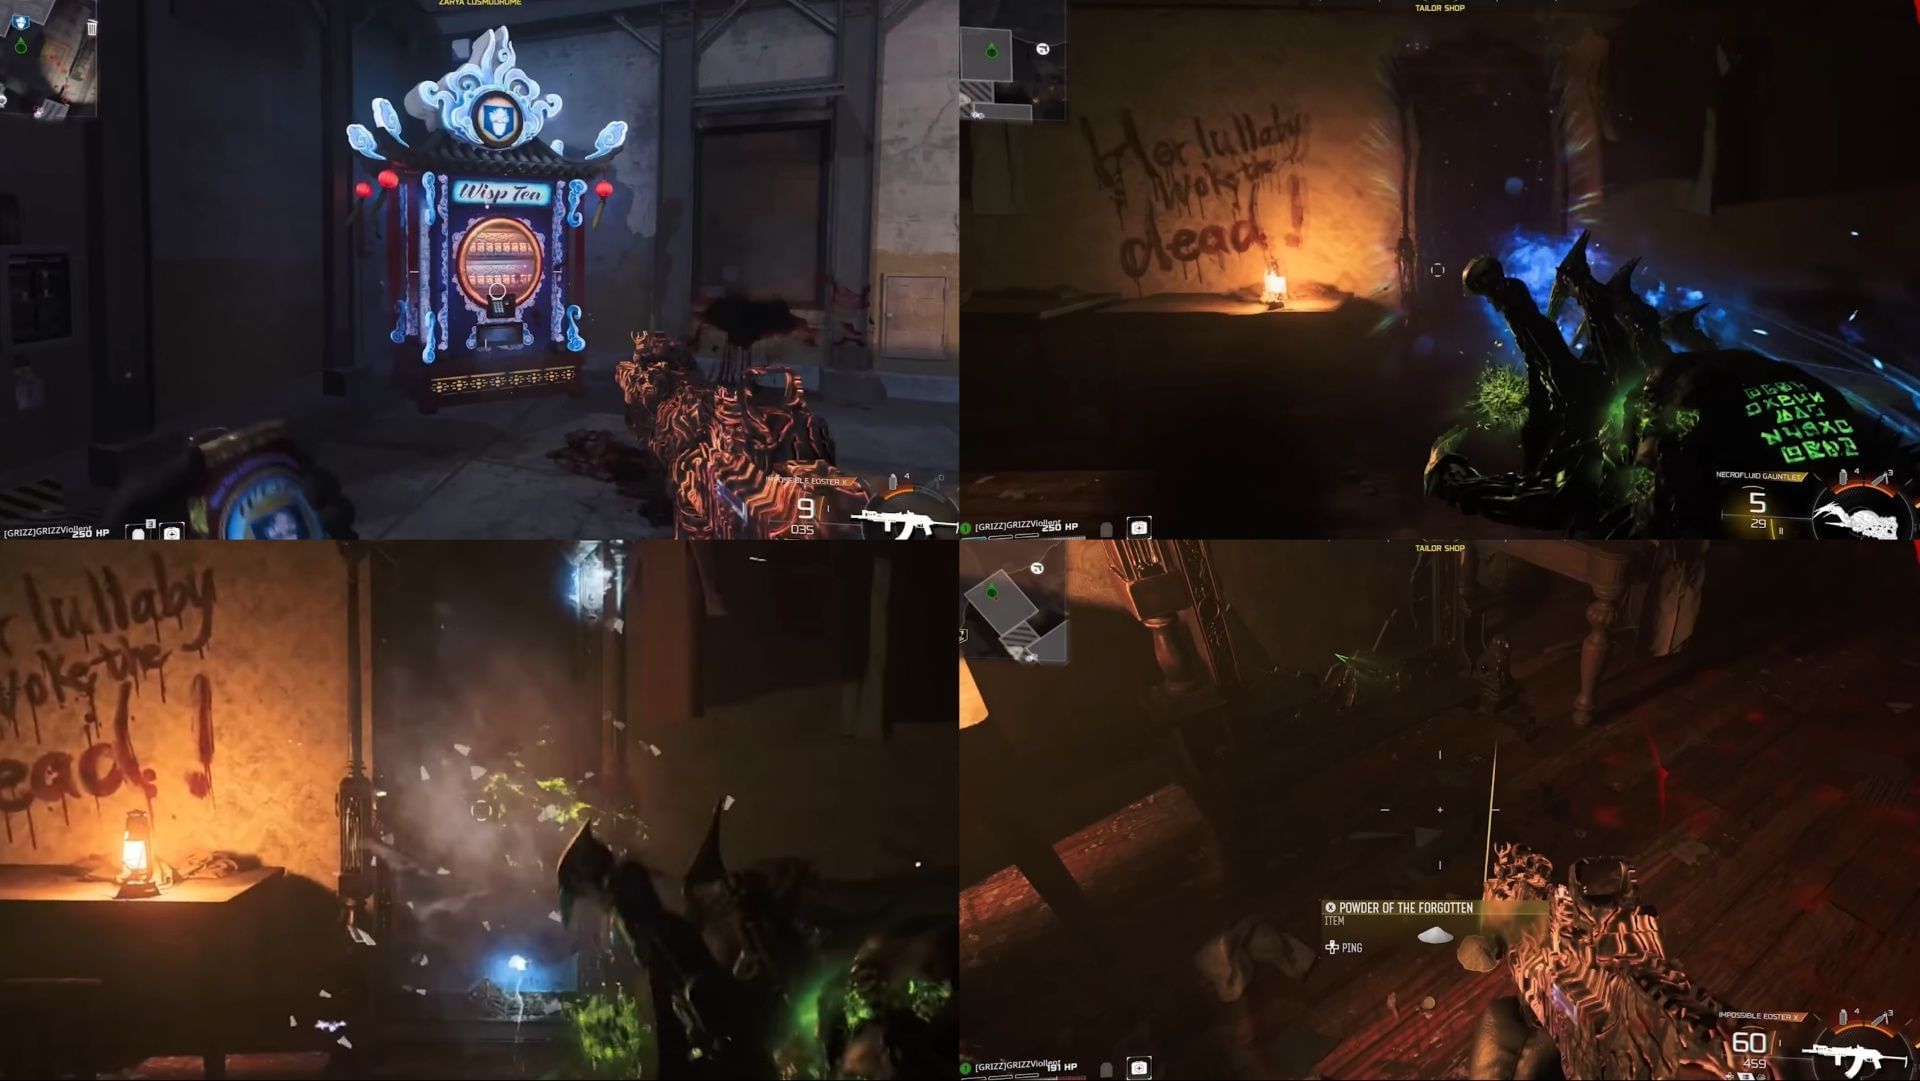
Now head to the Zarya Cosmodrome POI and purchase the Wisp Tea Perk-a-Cola. After that, go to the Ashwood POI and proceed near the Vulture Aid Perk-a-Cola machine. Just to the right of the machine, there will be a room where you can find a mirror.
Shoot the mirror with your Necrofluid Wonder Weapon, and it will reveal a picture. Wait a few seconds and shoot again; this will break the mirror, allowing you to pick up the Powder of the Forgotten item.
Widow's Lantern
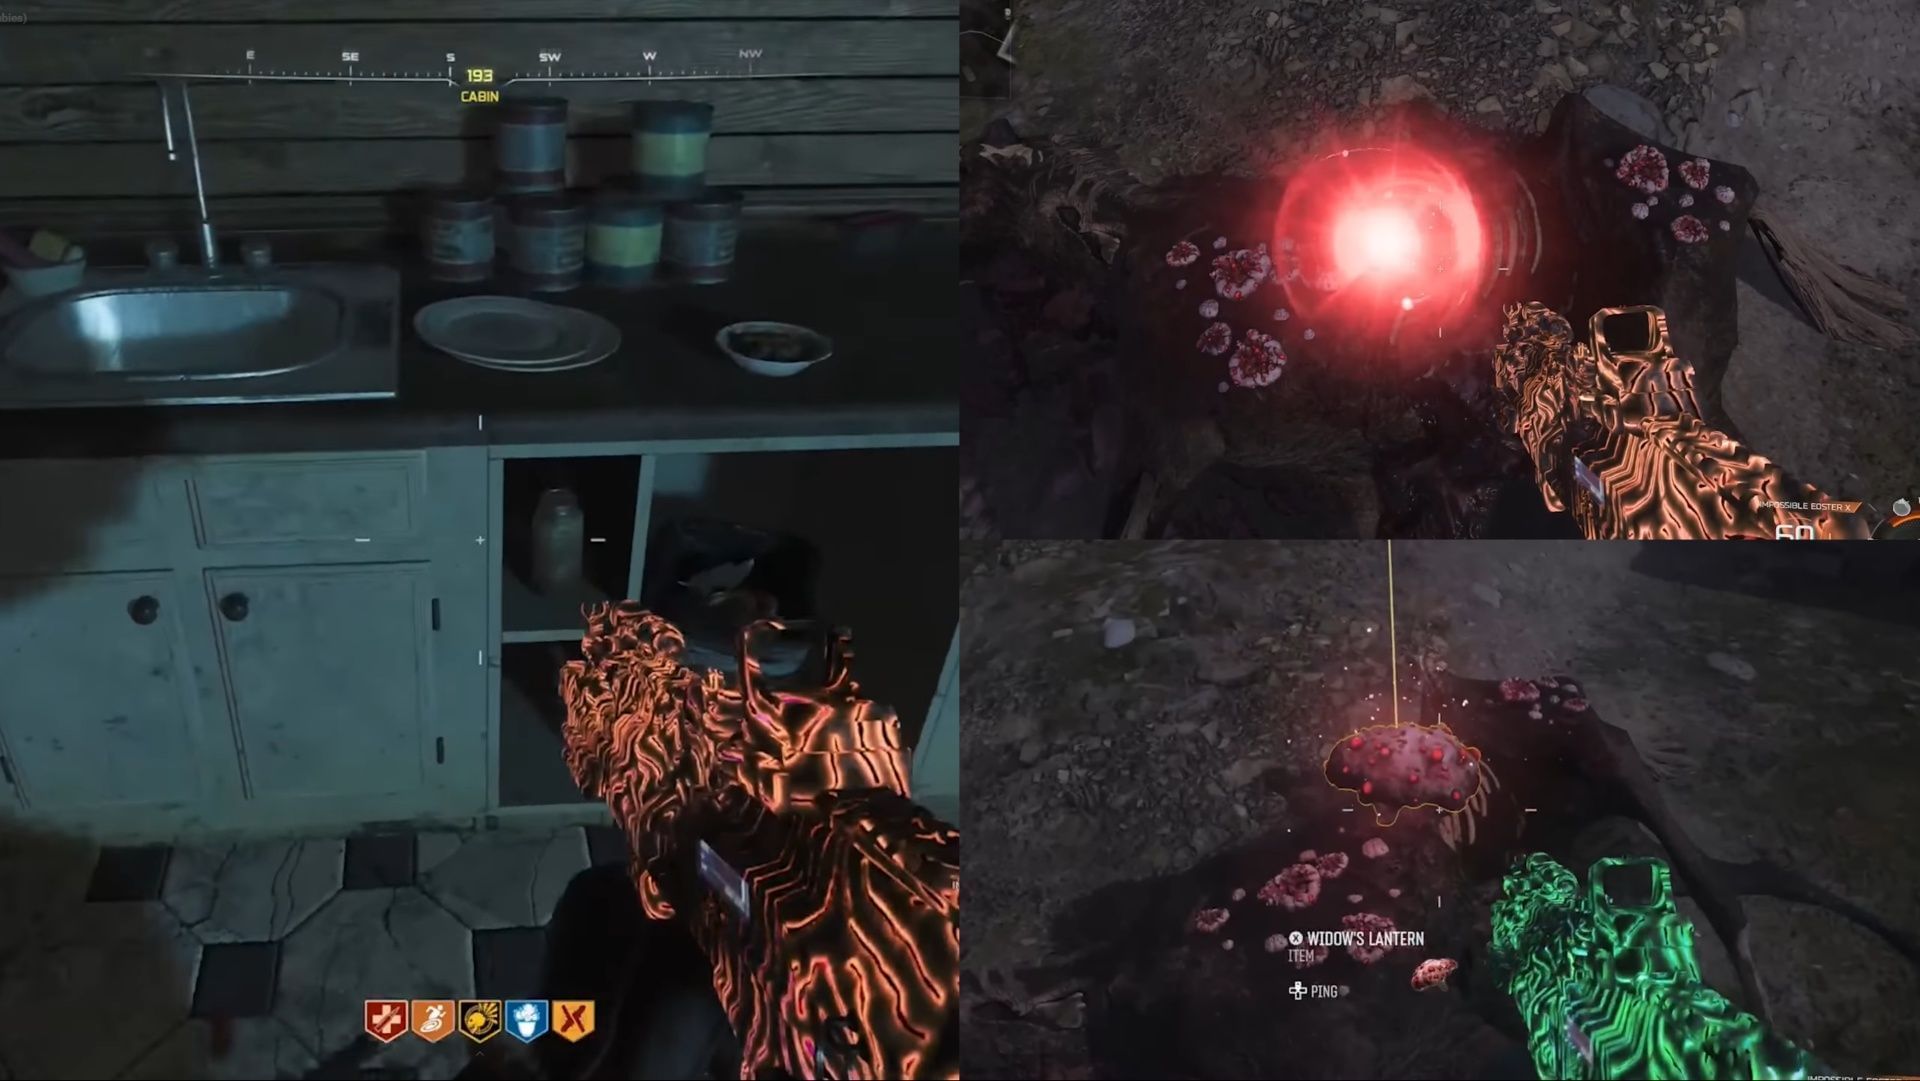
To collect this item, you first need to head to the Blackwater Lake POI and enter the building where the Melee Macchiato Perk-a-Cola machine is present. Now go to the kitchen, and inside the open cabinet under the sink, you will find the Jar of Spores. Pick it up.
Now head to the Vandorn Farm POI. On the road, you will find a dead horse corpse. Go near it and press the interact button to pour the spores from the jar you collected earlier.
Next, you need to wait three rounds. Once three rounds have passed, head back to the dead horse corpse, and you will find the Widow's Lantern item there. Pick it up.
Mysterious Limb
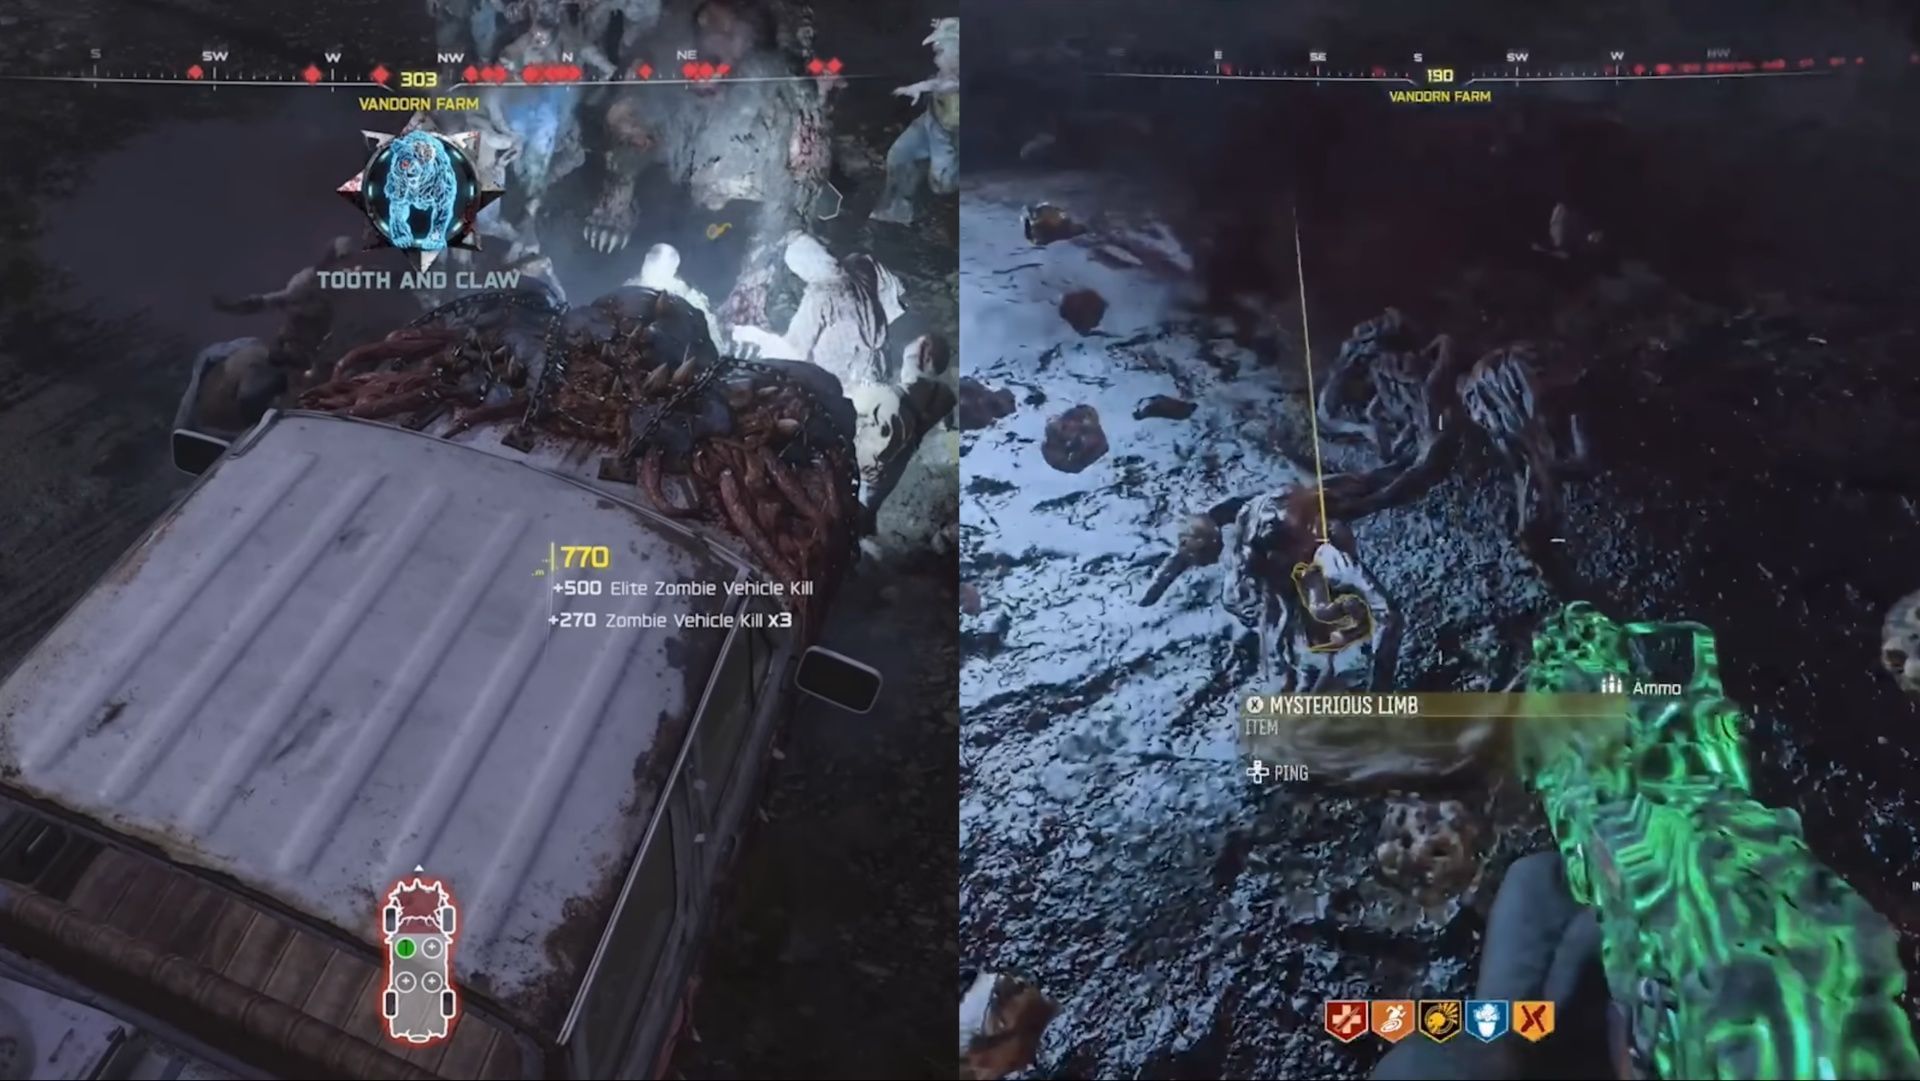
Collecting this item is the toughest one on the list. To collect it, progress through rounds until the new special enemy, Zursa, the zombified bear, appears. Once it appears, you need to eliminate it with Ol' Tessie's Beam Attack. This can be very difficult, so to make it easier, first damage Zursa on foot as much as you can but do not kill it. Then, enter Ol' Tessie and use the Beam Attack to eliminate it.
After that, go near the spot where it was eliminated, and you will find the Mysterious Limb item. Pick it up.
Horde Husk Chunks
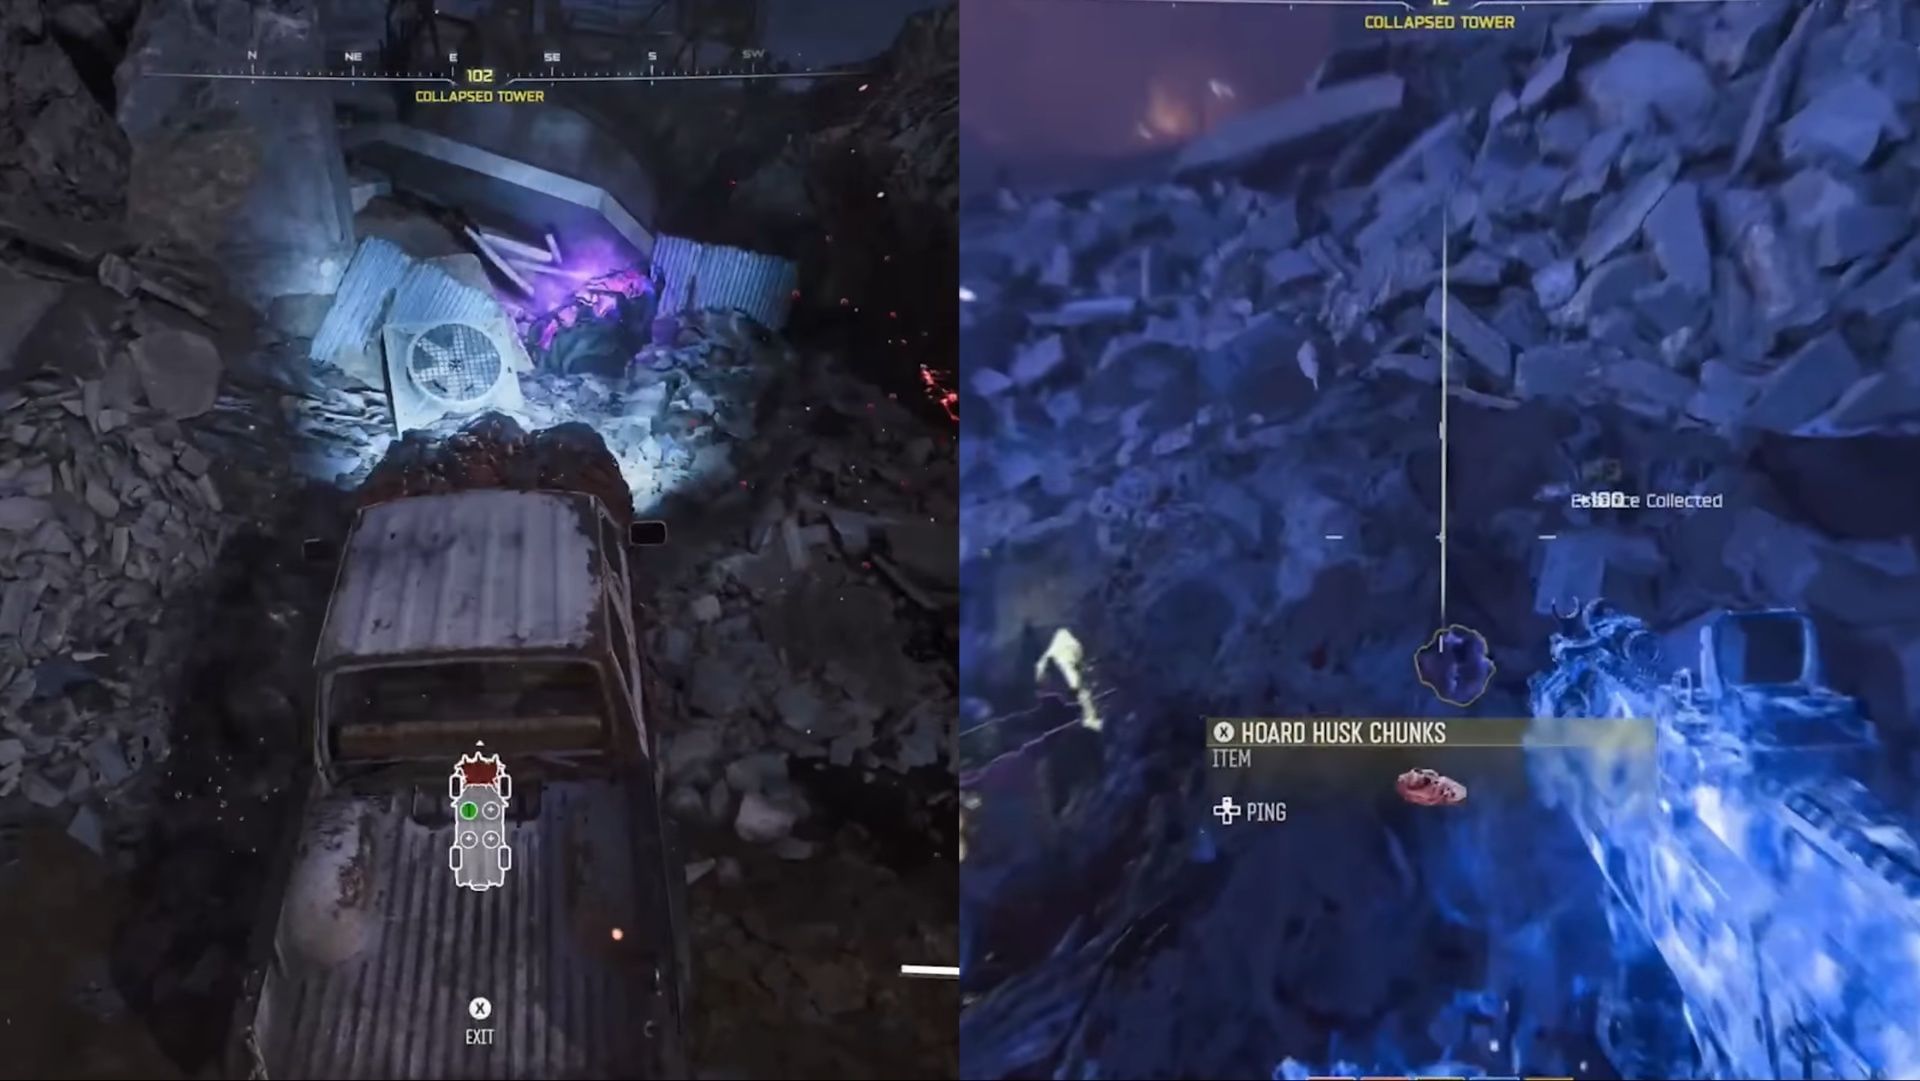
For this item, you need to drive Ol' Tessie via the road between the Janus Tower Plaza POI and Vandorn Farm. The road is known as the Collapsed Tower. There, on the road, you will find a purple glowing crystal. Shoot Tessie's Beam into this crystal, and it will then drop the Horde Husk Chunks item. Pick it up.
Collect the Syringe
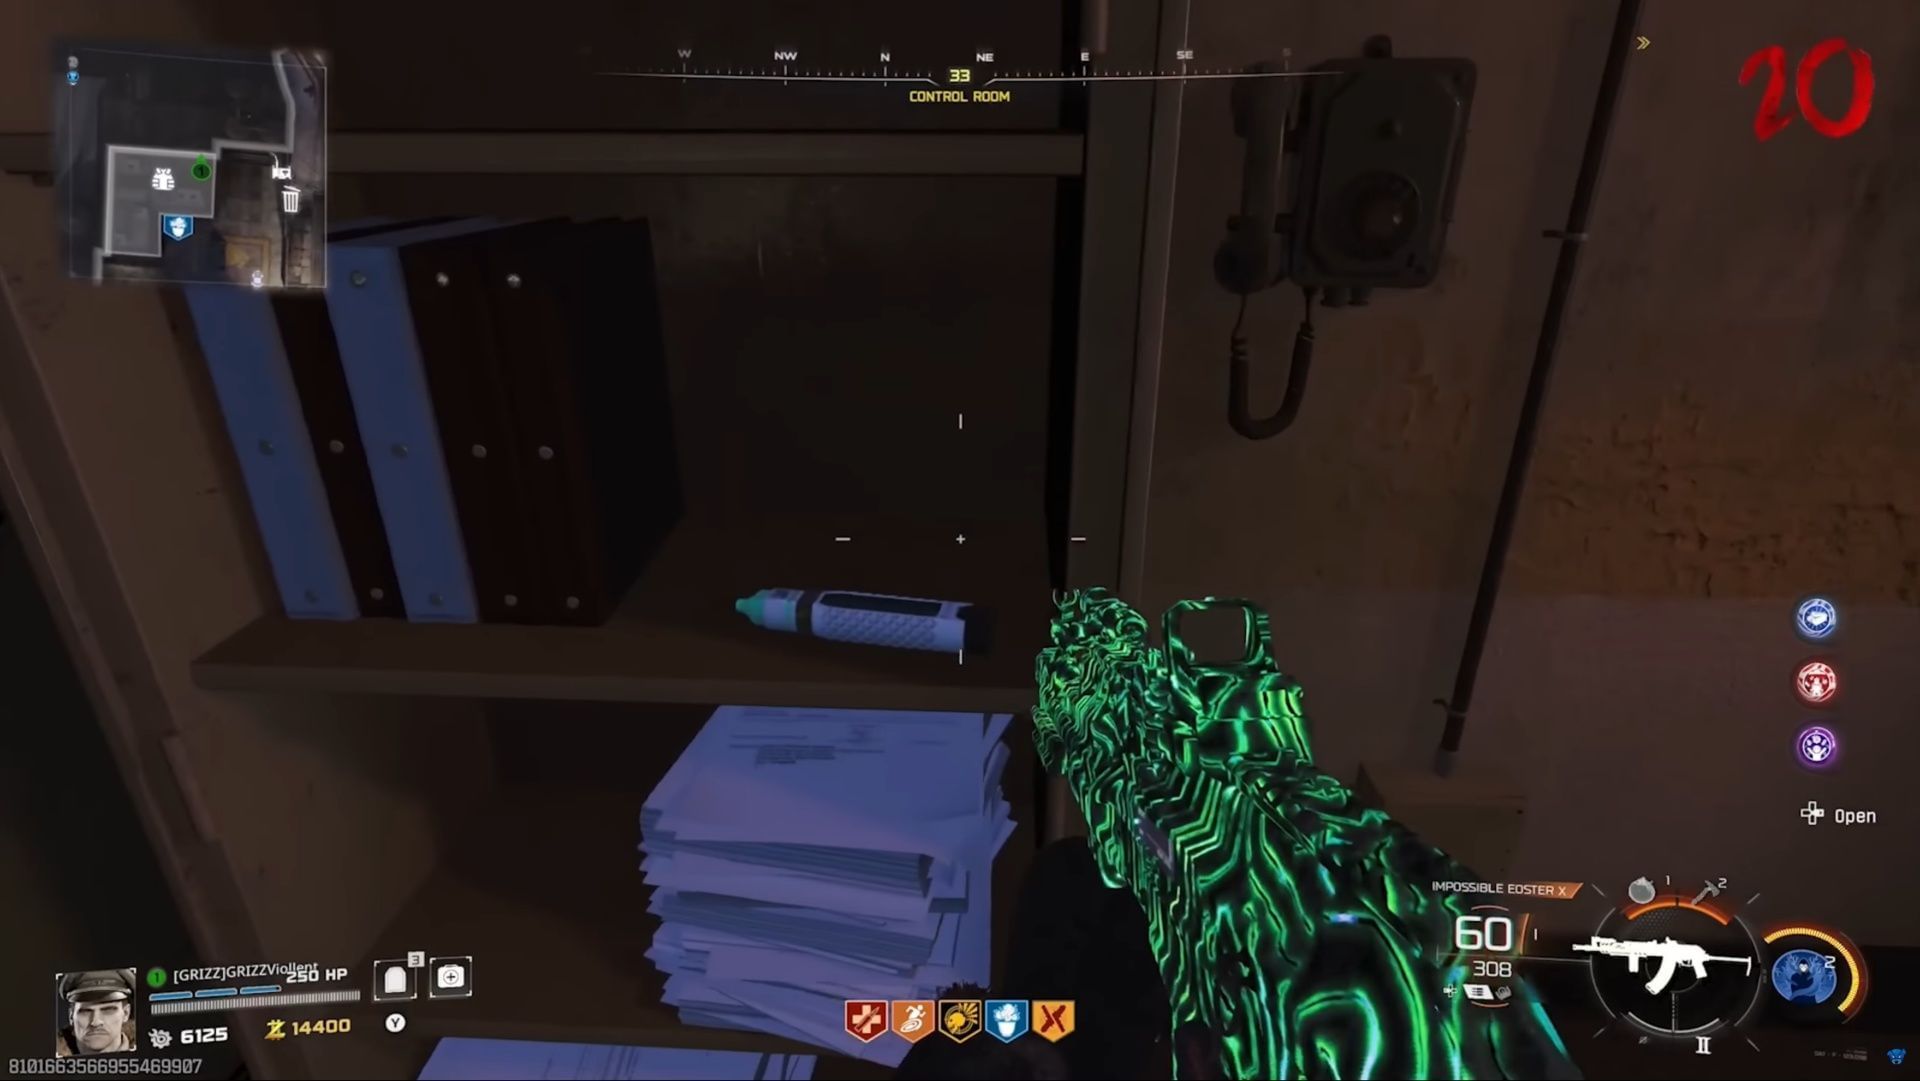
Once you have gathered all the items, head to the Zarya Cosmodrome. Just beside the Wisp Tea Perk-a-Cola machine, you will find the Control Room. Inside this room, to the right of the Armor wall buy, you will locate a file cabinet where the Syringe is lying. Pick it up.
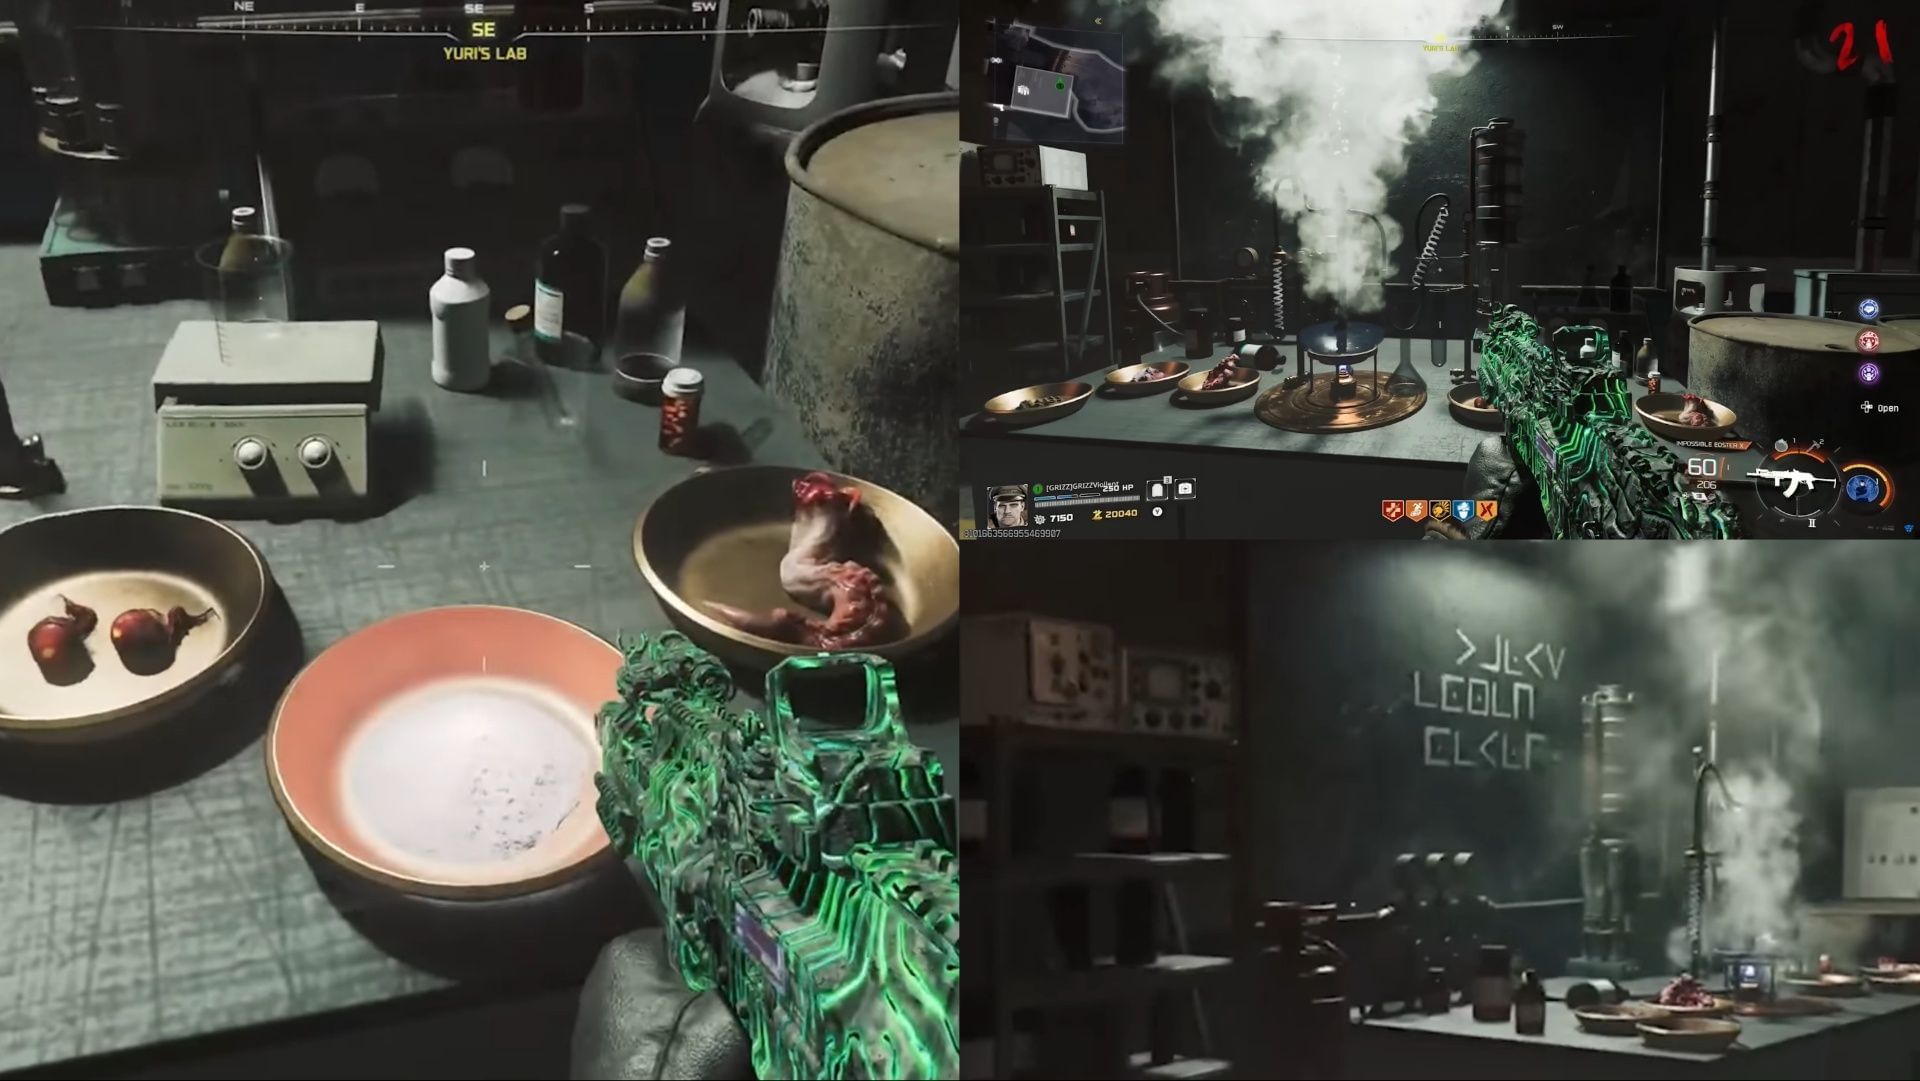
Unlock Yuri's Lab
Now, in the same POI, Zarya Cosmodrome, there is a locked chamber. You can find this room beside the M15 Mod 0 Wall-buy and unlock the door using 500 Essence.
Inside Yuri's Lab, you will find all six collected items placed in the research area.
Start the Blood Ritual
Now, interact with the Powder of the Forgotten item. The powder will be spilled, revealing three series of symbols on the board nearby.
Each series of symbols refers to one of your collected items. The starting characters of the series are different for each item, as listed below:
- C - Widow's Lantern
- L• - Mysterious Limb
- C• - Ravager Eyes
- L - Horde Husk Chunks
- > - Human Bones
Select the items that correspond to the series of symbols in the exact same sequence (top to bottom). This action will then start the blood ritual.
Once the blood ritual begins, you will be in a lockdown where your health will be reduced, and multiple zombies will spawn. It would be very difficult to overcome this challenge. However, once you complete this blood ritual, you can start the next step.
Now you need to focus on upgrading Ol' Tessie to its final form.
6) Final Upgrade for Ol' Tessie
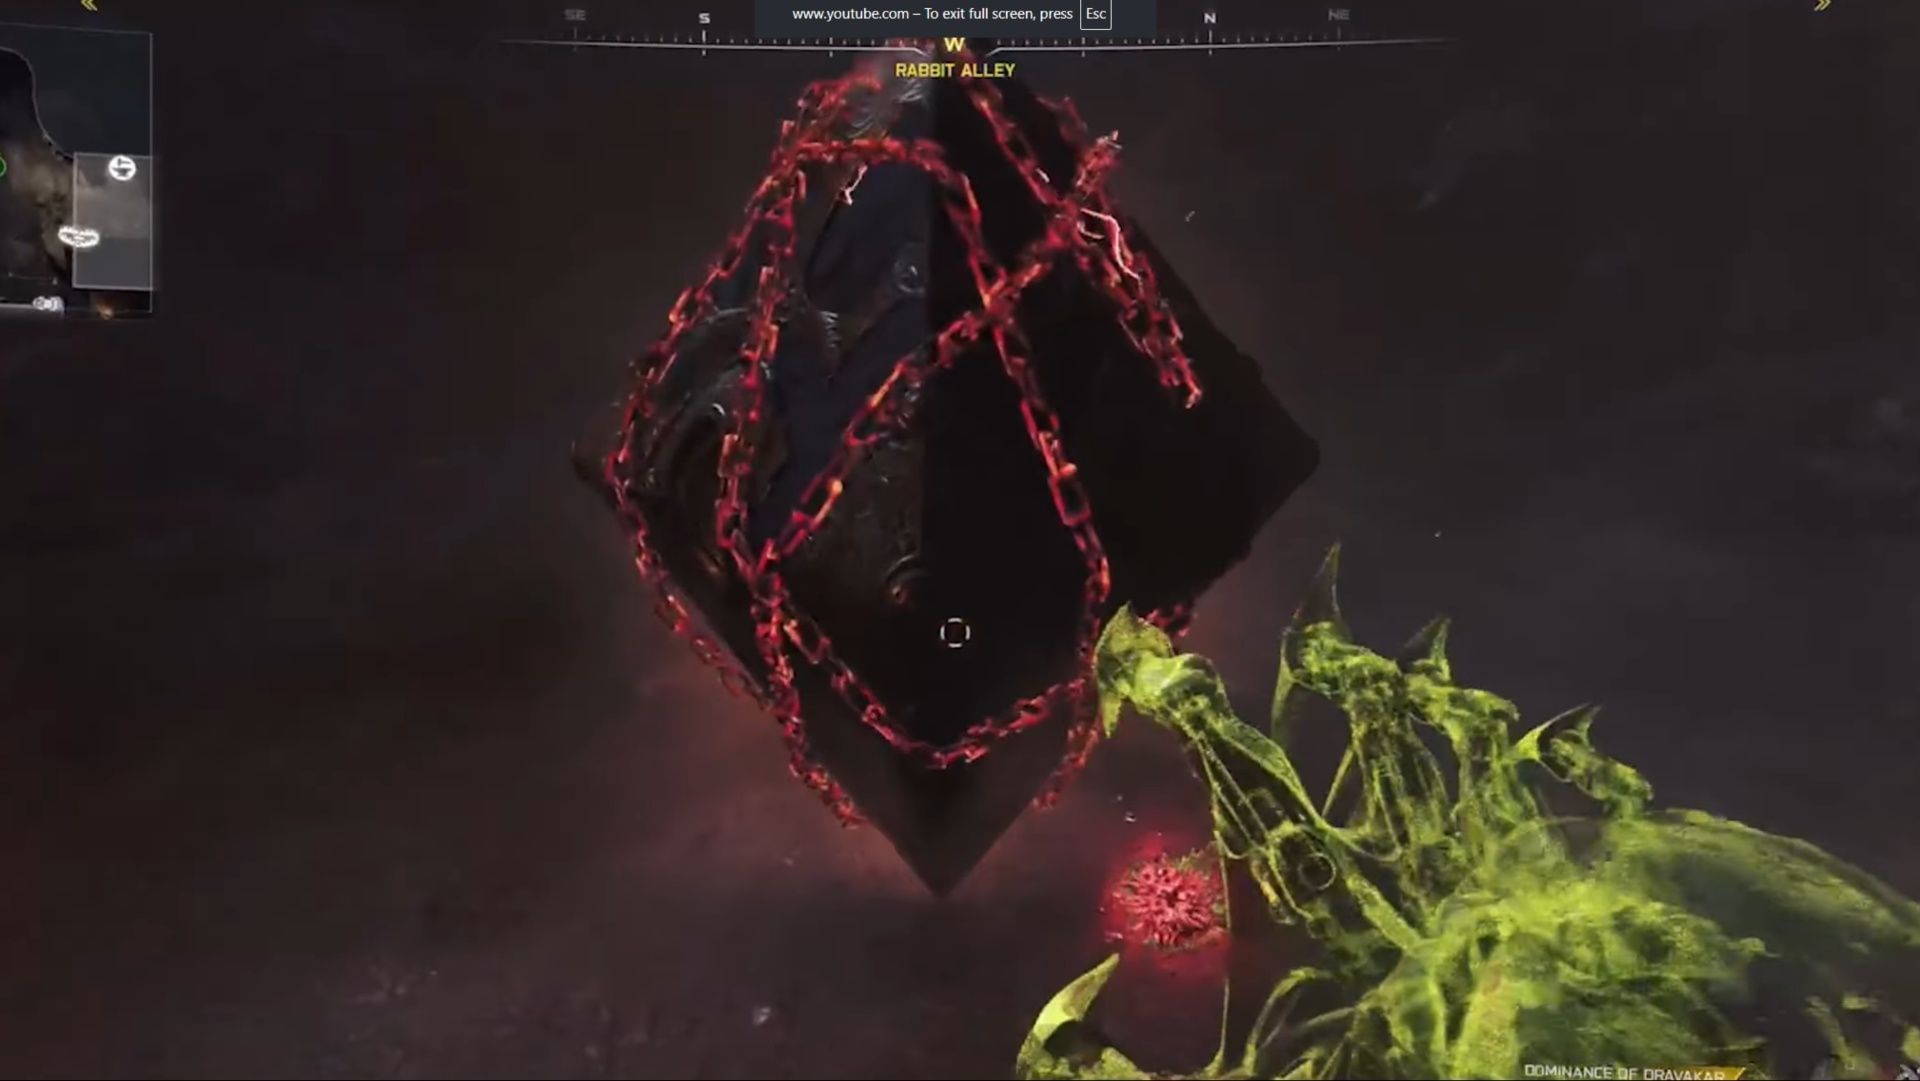
To achieve the final upgrade, you need to collect three keys. Each key will release one of the metal chains from the floating black cube located in the Rabbit Alley area of the Ashwood POI. You must collect and use one key at a time to remove each chain. The three keys are:
- Green Key (Terrapin Key)
- Yellow Key (Nightbird Key)
- Yellow Glowing Key (Bruin Key)
Each key has three potential spawn locations, and it will be available in one of them. To collect a key, you must use your Necrofluid Wonder Weapon to shoot it and pull the spike back, thus acquiring the key.
Green Key (Terrapin Key)
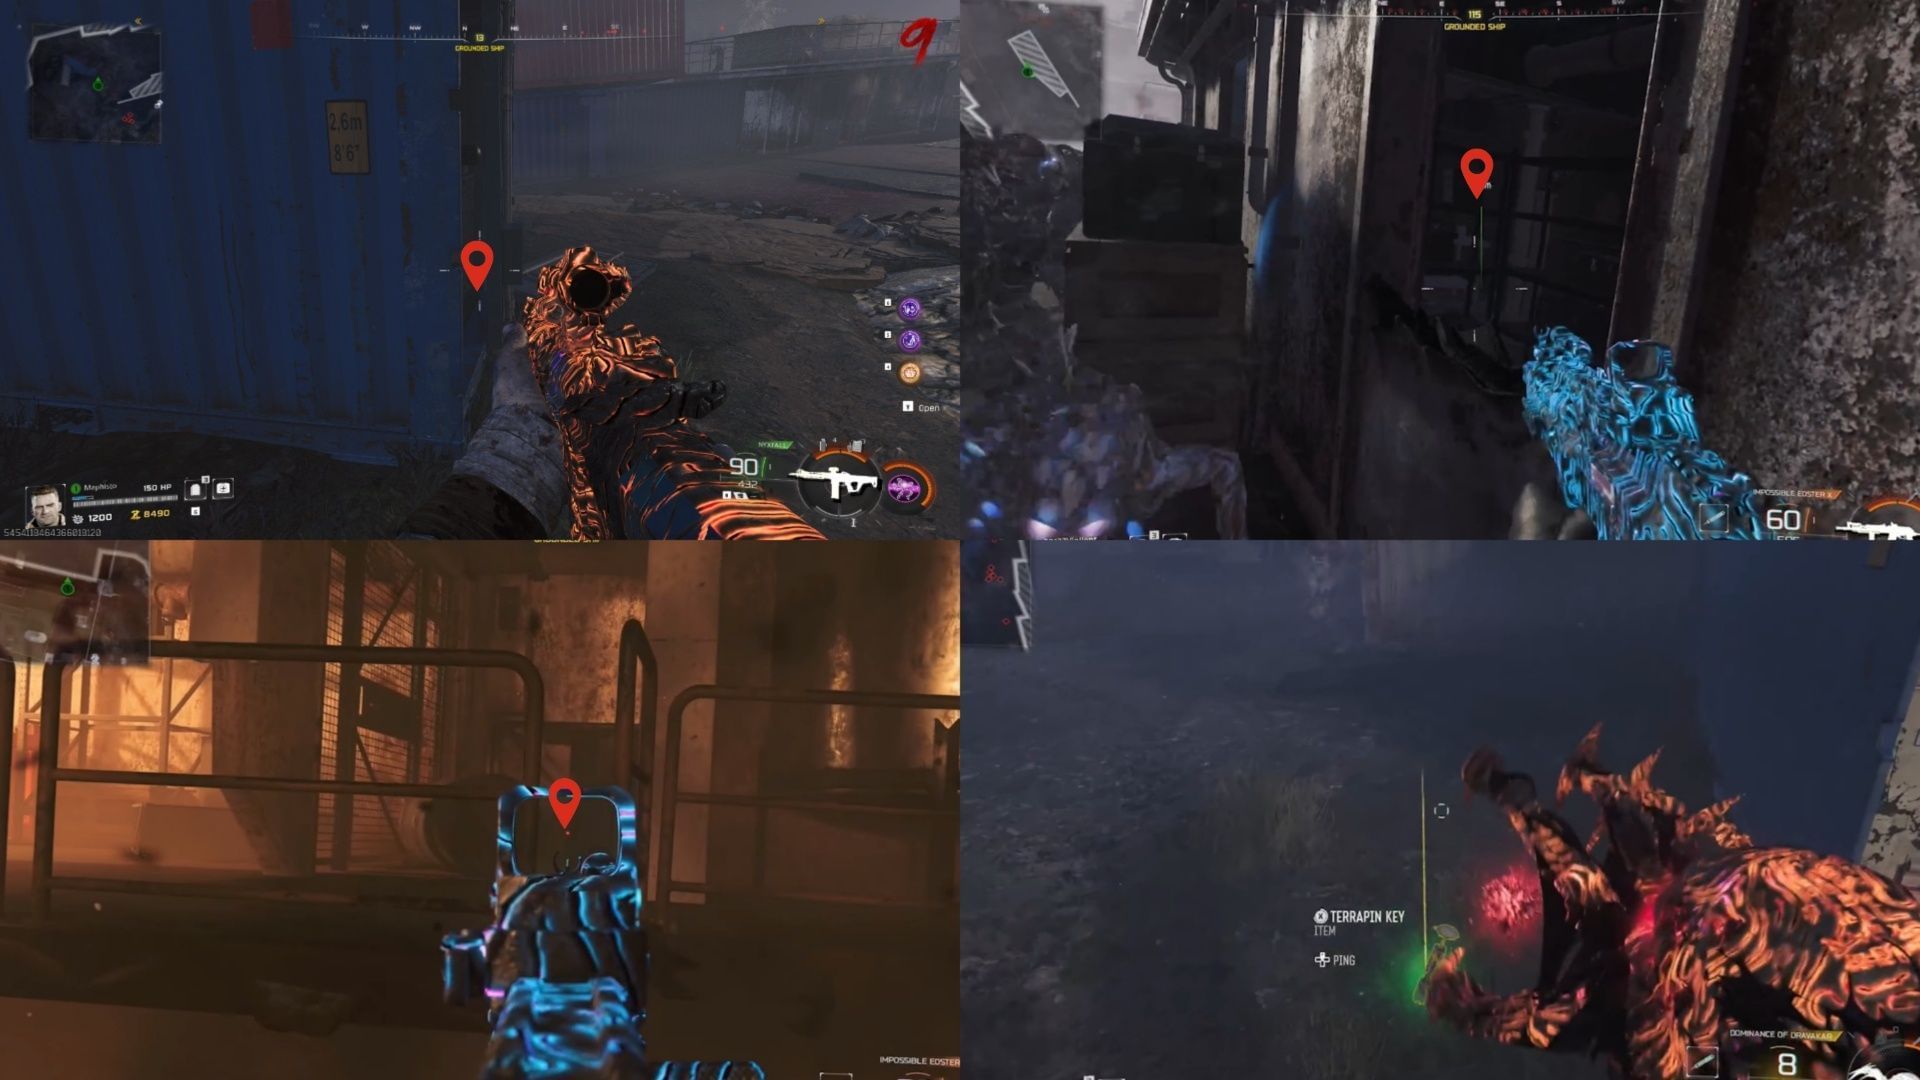
For the Green Key (Terrapin Key), you must head to the road between the Ashwood POI and Vandorn Farm POI. This road is known as the Grounded Ship. There will be a massively damaged ship, so climb up it and check all three potential locations. (You may also refer to the image above for the exact locations, as they can be hard to pinpoint.)
- First potential location: Hidden behind the door of a blue metal crate.
- Second potential location: Inside a window opposite the blue crate.
- Third potential location: On the east side of the ship's underneath section, between two barrels.
Once you collect the Green Key, it will slow you down. Use Aether Shroud to quickly head inside Ol' Tessie and make your way to Ashwood's Rabbit Alley. Use the key on the floating black cube.
Yellow Key (Nightbird Key)
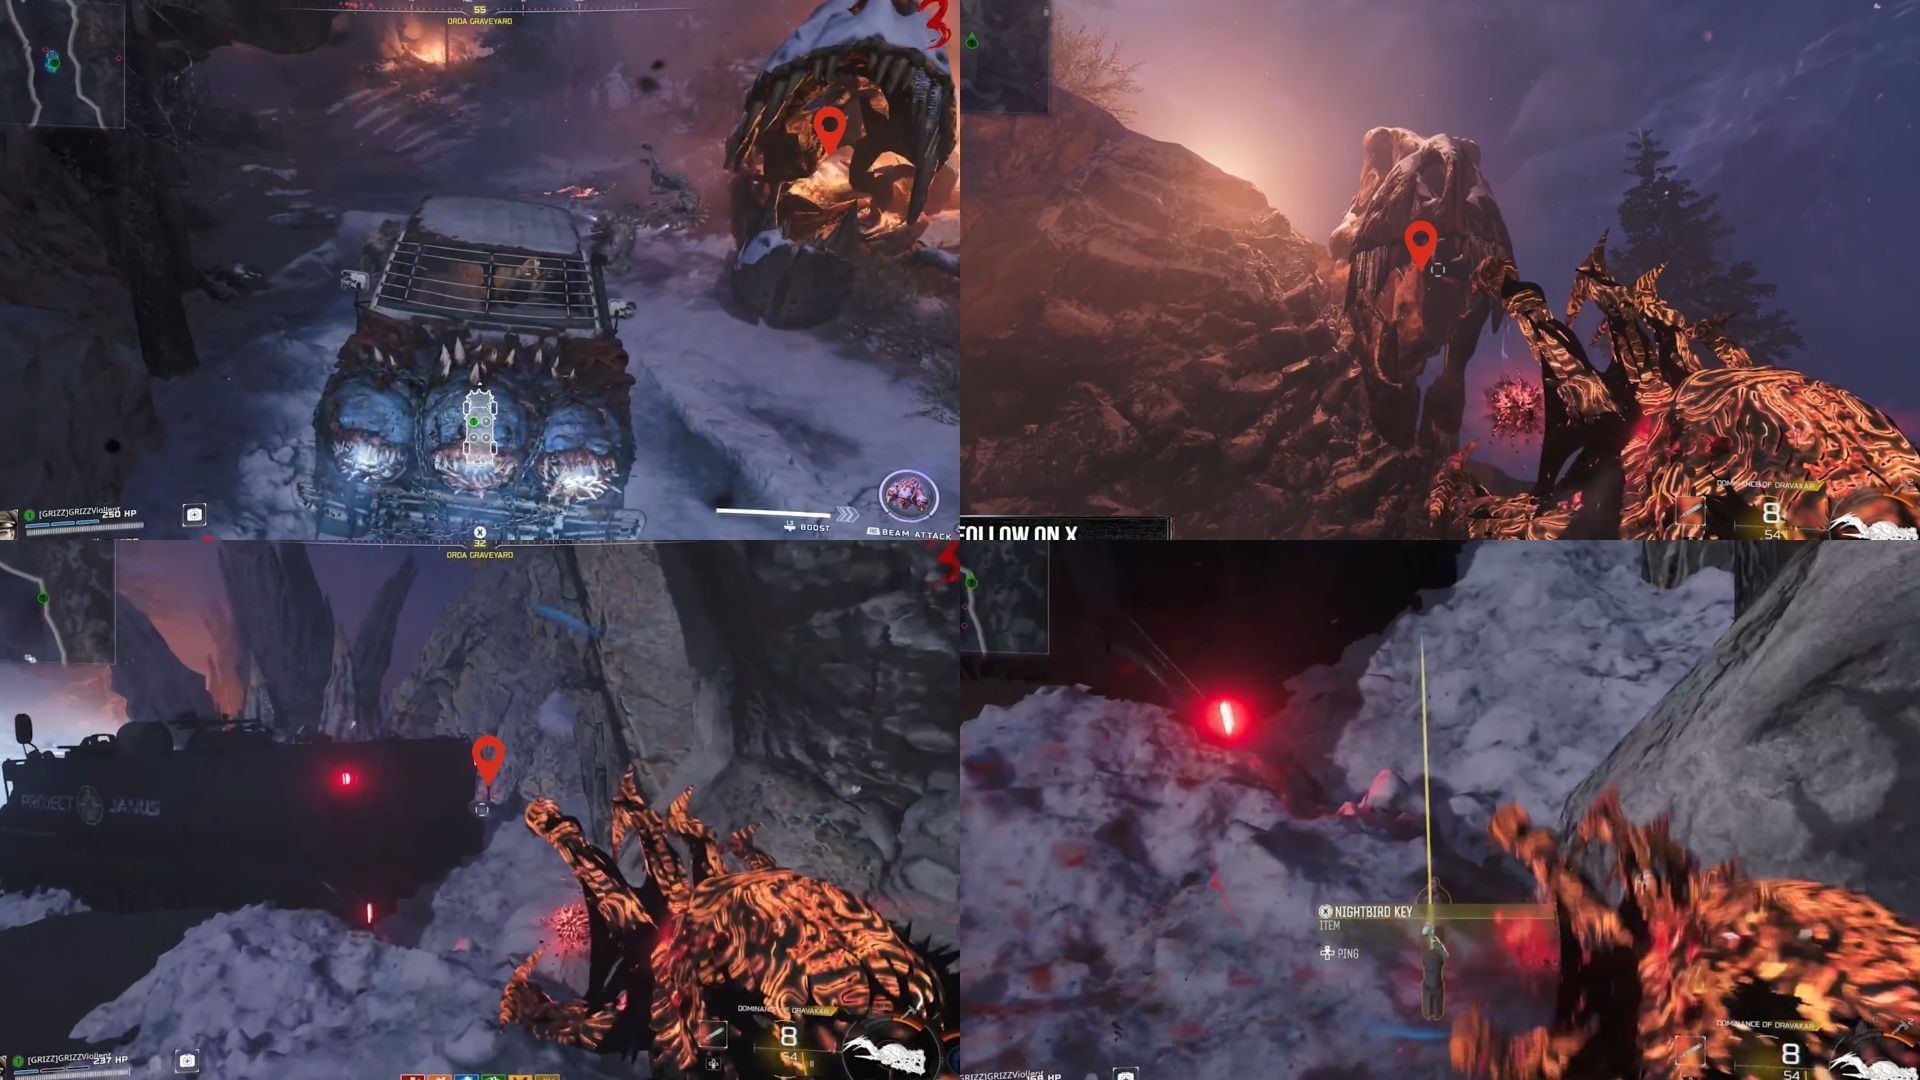
For the Yellow Key (Nightbird Key), head to the road that connects the Ashwood and Exit 115 POIs. The road is known as the Orda Graveyard, and the three potential Yellow Key locations are:
- First potential location: Inside the T-rex skull on the road.
- Second potential location: Inside the T-rex skull that is hanging on a cliff.
- Third potential location: Near the Exit 115 gate, on a small cliff with a broken vehicle, behind which you may find the key.
Once you acquire it, use it on the cube.
Yellow Glowing Key (Bruin Key)
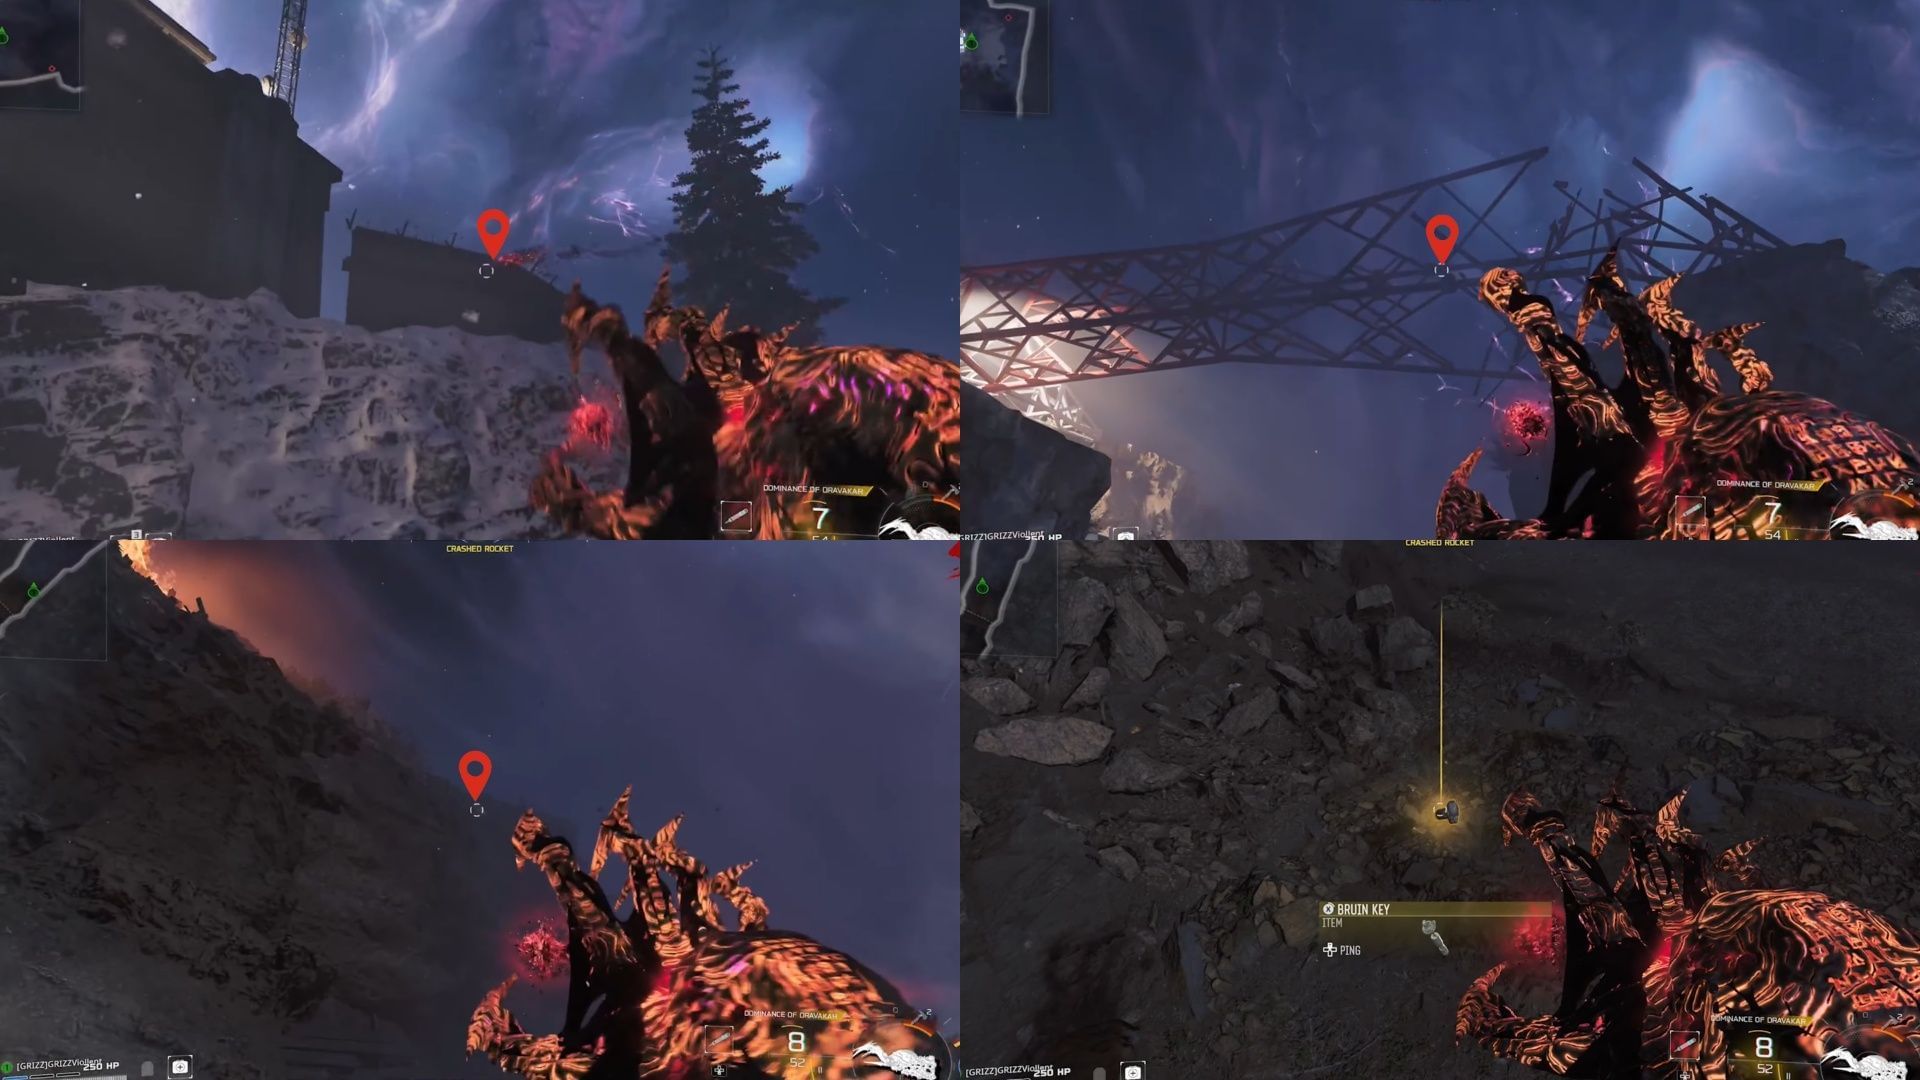
As for the final key, the Yellow Glowing Key (Bruin Key), it also has three potential locations. For these key locations, head to the road between Ashwood and Zarya Cosmodrome, the area known as Crashed Rocket:
- First potential location: Just outside the north gate of Zarya Cosmodrome, you will find a fenced wall on the left side. You may find the Bruin Key above that wall.
- Second potential location: Proceed along the road, and you will see a crashed tower above. You may find the key in that tower.
- Third potential location: Just outside the Ashwood southeast gate, on the left cliff, you will find a car crash. You may find the key there.
Once you have the final key, head back to Ashwood and open the floating black cube. A cutscene will play, and once it ends, the DG-2 Turret Barrel spawns. Pick it up. Finally, drive Ol' Tessie inside the garage present in Ashwood and head to the upgrade bench to upgrade Ol' Tessie into its final form, which mounts the turret on the vehicle.
Once you have upgraded Ol' Tessie into its final form, your next objective is to launch a rocket.
7) Launch the Rocket present in Zarya Cosmodrome
Shoot the Floating Clocktower
In the middle of the Ashwood POI, if you look up, you will see a purple glowing clock tower. You need to shoot this clock tower using the turret you recently installed on Ol' Tessie.
Once you shoot it, the time on the clock will stop.
Next, shoot the face of the clock with your Necrofluid Wonder Weapon and pull back the spike. You will then see that your Necrofluid weapon has acquired the same purple effect.
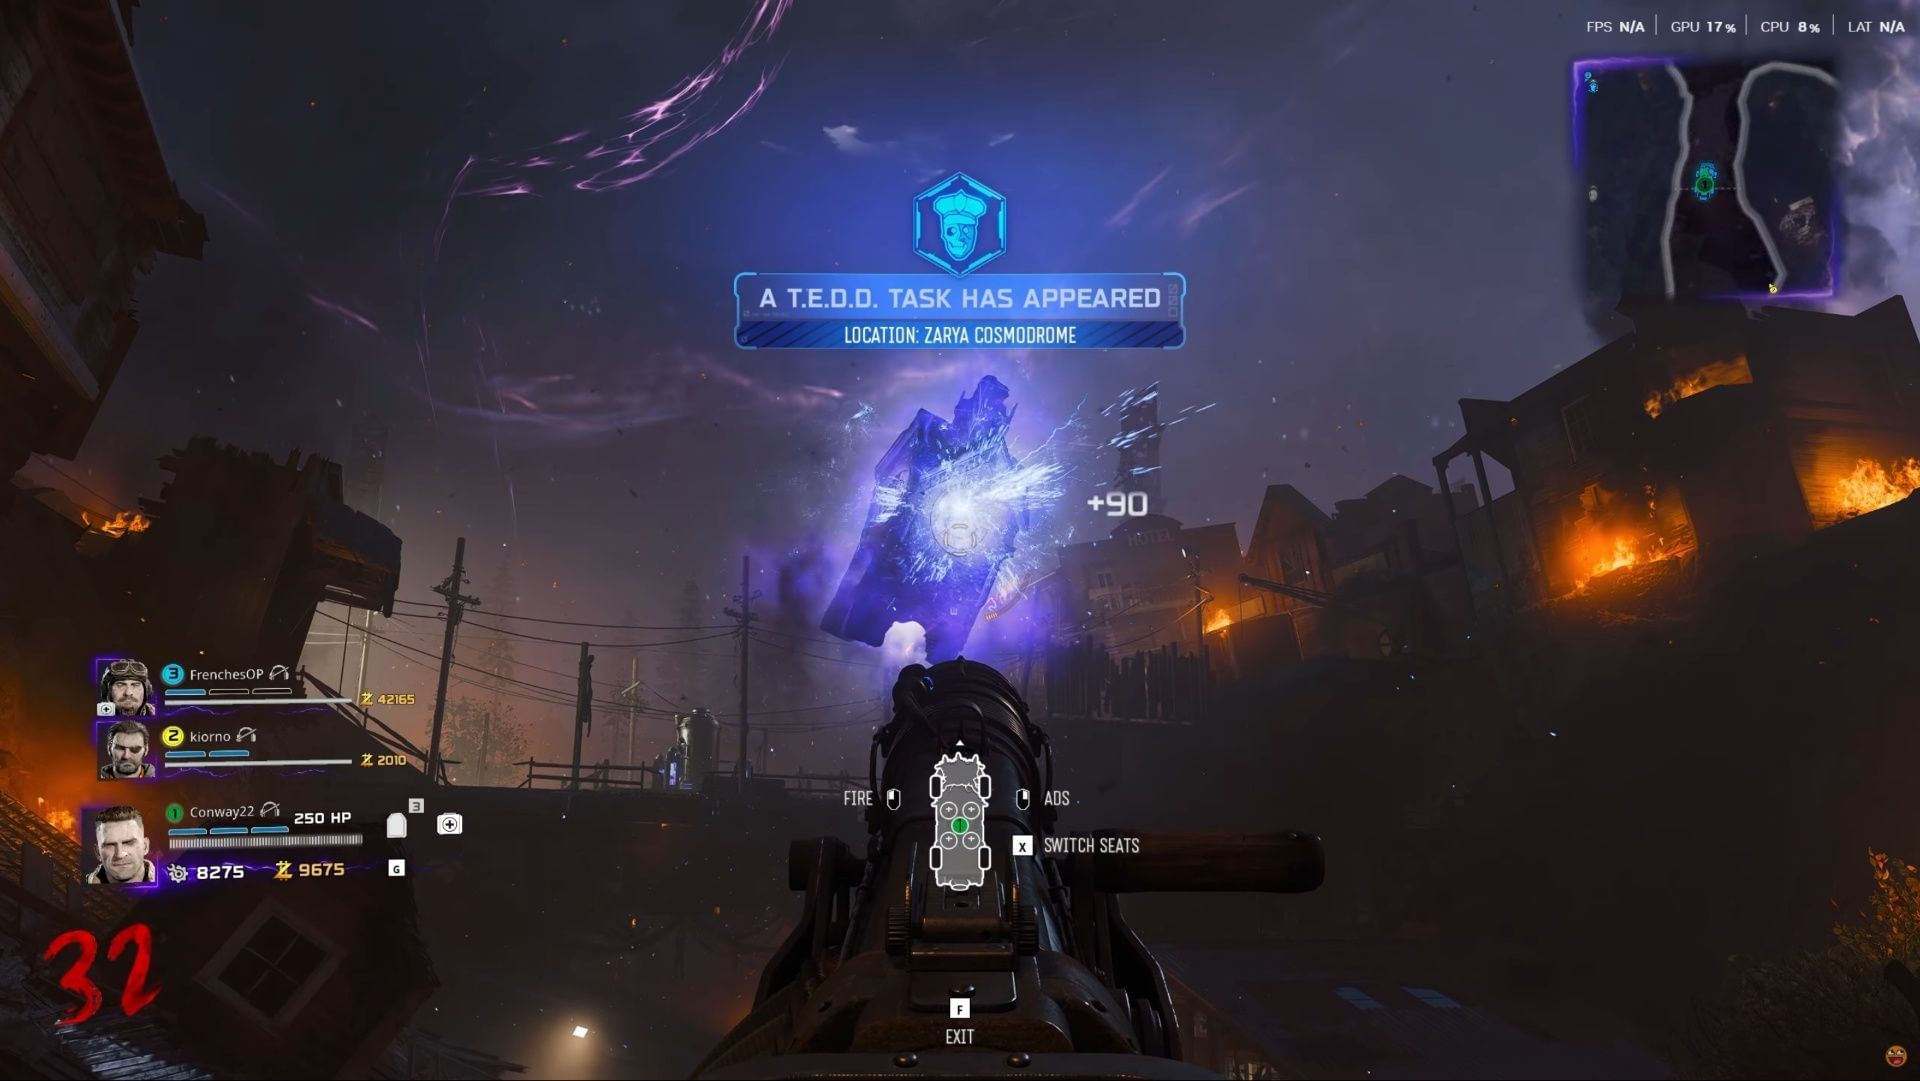
Stop the two radars in Zarya Cosmodrome
Keep in mind that this purple effect is temporary and can be used only once per activation. You need to quickly head to the Jump Pad present in Ashwood and launch yourself to Zarya Cosmodrome.
Once you land, you will find two buildings, each with spinning radars. Shoot the first radar with your Necrofluid while the purple effect is active, and the radar will slow down and come to a halt.
Do not progress the round. In the same round, head back to Ashwood. This time, you need to shoot a different face of the floating clock to get the purple effect on your Necrofluid again. After that, head back to Zarya Cosmodrome and shoot the second radar with the active effect.
Solve the complex puzzle
Once both radars are stopped, head to the Control Room just behind the Wisp Tea Perk-a-Cola machine in the Zarya Cosmodrome POI. On the east side of the room, there will be a cabinet where you will find the Maintenance File on the bottom shelf. Pick it up. Now, in the same room, you need to solve a complex puzzle.
Two screens in the room will continually show symbols, and on the console panel, six screens will be blinking different numbers.
The two screens displaying symbols represent one word from these four options: ROCKET, ENGINE, LAUNCH, and WEAPON. Once you identify the word, you need to match the alphabetical position of each letter with a number that is one place lower than its numerical position. For example, if the word is ENGINE, and 'E' is the 5th letter (05) in the alphabet, you need to input 04. You must apply this same rule to every letter in the word.
To make this puzzle easier, popular Zombies YouTuber @MrRoflWaffles has provided an image linking the symbols to the words and the corresponding numbers you need to match. You can refer to the image to find the word represented by the blinking screens.
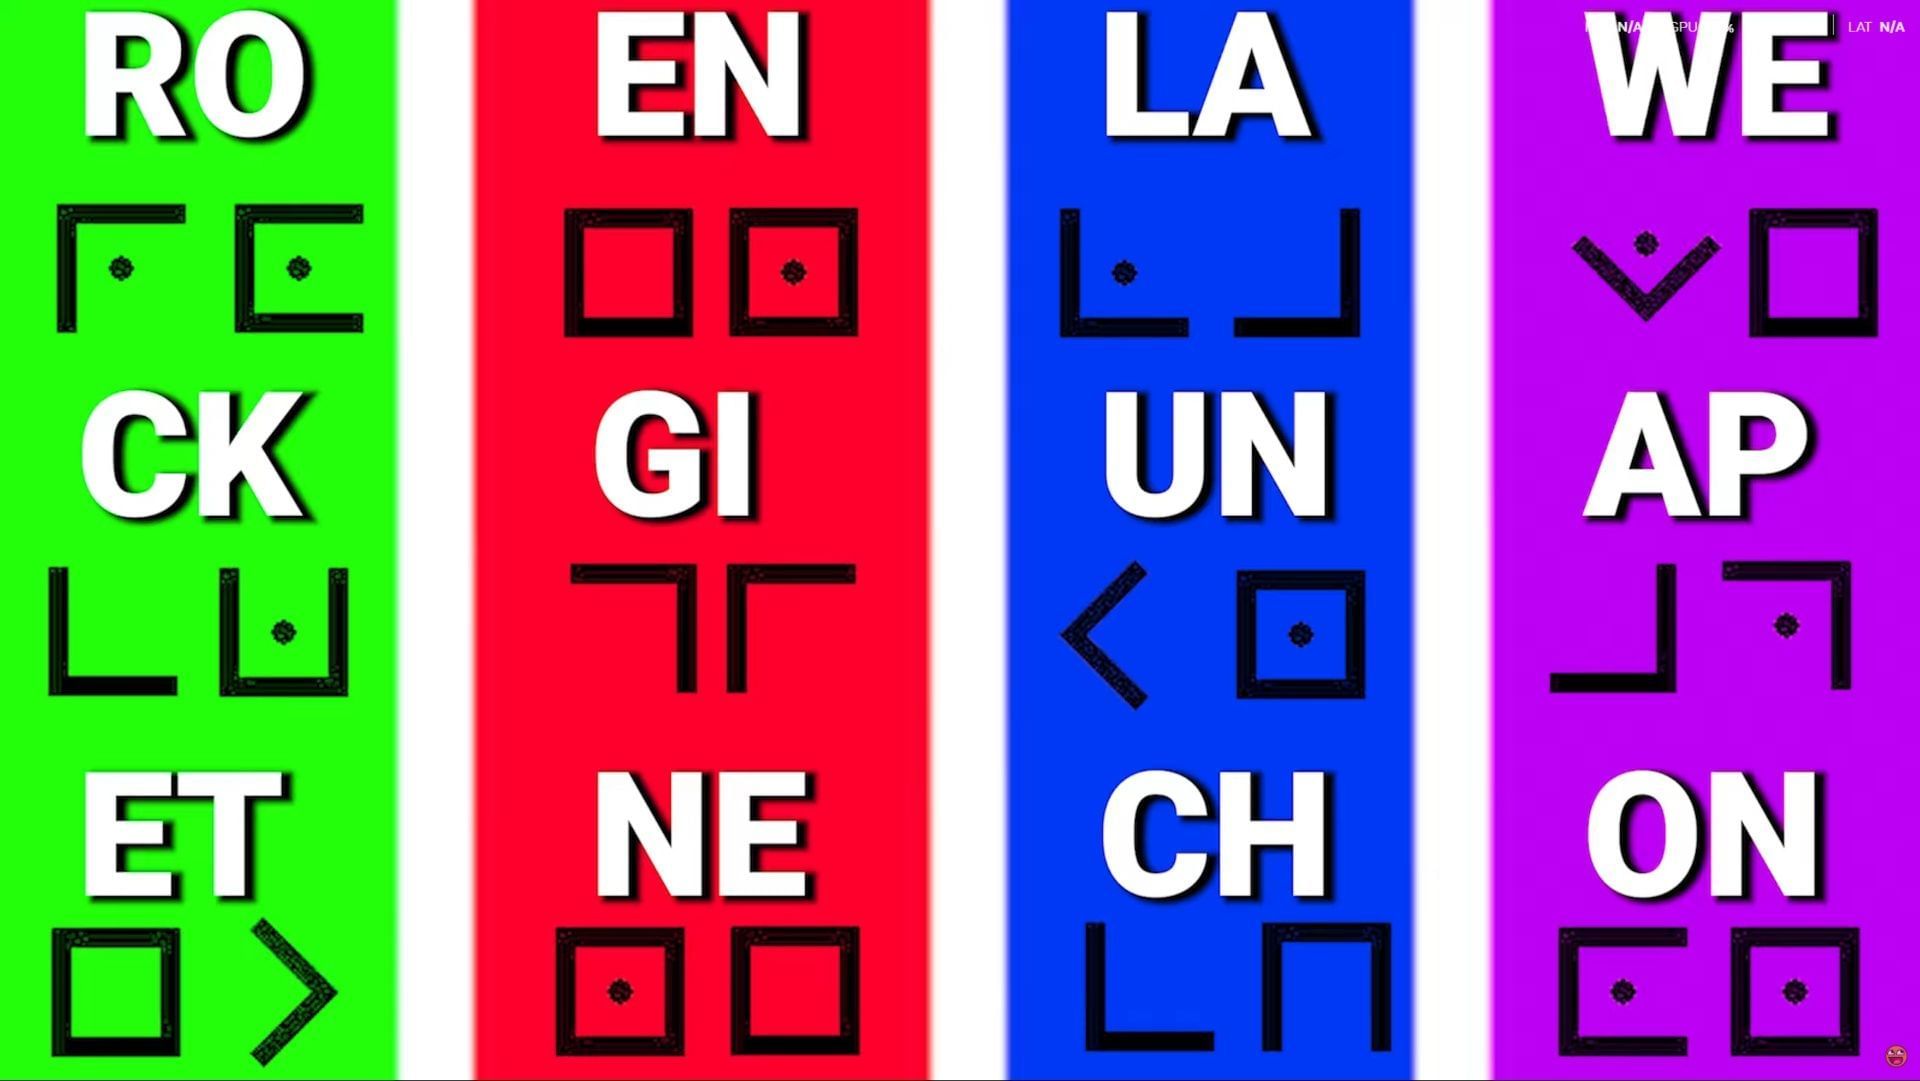
Whatever word you find, match the corresponding numbers below:
- ROCKET: 17 - 14 - 02 - 10 - 04 - 19
- ENGINE: 04 - 13 - 06 - 08 - 13 - 04
- LAUNCH: 11 - 00 - 20 - 13 - 02 - 07
- WEAPON: 22 - 04 - 00 - 15 - 14 - 13
To match the numbers, simply shoot the red button on the screen when the required number blinks. Be fast and avoid incorrect inputs, as you cannot retry in the same round. You will have to progress to the next round to attempt it again, so proceed carefully.
Once done, the rocket will launch.
8) Complete the lightning sequence in Exit 115 POI
In the next round, you need to charge your Necrofluid Gauntlet again with the time-stopping effect. Make sure to do this in an even-numbered round, since lightning only appears in those rounds.
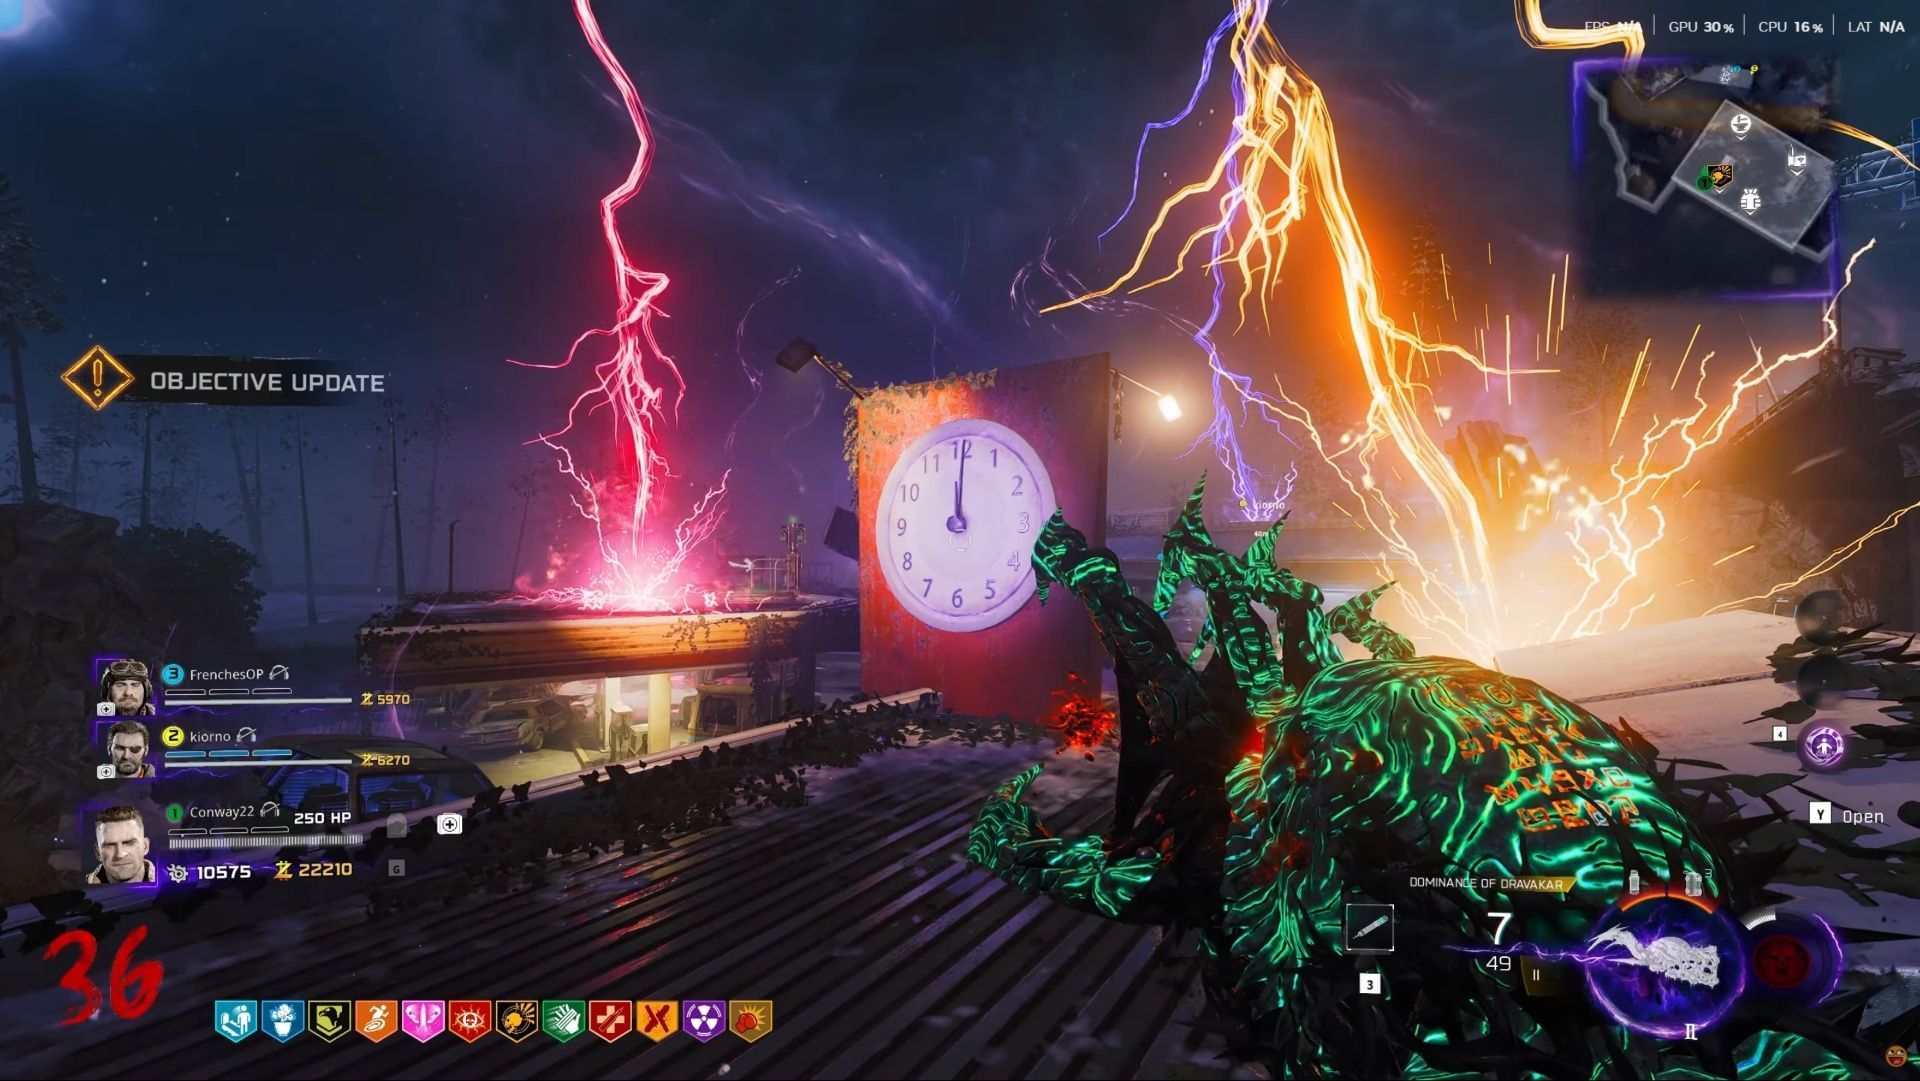
Once you reach Exit 115, you will find different colored lightning striking the area. (If you don't see the lightning, progress two rounds, and it should appear in the following even round.) Now, you need to shoot the clock present on the roof of the gas station. This will freeze the lightnings for one minute. During this minute, you must lure three specific zombies into the three different colored frozen lightning strikes.
Lure specific zombies
During this one-minute window, you must lure three specific zombies into the three different colored, frozen lightning strikes.
The Waitress Zombie (Diner)
- Head to the cash counter inside the Diner.
- With the Melee Macchiato Perk active, melee the cash register. This will wake up the Waitress Zombie.
- The zombie will have a glowing color (red, blue, or yellow). Lure her into the corresponding lightning strike color.
The Mechanic Zombie (Service Station)
- Head to McDougal's Service Station. You will find a zombie lying on the ground.
- Command your friendly Klaus to stand near that zombie. When Klaus arrives, he will stomp the ground, waking up the Mechanic Zombie.
- Similar to the waitress, this zombie will have a different glowing color. Lure it into the corresponding lightning strike color.
The Trucker Zombie (Shipping Container)
- Locate the shipping container near the Diner, with a zombie lying beside it.
- Drive Ol' Tessie and shoot the container door with the beam weapon. Then, slam Tessie into the door to force it open.
- This action will wake up the Trucker Zombie. It will also have a glow, so lure it into the corresponding lightning color.
Important Note
If you are playing co-op, all three steps must be completed within the one-minute freeze time. If you are playing solo, you can complete this challenge over multiple rounds.
9) Complete Vandorn Farm lockdown sequence
Now, charge up your Necrofluid Gauntlet again and travel to the Vandorn Farm POI. Head inside the farmhouse, and you will see a dining table with the family's skeletons arranged around it. There will be a clock nearby, and the time shown can be different each playthrough, potentially displaying 9:00, 3:00, 12:00, or 6:00.
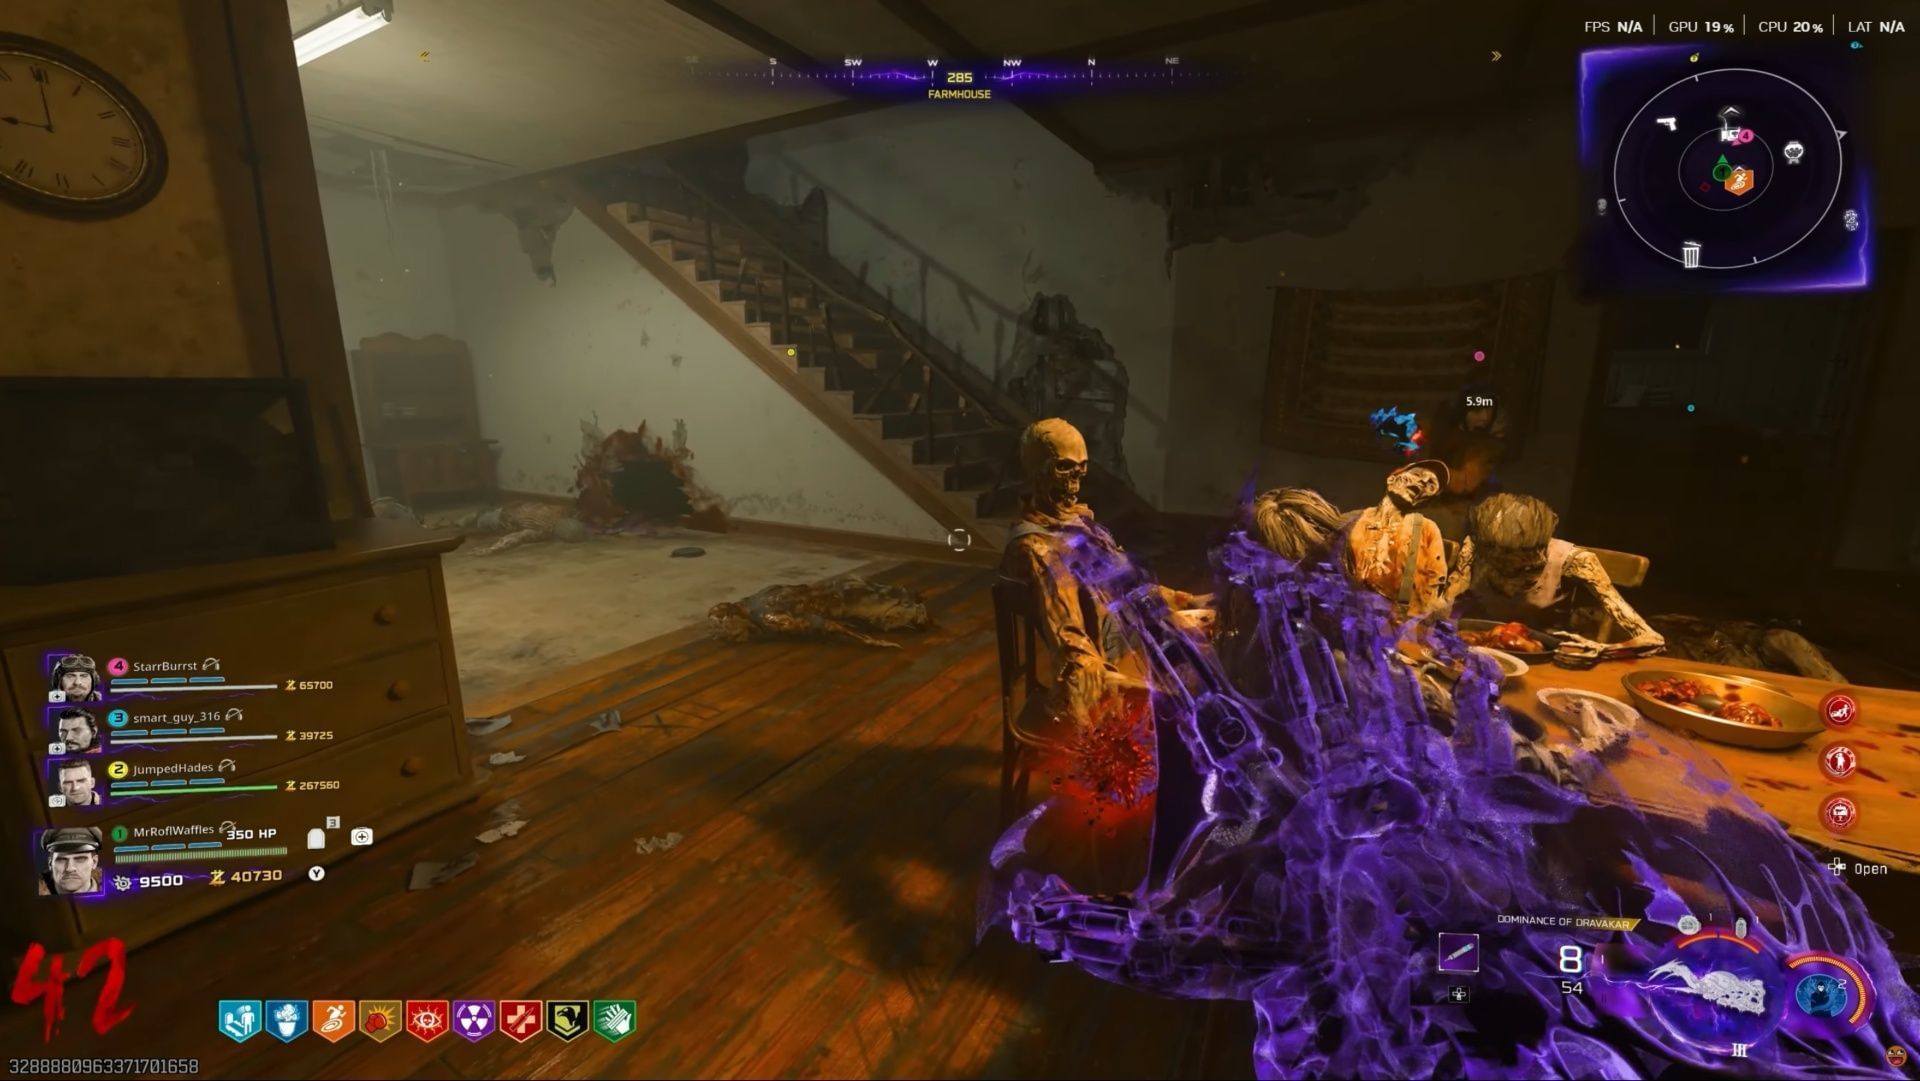
Whatever time the clock shows, check the floor; the numbers corresponding to the clock face are carved in Roman numerals on each side of the dining table. Stand in the correct position (the Roman numeral corresponding to the clock time) and face the father's skeleton head on the table. Stay there, and after a short time, the head will turn to face you, and its eyes will turn a glowing red. At that moment, shoot the head with your Necrofluid Gauntlet while the purple effect is active.

With this successfully done, you now need to collect four artifacts in the area:
- Tasty Face: Head upstairs in the farmhouse, and you will find this item on the bunk bed.
- Junior's Fun-Face: Head to the Barn and go upstairs. In the northeast corner, just beside the hay, you will find the face mask.
- Ma's Chalice: Head to the cellar and interact with the bathtub to collect this item.
- Pa's Pigsticker: Head to the Garage. There is a workbench there, so go prone and check under the workbench to find the sticker.
Once you have all four items, head outside. You will find four ritual circles on the ground. Place all four items in each red circle. Once done, quickly head near each circle and interact with all four. This will start a lockdown, so you must defend the artifacts from the zombies.
Once the lockdown is complete and your screen has briefly turned white, head to the Blackwater Lake POI. On the west side of this POI, there will be a dock where you will find a soul. Interact with the soul, and you can then proceed to the next step.
10) Complete the Blackwater Lake Easter Egg
Now, charge up your Necrofluid Gauntlet again with the purple effect and then travel to the Blackwater Lake POI. Inside the cabin there, you will find a projector. Shoot it with your Necrofluid while the purple effect is active.
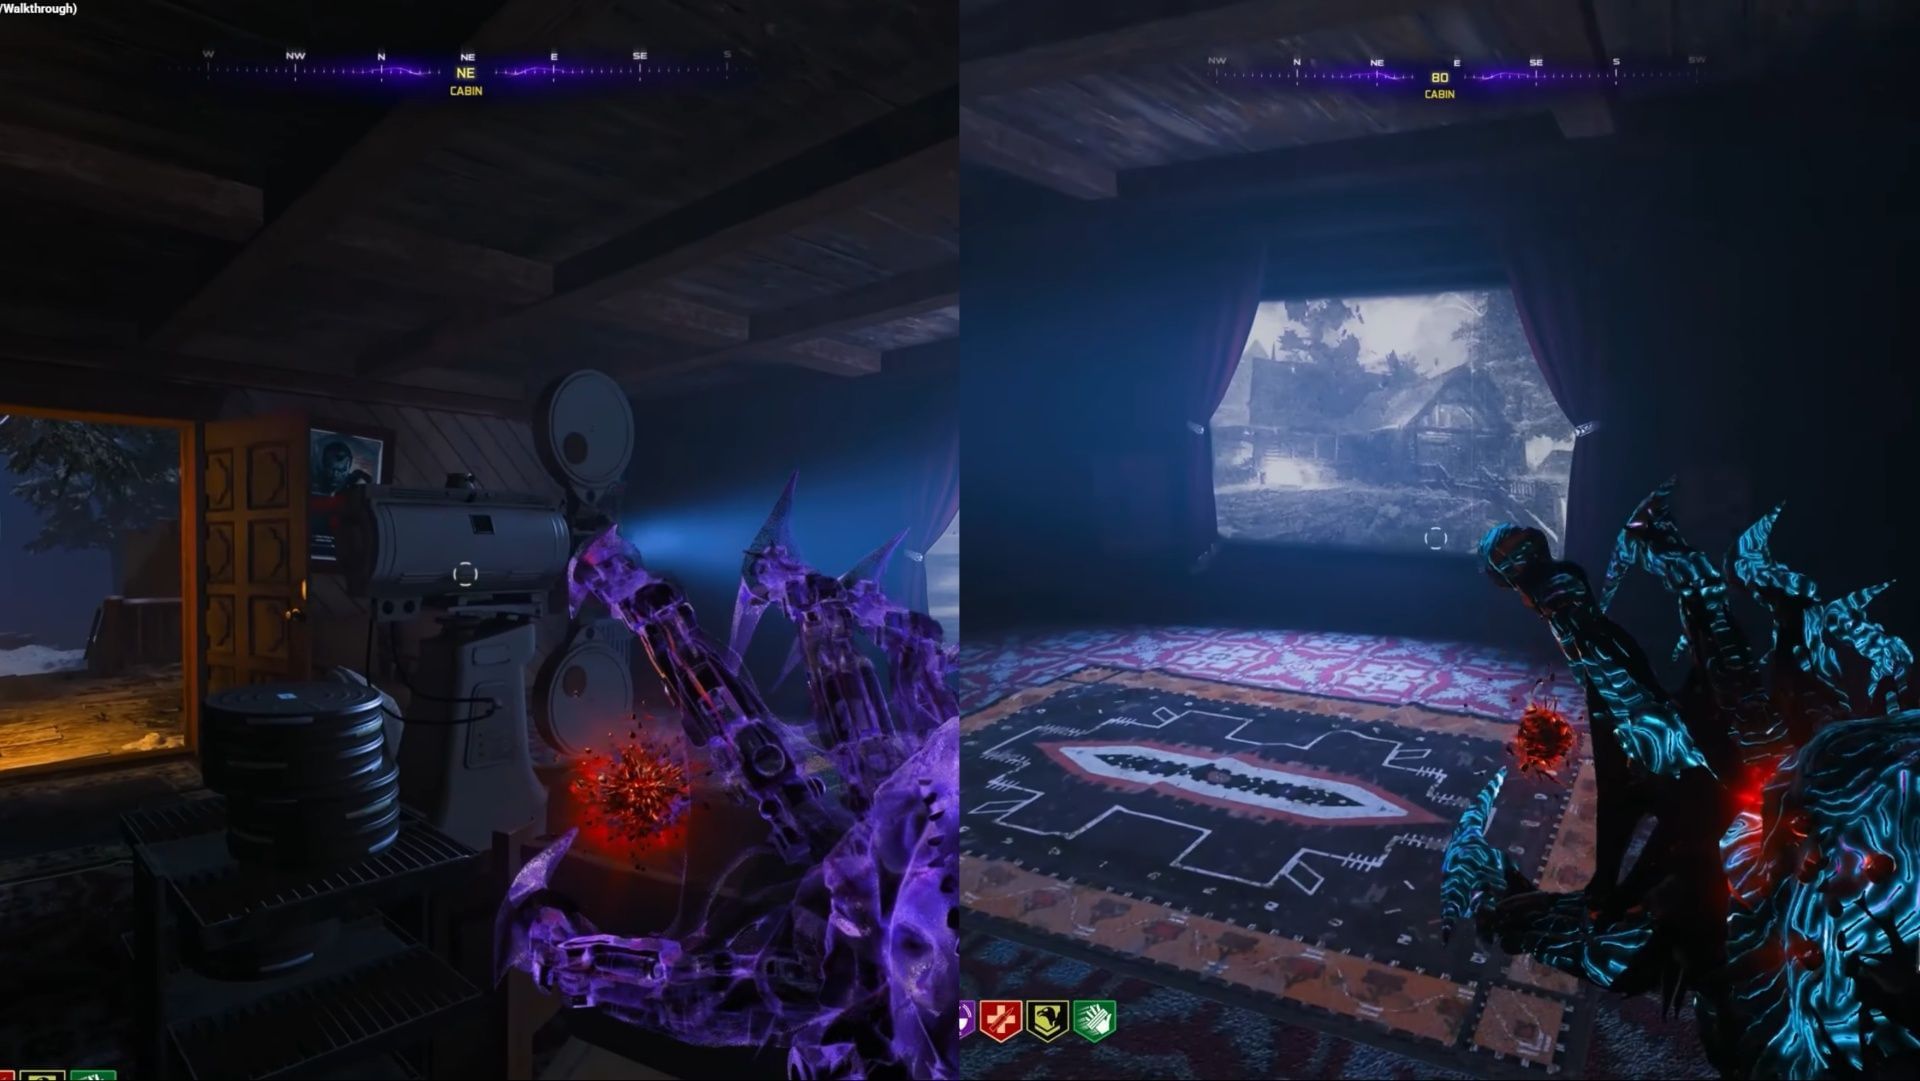
This action will reveal four locations in a specific order. It is highly recommended that you take a screenshot of the sequence, as the order will be different in each playthrough.
The order is essential because there are different reels located throughout the POI that you need to shoot in that exact sequence.
Here are the images displayed and their corresponding reel locations:
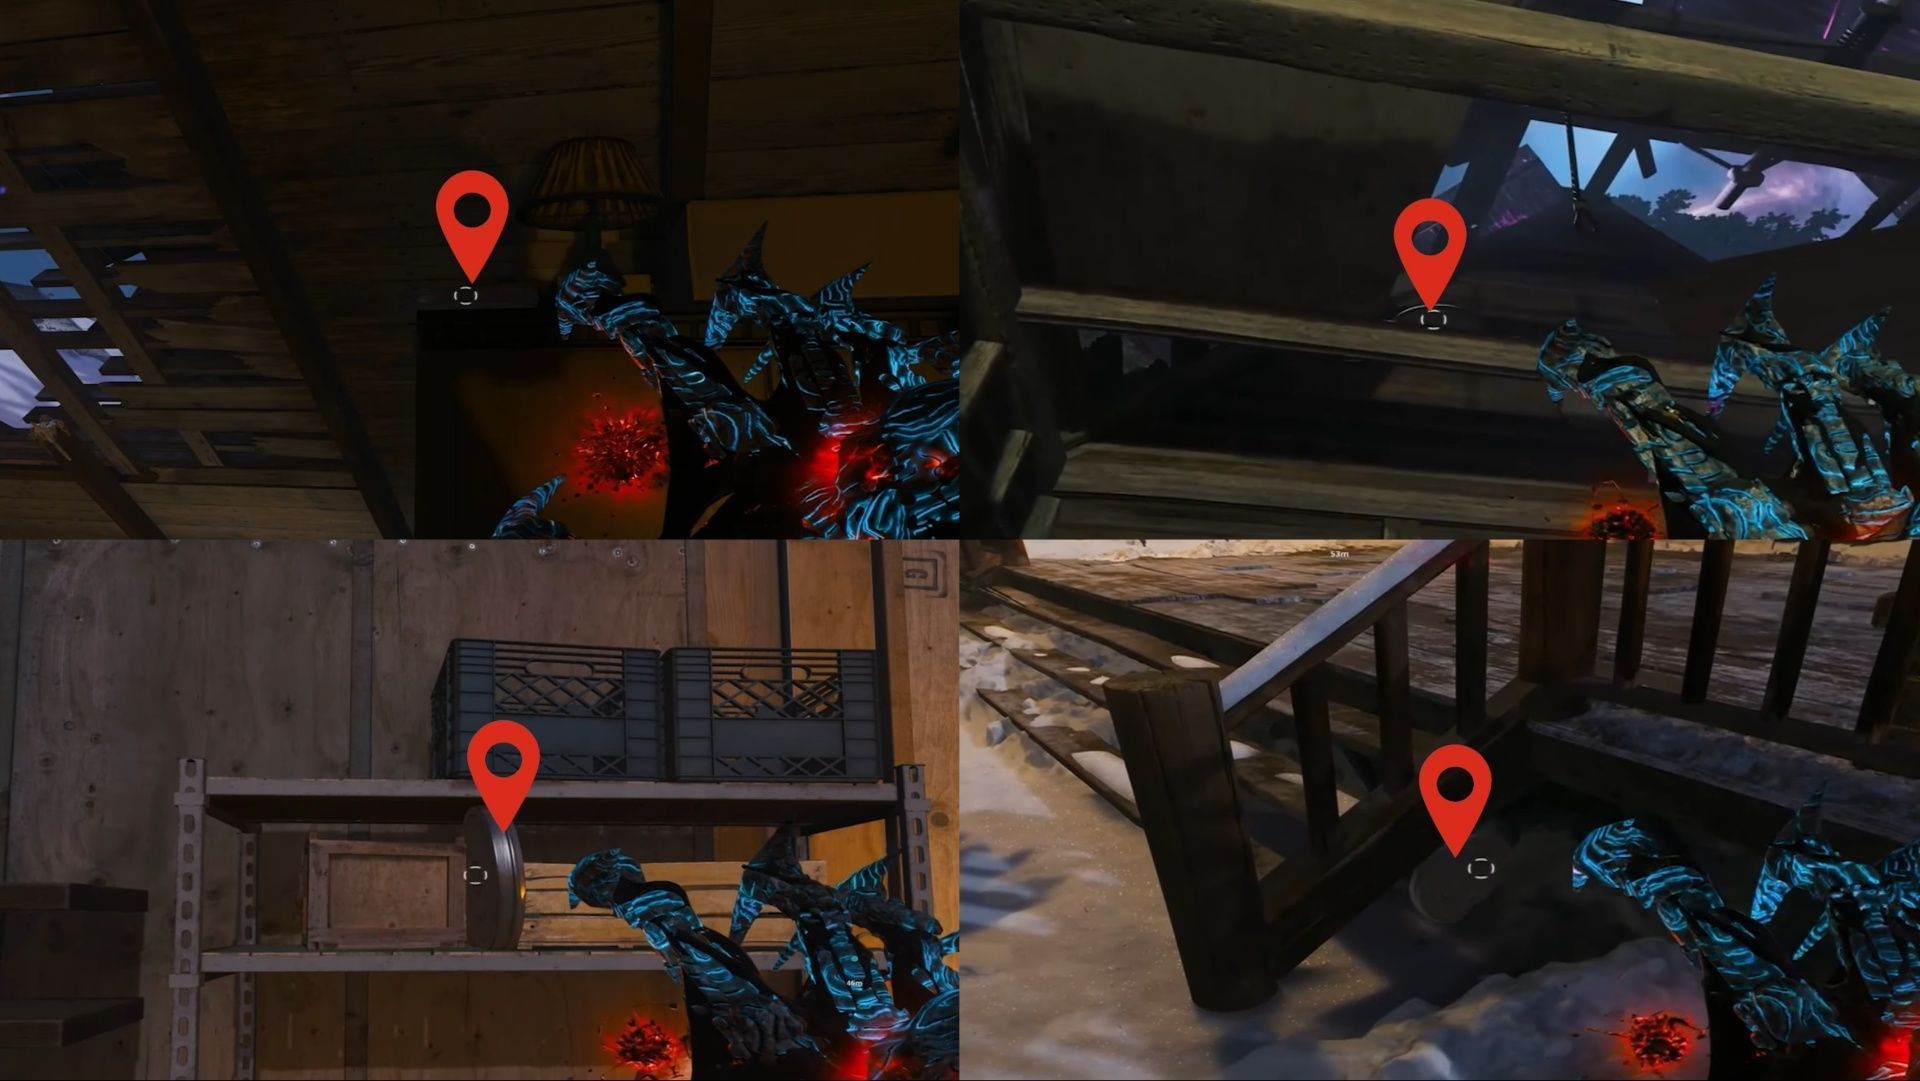
- Front of the Cabin image: The reel is inside the cabin, just near the power switch.
- Toolshed image: The reel will be present inside the Toolshed on a shelf.
- Boathouse image: The reel will be inside the building that has the Armor wall-buy, and it will be present on the ceiling.
- Back image of the cabin: The reel will be present under the stairs at the back of the cabin.
Shoot the reels with your Wonder Weapon in the correct order of the images you see on the projector screen.
Once completed correctly, head upstairs in the cabin, and you will see a box glowing with red and blue light. Simply interact with it, and it will open.
Now, use the radio to call your friendly Klaus, and then command him to go near the box you just opened. Upon summoning Klaus to that spot, he will come and grab the item inside the box.
After this, Klaus will wake up and stand in a corner outside the cabin. Before interacting with him, make sure you are ready with everything to encounter the boss.
11) Initiate the Boss Fight
Once you interact with Klaus, he will release several souls from the pyramid. Now, drive Ol' Tessie and make your way through the fog.
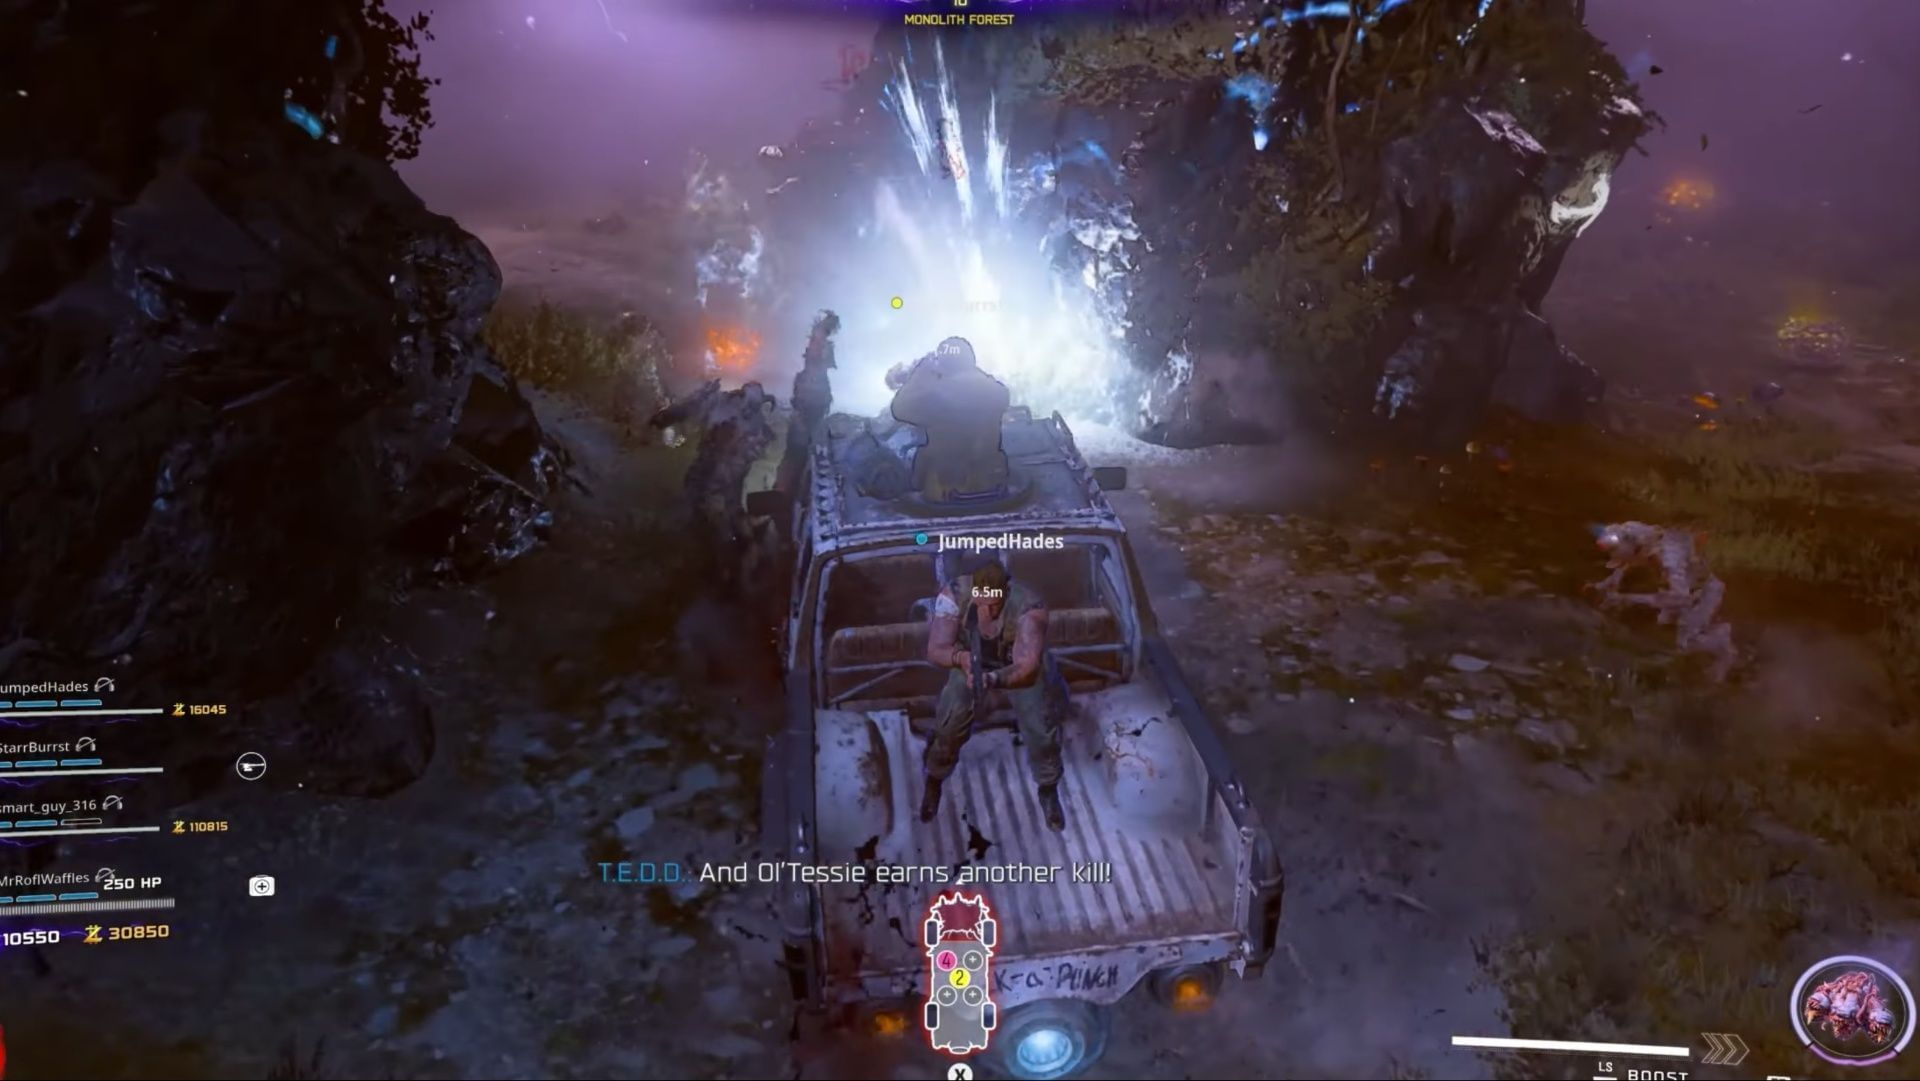
- Monolith Forest: First, you will reach the Monolith Forest. Inside, there will be three souls on the ground; you can easily distinguish them by the white mist they emit. Simply drive through these souls to gather them up.
- Collapsed Tower: After that, you will reach the Janus Tower Plaza. Again, make your way through the Collapsed Tower area, where there will be another three souls. Drive through them and you will reach Vandorn Farm.
- Grounded Ship: Now, make your way through the Grounded Ship area, where there will be three more souls. Drive through them.
- Lost Cabin: After that, you will reach Ashwood, and then make your way through the Lost Cabin area, where three final souls are present.
Once you drive through the last soul, you will then be teleported to the boss fight.
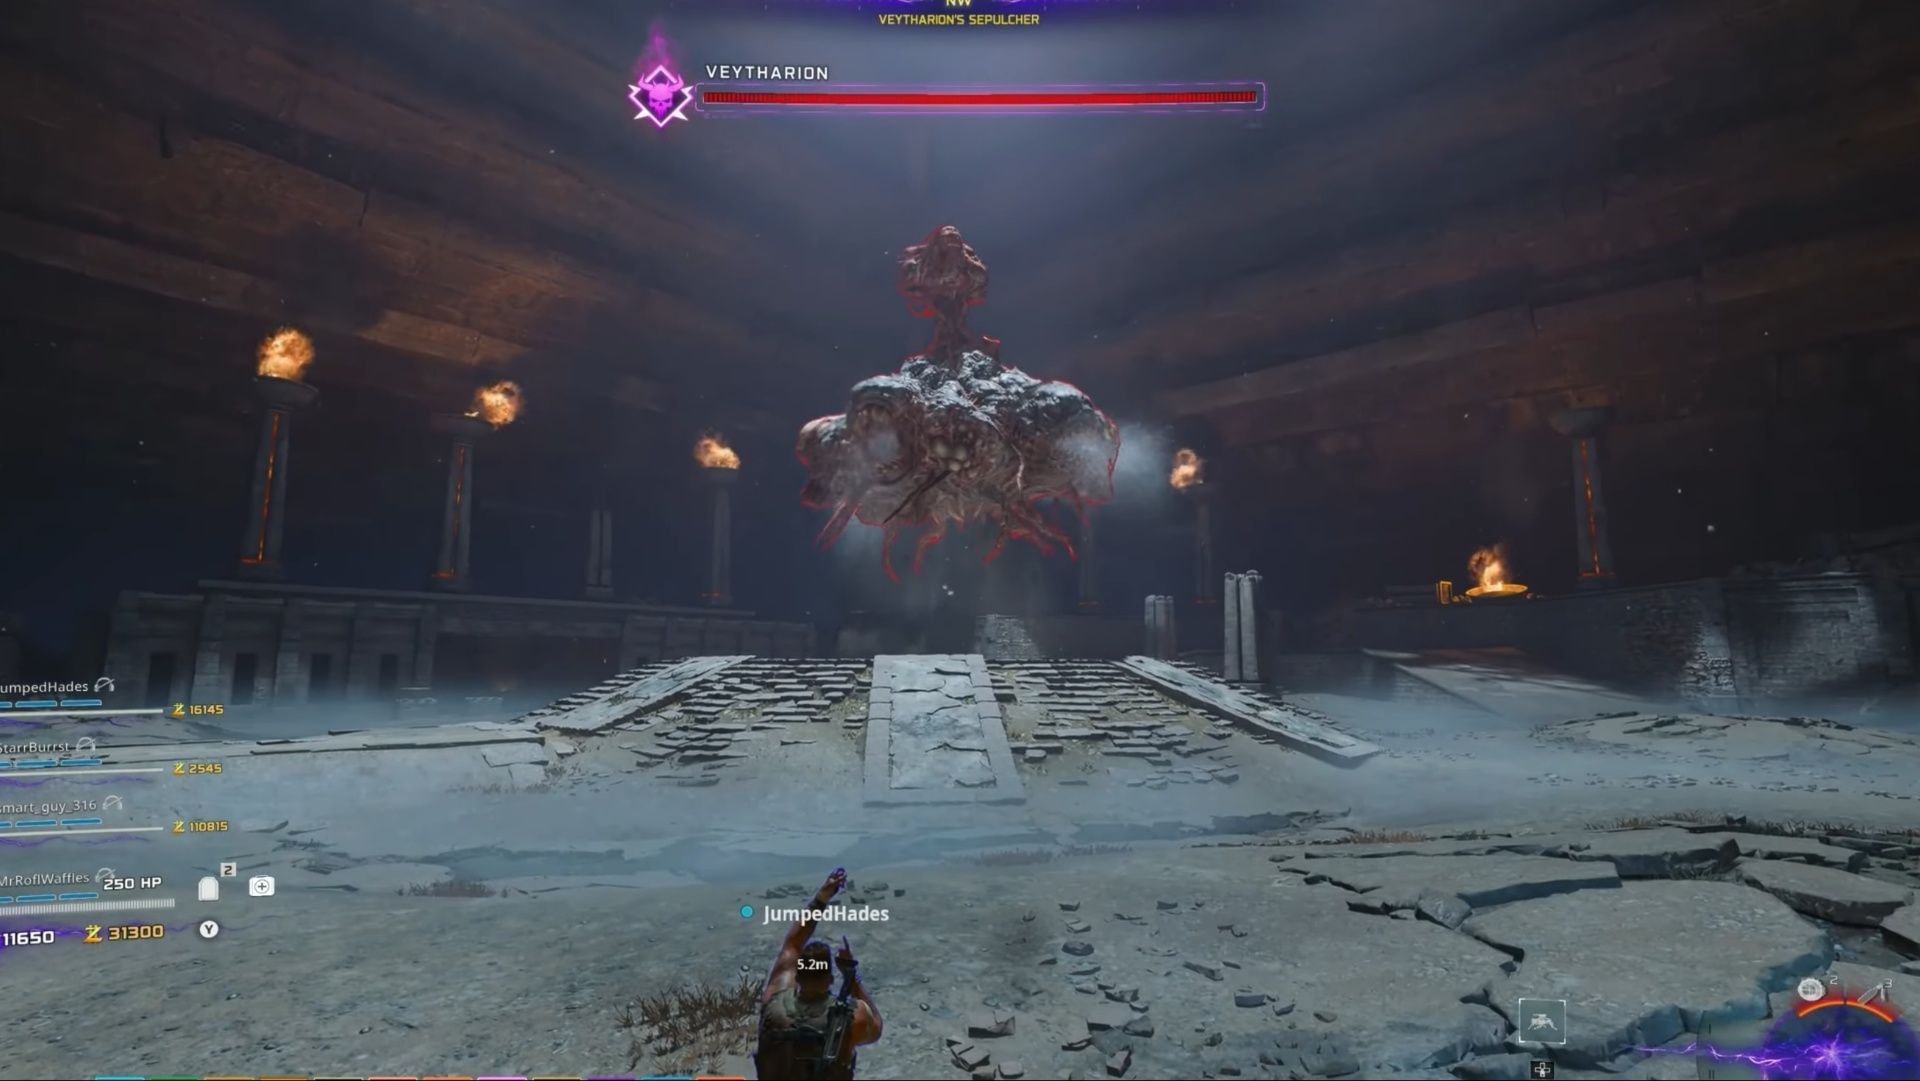
The boss's name is Veytharion, and it has a large health pool. Take your time, avoid its attacks, and eliminate it. After this, you will successfully complete the Black Ops 7 Zombies Ashes of the Damned main quest Easter Egg.
For the latest Call of Duty news and guides, be sure to check the links below:
- How to solve Keypad puzzle in Fracture mission: Black Ops 7 campaign guide
- Black Ops 7 not working on Xbox error: Possible reasons and fixes
- Black Ops 7 DirectX error: Possible reasons and fixes
- How to unlock all Tactical Equipment in Black Ops 7 Zombies